How Solar Power for Homes: A Practical Guide for 2026
A practical, step-by-step guide to adopting solar power at home, covering basics, sizing, components, financing, installation options, and maintenance.

With how solar power for homes in mind, this guide helps you plan a complete home solar setup. You’ll learn how to estimate your needs, select panels and inverters, navigate interconnection and incentives, and compare installation options. According to Solar Panel FAQ, understanding system sizing and local policies is the key to maximizing savings and performance.
Understanding the Basics of Solar Power for Homes\n\nSolar power for homes begins with photovoltaic (PV) panels that harvest sunlight and convert it into direct current (DC) electricity. An inverter then transforms DC into alternating current (AC) for household use. The system typically includes modules, racking, wiring, a disconnect, and a monitoring interface. Net metering lets you earn credits for surplus energy fed back to the grid. According to Solar Panel FAQ, the most important ideas are proper siting, system sizing, and knowing local policies that affect savings. When homeowners understand these basics, they can compare quotes more effectively and avoid overpaying for underperforming kits. This knowledge also helps when discussing options with installers, utilities, and lenders. You’ll learn practical steps to go from concept to commissioning while keeping safety and efficiency front and center. The discussion also highlights terminology you’ll encounter, such as efficiency, degradation, and module performance over time. Finally, you’ll see how advances like microinverters and optimizers can improve performance on partially shaded roofs.
Sizing a Home Solar System: A Practical Approach\n\nSizing means matching production to your consumption while accounting for roof constraints. Start by pulling 12 months of electric bills to understand seasonal variation in usage. Convert monthly kWh to daily usage, then select a target system size that can cover most needs on sunny days. The Solar Panel FAQ team notes that sizing also depends on local policies, incentives, and roof space, so you should seek quotes that include performance projections under different conditions. Oversizing can raise upfront costs without proportional savings, while undersizing leaves you short on daytime energy. A balanced approach aims to cover 70–90% of annual usage with room to grow, balancing cost, reliability, and resilience.
Components You’ll Choose: Panels, Inverters, and Mounts\n\nPanel choices include monocrystalline, polycrystalline, and newer thin-film options. Monocrystalline panels typically offer higher efficiency and space savings, while polycrystalline panels can be cheaper per watt but slightly less efficient. Inverters convert DC to AC; options include string inverters, microinverters, and power optimizers, with the choice influenced by shading and roof complexity. Mounts can be roof-mounted or ground-mounted; ground mounts simplify service and future expansions but cost more. Monitoring systems provide real-time production data and alerts for faults. The Solar Panel FAQ guidance emphasizes matching component choices to climate, roof orientation, and budget. Be sure to review warranties, temperature coefficients, and the installer’s track record. Safety, conductor sizing, and grounding are essential for a reliable installation.
Interconnection, Net Metering, and Permitting\n\nNet metering policies vary by jurisdiction, but most residential systems connect to the grid through a utility interconnection agreement. This arrangement allows you to receive credits for excess energy produced during sunny days and use them when production dips. The interconnection process typically requires inspections, permits, and a formal disconnect for safety. Solar Panel FAQ notes that starting approvals early can prevent delays and added costs. Prepare a plan showing your system’s size, location, and expected production, then coordinate with your utility and local authorities to ensure compliance with electrical codes. For unusual roofs or historical properties, additional approvals may apply. A careful approach reduces the risk of rejection and expensive rework.
Costs, Financing, and Incentives for Home Solar\n\nCost is a major consideration, but it’s not the only factor. You should evaluate upfront costs, ongoing maintenance, system longevity, and how incentives affect your net investment. Financing options include cash purchases, solar leases, power purchase agreements (PPAs), and low-interest loans. Incentives vary by location and can include federal tax credits, state rebates, and utility programs. Solar Panel FAQ analysis shows that incentives, installation quality, and local electricity rates have the biggest influence on return on investment. Before committing, ask potential installers for a detailed financial projection showing production estimates, payback, and sensitivity scenarios under different weather conditions. Also verify warranties on panels and inverters and ensure documentation for any tax or rebate claims is in place.
Installation Options: DIY vs Professional Installation\n\nA DIY approach can save money but requires strong electrical skills and adherence to safety standards. Most homeowners benefit from hiring a licensed installer who will handle permits, wiring, and grid interconnection. Professional installs ensure code compliance, proper panel orientation, and reliable warranty coverage. If you opt for DIY, limit work to non-electrical tasks such as roof assessment, mounting layout, and system planning; avoid wiring and metering tasks unless you are qualified. Always involve a licensed electrician to connect the system to the main panel and utility service disconnect. Planning a site visit with multiple installers can reveal differences in equipment quality, warranties, and expected energy yield. The right choice depends on your comfort with risk, local regulations, and time.
Maintenance, Monitoring, and Performance Optimization\n\nSolar panels require minimal ongoing maintenance, usually just periodic cleaning and inspections. Use a solar monitoring app or inverter portal to track daily production, grid imports, and any faults. Shade management is crucial; even small changes in trees or nearby structures can affect output. Check for dust, leaves, or snow that can block sunlight, and ensure all mounting hardware remains secure. Regular checks help you spot degradation or failure in inverters or optimizers early. The Solar Panel FAQ team recommends scheduling a professional check every few years to verify wiring integrity, grounding, and inverter performance. If you plan future roof repairs or expansions, coordinate with your installer to avoid rework.
Getting Started: A Simple Plan to Move Forward\n\nBegin with a clear energy plan and site assessment. Gather your last 12 months of electricity bills, your roof dimensions, and a brief budget. Then request quotes from multiple installers, asking for performance simulations and a written warranty. Compare financing options, incentives, and expected payback; consider your property’s resale value and energy independence goals. Finally, choose the installation path that best aligns with your preferences for cost, control, and long-term reliability. With persistence and careful planning, Solar Power for Homes can be a practical, value-adding upgrade for many households.
Tools & Materials
- Electric bill statements (12 months)(To estimate usage and demand)
- Roof measurements and sun exposure data(Estimate roof area, orientation, tilt, shading)
- Measuring tape(For space planning)
- Safety gear (safety glasses, gloves)(During site assessment)
- Ladder or roof access equipment(Only if you plan roof inspection)
- Permitting checklist(Local codes and utility process)
- Quotes from installers(Compare components and warranties)
Steps
Estimated time: Estimated total time: 4-8 weeks
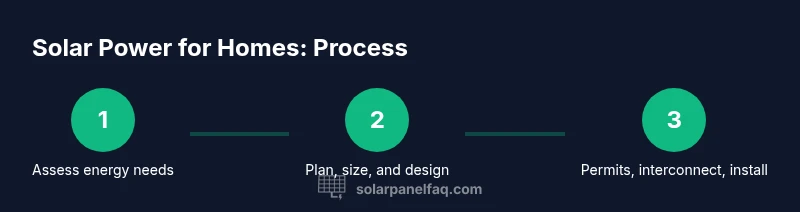
- 1
Assess energy needs
Review your electricity usage and budget. Translate monthly bills into a target system size and identify daily kWh usage. This baseline guides panel count, inverter choice, and financial expectations.
Tip: Start with your 12-month bill for accurate seasonal patterns. - 2
Check roof and site viability
Evaluate roof orientation, tilt, shading, and space to mount modules. A south-facing roof with minimal shade yields higher production. If space or angle is limited, consider ground mounts or microinverters.
Tip: Use a sun-path tool to estimate seasonal shading. - 3
Plan system size and layout
Draft a layout that fits your roof and allows for future expansion. Decide on panel type and inverter configuration based on shading and budget. Ensure plan includes access for maintenance and monitoring equipment.
Tip: Request a production projection from each installer. - 4
Explore financing and incentives
Compare cash purchase, loans, leases, and PPAs. Incentives vary by location and can significantly affect payback. Gather timelines for applying to federal, state, and utility programs.
Tip: Ask for a full financial model with sensitivity analysis. - 5
Obtain permits and arrange interconnection
Initiate permits and interconnection discussions early to avoid delays. Prepare documentation showing system size, location, and proposed production. Expect inspections and a formal disconnect for safety.
Tip: Track approval timelines with your local authority and utility. - 6
Select components or choose a contractor
Compare panel efficiencies, inverter types, and warranty terms. If hiring, review installer track records and post-installation support. For DIY, limit to planning; electrical work should be done by a licensed pro.
Tip: Ask for grid-tie testing procedures and verification steps. - 7
Prepare for installation and safety
Coordinate access, secure ladders, and arrange temporary power isolation if needed. Ensure roof anchors, wiring paths, and conduit routing comply with code. Have a plan for rain or weather-related delays.
Tip: Schedule a pre-install site walk with the installer. - 8
Commission, test, and monitor
After installation, perform commissioning checks and connect the monitoring system. Validate net metering credits and confirm warranty registrations. Review performance data to ensure targets are met.
Tip: Set up alerts for production dips and equipment faults.
Frequently Asked Questions
What is the typical size of a residential solar system?
Residential systems are sized to match your energy use, roof space, and budget. The exact size depends on bills and goals.
Residential solar sizes vary by energy use and roof space; consult an installer for a precise size.
Do I need permits and interconnection approvals?
Yes. Most jurisdictions require electrical permits and interconnection approval from the utility.
Permits and interconnection approvals are usually required.
What incentives are available for homeowners?
Incentives vary by location; look for federal tax credits, state rebates, and utility programs.
Incentives vary by location; check federal, state, and utility programs.
Can I install solar panels myself?
DIY installation is possible but risky due to electrical and fire hazards; professional installation is recommended.
DIY installation is possible but risky; it's usually better to hire a pro.
What maintenance does a home solar system require?
Keep panels clean, monitor inverter performance, and schedule periodic professional checks.
Keep panels clean and monitor performance; periodic checks help.
Watch Video
Top Takeaways
- Assess energy needs before choosing system size.
- Interconnection and incentives influence savings.
- Professional installation ensures safety and code compliance.
- Monitor performance to maintain efficiency.