Fix Solar Panels to Roof: A Step-by-Step Installation Guide
Learn how to safely fix solar panels to your roof with a practical, step-by-step guide. Get prep tips, mounting options, safety guidance, and maintenance for long-lasting performance.

According to Solar Panel FAQ, you can safely fix solar panels to the roof by following a structured mounting plan, using rated hardware, and performing rigorous safety checks. This guide shows essential prep, step-by-step mounting options, and maintenance reminders to protect your warranty and performance. Always verify local code requirements and work with a licensed contractor if needed.
Why fixing solar panels to roof properly matters
Fixing solar panels to the roof correctly matters for safety, performance, and longevity. Improper mounting can lead to leaks, panel misalignment, or wind uplift that damages the array and roof structure. The roof type (asphalt shingles, metal, tile) influences flashing, mounting method, and weatherproofing needs. A solid mounting plan preserves warranty, reduces maintenance, and improves energy generation consistency. In this context, you will learn a structured approach that minimizes roof damage while keeping the system secure during heavy weather. As noted by Solar Panel FAQ, using rated hardware and correct torque is essential to avoid loosening over time. Before you begin, verify your roof can bear the added load and that shading or orientation won’t undermine performance. If in doubt, consult a licensed contractor who can assess rafter spacing, sheathing integrity, and potential retrofit options. By respecting flashing details and proper sealing, you reduce the risk of leaks at penetrations around mounts and wiring conduits. This sets the foundation for a safe, durable installation you can trust for years to come.
tipArticlesRequiredByPlatformOnlyCommentaryForStructureNoteNeeded
noteByContent
Tools & Materials
- Ladder (extension, rated for roof work)(Stable footing; use on dry, non-slippery surfaces)
- Fall-arrest harness and lanyard(Full-body harness with proper anchorage points)
- Roof anchors or anchor straps(Secure anchors for safety line placement)
- Solar mounting rails and clamps(Compatible with panel size and roof type)
- Roof flashing kit(Flashings for penetrations and edge seals)
- Exterior-grade sealant/caulk(Weatherproof seal around mounts and penetrations)
- Power drill with appropriate bits(Masonry/wood bits suitable for roof material)
- Torque wrench(To torque screws to manufacturer specs)
- Conduit clips and cable management ties(Route wiring neatly and safely)
- Safety gloves and safety goggles(Personal protective equipment)
- Roofing sealant remover (optional)(For cleaning old sealant if needed)
Steps
Estimated time: Estimated total time: 4-8 hours
- 1
Prepare and plan
Inspect the roof, verify load capacity, and map mounting locations. Gather manufacturer mounting instructions for your panel model and confirm that your proposed layout aligns with rafter lines and spacing. This step reduces rework later and helps you budget hardware precisely.
Tip: Enlist a helper to keep rails aligned while you mark locations. - 2
Mark mounting locations
Using a chalk line and level, mark rail positions that are square to the roof and consistent from edge to edge. Double-check spacing against the panel dimensions and ensure clearance for wiring. Poor alignment leads to panel stress and uneven shading.
Tip: Measure twice and mark once to avoid costly mistakes. - 3
Install flashing and prepare penetrations
Apply flashing at all penetrations and along expected mounting points. Ensure shingles or roofing material is properly cut and re-sealed to prevent leaks. Flashing should extend under shingles where required and sealant should be compatible with your roof material.
Tip: Work from the bottom up to maintain water shedding flow. - 4
Attach rails and secure with hardware
Pre-drill holes, position rails, and fasten with corrosion-resistant hardware. Torque screws to the manufacturer’s specification using a torque wrench to prevent loosening without damaging the roof. Include anchors at each mounting point for wind resistance.
Tip: Avoid overtightening to prevent stripping or cracking roof material. - 5
Mount panels and manage wiring
Lift panels onto the rails, secure with clamps, and verify even spacing. Route wiring through conduits and clips, keeping cables away from hot surfaces and moving parts. Check that all connections are tight and protected from the elements.
Tip: Have a second person help with lifting and guiding panels into place. - 6
Seal, test, and document
Apply sealant along rail bases and flashing seams to seal against water intrusion. Test electrical connections according to the manufacturer’s instructions and record serials, torque values, and layout photos for warranty purposes. File permits and utility paperwork if required.
Tip: Document every step for warranty and future maintenance.
Frequently Asked Questions
Is it safe to fix solar panels to a pitched roof?
Yes, it can be safe when you follow established safety practices: use fall protection, secure anchors, work with a partner, and adhere to local codes. Always verify roof condition and wind loads before starting.
Yes, it’s safe if you follow safety practices and codes.
Do I need permits to mount solar panels?
Permit requirements vary by location and project scope. Check with your local building department and utility for permissions, inspections, and interconnection rules before mounting.
Permit requirements vary; check with your local authorities.
Can I mount panels on a flat roof?
Yes, but you’ll generally use different mounting hardware and ballast methods to secure panels without penetrating or damaging the roof membrane. Update flashing to suit flat configurations.
Yes, with the right ballast and mounting hardware.
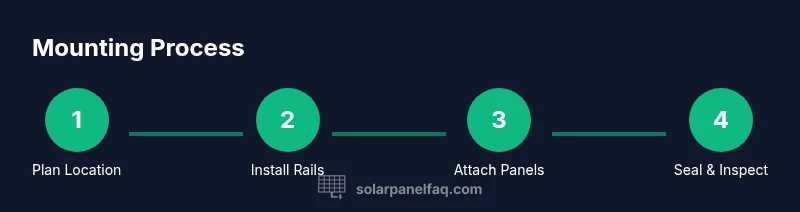
What is the typical order of operations for mounting panels?
Plan layout, install rails or mounts, attach panels, route wiring, seal penetrations, and perform a final safety and performance check. Following a sequence reduces rework and protects the warranty.
Plan, mount, wire, seal, and verify performance.
How long does installation typically take?
Installation duration depends on roof type, system size, and crew experience. A professionally installed system can take a full day or more, while a DIY approach may require extra time for permits and inspections.
It depends on roof type and crew, but plan for a full day or more.
Watch Video
Top Takeaways
- Plan roof compatibility and load before drilling
- Use rated hardware and correct torque to prevent loosening
- Seal penetrations thoroughly to prevent leaks
- Route wiring safely with proper clips and conduit
- Document the installation for warranty and future maintenance