How to Fix Solar Panels on a Flat Roof: A Practical Guide
Step-by-step instructions to securely install solar panels on a flat roof using ballast or rails, weatherproof sealing, and safety best practices. Learn how to choose mounting methods, plan layouts, and maintain durability—based on Solar Panel FAQ insights.

Discover how to fix solar panels to a flat roof safely and effectively. This guide walks you through choosing a mounting method, preparing the roof, installing rails or ballast, securing panels, and sealing for weatherproofing, plus basic wind-load checks and safety steps. By the end you’ll know how to fix solar panels to flat roof with confidence and durability.
Understanding Flat Roof Mounting Basics
Flat roofs offer generous space and easy access for electrical connections, but mounting solar equipment on them requires a system that handles wind uplift and water drainage without penetrating the membrane. According to Solar Panel FAQ, the most reliable approach on flat surfaces is either ballast-based rails or non-penetrating ballast blocks, chosen to minimize roof damage while meeting local code. Before you begin, inspect the roof for membrane condition, pooling, and existing penetrations, and verify that the structural deck can bear the added load. A well-planned layout reduces shade and streamlines cable routing. Consider the consequences of temperature shifts and ponding water, and ensure your plan includes a safe access path for maintenance. The goal is a durable, weatherproof installation that can tolerate seasonal changes without loosening or leaking. Start with an as-built drawing, note skylights or vents, and align mounting points away from those features. Confidence comes from a clear plan, proper hardware, and careful attention to the roof’s membrane.
Choosing a Mounting System for Flat Roof
Two common approaches: ballast-mounted rails and penetrating rail systems (where allowed by code). Ballast systems rely on weights to hold panels in place, ideal for maintaining the roof's integrity but require careful weight distribution and adequate ballast blocks. Penetrating rails attach to the structural deck and provide a more compact footprint, but they introduce potential leak points and require flashing details. Solar Panel FAQ analysis shows homeowners often prefer ballast for flat roofs due to less membrane intrusion, but building codes and roof type will drive the right choice. When selecting a system, consider the roof material (EPDM, TPO, or asphalt), anticipated wind loads, and the mounting hardware compatibility with your solar modules. Plan the layout so panels align with sun exposure while leaving space for maintenance or future expansion. Document the mounting plan for inspections and warranty requirements.
Preparing the Roof and Safety Precautions
Begin with a thorough roof assessment: check membrane condition, inspect for prior leaks, and verify the structural deck’s ability to bear added load. Ensure all safety gear is on hand: fall protection harness, gloves, eye protection, and non-slip footwear. Weather conditions matter: choose a dry day with mild temperatures to reduce the risk of slips. As you work, maintain three points of contact when on a ladder and consider professional help for any flashing or penetrating work. According to Solar Panel FAQ, verifying roof integrity and leak history before installation helps protect both the roof and the solar array. Keep a clean workspace and label all wiring routes to simplify later electrical connections.
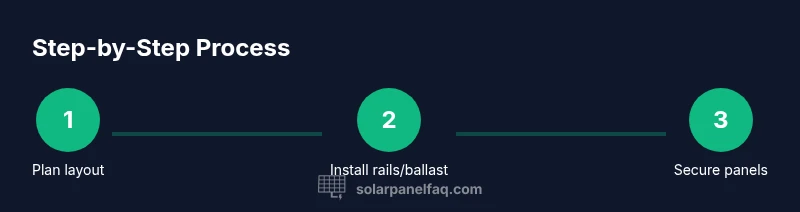
Step-by-Step Installation Overview
This section provides a high-level view of the process. Plan the layout first, then install mounting rails or ballast blocks, secure the rails, attach panels with clamps or hardware, seal all penetrations and joints, and finally perform a basic wind and electrical inspection. The detailed steps are provided in the dedicated Step-by-Step section for precision and safety.
Weatherproofing, Sealing, and Maintenance
Weatherproofing is crucial on flat roofs. Use appropriate flashing details around edges, skylights, and penetrations; apply a compatible sealant or gasket material to create a continuous barrier against wind-driven rain. Route cables in protected conduits or channels to minimize wear and exposure. Periodic maintenance should include cleaning debris from gutters, checking for panel movement after storms, and inspecting seals for signs of drying or cracking. The Solar Panel FAQ team emphasizes adhering to manufacturer recommendations for sealants and flashings to preserve warranties and ensure long-term performance.
Tools & Materials
- Aluminum mounting rails(Pre-cut lengths suitable for panel count; corrosion-resistant)
- Non-penetrating ballast blocks(Weighted blocks or plates designed for flat roofs)
- Roof sealant or butyl tape(Weatherproof sealant compatible with roof membrane)
- Stainless steel mounting hardware(Bolts, nuts, washers sized for rails and modules)
- EPDM/TPO flashing or end-caps(Flashing for edges and penetrations as needed)
- Torque wrench(Ensure proper clamping without over-tightening)
- Power drill with metal cutting and drilling bits(For rail anchoring and panel mounting)
- Measuring tape and chalk line(Accurate layout and alignment)
- Marker or pencil for layout(Label anchor points and wire paths)
- Personal protective equipment(Gloves, safety glasses, non-slip footwear, harness)
- Cable management accessories(Conduits, clips, raceways to tidy wiring)
Steps
Estimated time: 2-6 hours
- 1
Assess roof and plan layout
Perform a thorough roof inspection, noting membrane condition, ponding, vents, and skylights. Create a scale layout of available space for panels, ensuring access for maintenance. Mark anchor points with a chalk line and verify that the deck can support the intended load.
Tip: Double-check all measurements before drilling or placing ballast. - 2
Mark anchor points and position rails
Using your layout, mark anchor points in a straight line with a chalk line. Position rails or ballast blocks to distribute weight evenly across the roof and avoid overloading any single area. Confirm alignment with the planned panel rows.
Tip: Use a level to maintain perfectly flat rail alignment to prevent panel tilt. - 3
Install mounting rails or ballast layout
Secure rails to the roof deck or place ballast blocks according to the chosen system and manufacturer guidelines. Ensure clamps or fasteners are appropriate for the rail material and roof surface. Tighten to the recommended torque without over-tightening.
Tip: Keep hardware organized in labeled containers to avoid misplacement. - 4
Attach panel clamps and place modules
Install panel clamps on rails and carefully set each solar module in position. Align modules for optimal sun exposure and create uniform gaps for expansion and airflow. Verify that clamps grip the modules without stressing frames.
Tip: Leave a small gap at rail ends to accommodate thermal expansion. - 5
Seal penetrations and joints
Apply flashing and sealant where rails meet the roof and around any penetrations such as conduit entries. Ensure a continuous seal along all edges to prevent water intrusion. Check that the membrane remains intact and free of tears.
Tip: Apply sealant in a continuous bead and smooth it for a uniform finish. - 6
Wind-load check and final inspection
Perform a basic wind-load check by ensuring there is no excessive movement in rails or panels under mild wind conditions. Inspect electrical connections and labeling, and confirm that all fasteners are secure. Document the installation for warranty compliance.
Tip: Keep a closure checklist for permits and warranty documentation.
Frequently Asked Questions
Do I need a permit to install solar panels on a flat roof?
Permits depend on local codes and utility requirements. Check with your city or county building department and your electricity utility before starting. Following code requirements helps protect warranties and ensures safety.
Permits vary by locality; contact your building department before you start.
Can I use ballast-only mounting on any flat roof?
Ballast systems can work well on many flat roofs if the roof structure and membrane are in good condition and the weight is properly distributed. Some roofs require flashing or penetration-based mounting per code.
Ballast can work on many flat roofs, but always check local codes and roof integrity.
Will installing on a flat roof affect warranty?
Warranties vary by manufacturer and installer. Follow the equipment and installation instructions exactly and use approved mounting hardware. Improper mounting can void parts of the warranty.
Warranties depend on the installer and manufacturer; follow guidelines to protect coverage.
How long does a typical installation take?
Time varies with roof size and system complexity. It generally takes several hours, depending on layout, mounting method, and whether electrics are included in the crew’s scope.
Timeline depends on roof size and setup; plan for several hours.
How often should I inspect the system?
Inspect the system quarterly for any signs of movement, corrosion, or leaks and after major weather events. Clean debris from panels and gutters to maintain performance.
Check it every few months and after storms to catch issues early.
What maintenance is required for flat-roof mounting?
Maintenance includes checking fasteners, seals, and drainage paths, and ensuring cables are protected from wear. Re-seal as recommended by the manufacturer and replace worn components.
Regular checks and timely replacements keep the system reliable.
Is non-penetrating mounting safer for flat roofs?
Non-penetrating mounting reduces the risk of leaks but must be designed for the roof’s load and wind. It’s important to follow manufacturer guidelines and local codes.
Yes, non-penetrating options often reduce leak risk when code-approved.
Watch Video
Top Takeaways
- Plan layout before any installation work.
- Choose ballast or penetrating rails based on roof type and codes.
- Seal all joints and flashing to prevent leaks.
- Inspect and test the system after installation.