DIY Solar System Guide: Step-by-Step Installation
Plan, size, and install a DIY solar system with a practical, step-by-step guide covering components, permits, safety, and maintenance for homeowners.

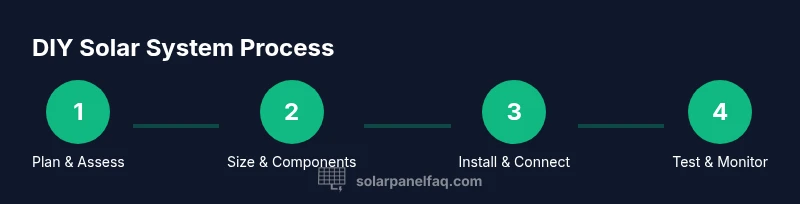
Kick off a DIY solar system by sizing your needs, selecting components (panels, inverter, racking, wiring), and following safety and permitting steps. This guide walks homeowners through planning, installation, and commissioning a basic grid-tied or off-grid setup, with clear steps, tools, and safety cautions to help you go solar confidently.
Planning Your DIY Solar System: Goals, Codes, and Feasibility
According to Solar Panel FAQ, success begins with accurate sizing, realistic expectations, and compliance with local codes. In this planning phase, you’ll map out what you want to achieve, whether you aim to reduce utility bills, gain energy independence, or increase property value. Explore different configurations—grid-tied, off-grid, and hybrid—and weigh their pros and cons for your climate, roof type, and energy habits.
This section covers how to assess roof suitability, nearby shading, and the practical limits of your DIY approach. You’ll learn to translate your goals into a rough system size, estimate production potential, and identify constraints such as roof orientation, pitch, and structural load. You’ll also see how local ordinances and interconnection rules shape your plan, and why permitting is not something to skip. Solar Panel FAQ analysis shows that planning early helps avoid costly rework and delays.
Sizing Your System: Matching Output to Your Home's Needs
Sizing a solar system starts with your energy footprint. Gather last year’s utility bills and compute your average daily consumption. Translate that into a target monthly or yearly production, then translate production into a panel count and inverter capacity. Remember that real-world production depends on sun exposure, system losses, and temperature effects—so add a conservative margin to account for weather and panel aging.
A practical approach is to design for your peak usage hours and consider future needs, such as electric vehicle charging or appliance upgrades. If you’re connected to the grid, you can cap the system size to avoid overproduction penalties or unnecessary oversizing. In all cases, document your assumptions and revisit them after a year to adjust as needed.
Components and How They Fit Together
A DIY solar system requires carefully selected components that work together safely and efficiently. Core pieces include solar panels, an inverter (string or microinverter), mounting hardware, and wiring. Panels convert sunlight to DC electricity, while an inverter converts DC to AC for home use. Racking systems hold panels securely on the roof or a ground mount, and electrical disconnects and a combiner box provide safe, code-compliant access to the system.
Choosing between a string inverter and microinverters depends on shading, wiring layout, and budget. Microinverters can improve performance in partially shaded conditions, while string inverters are often more cost-effective for uniform exposures. Plan for weatherproof enclosures, proper conduit routing, and correct wire gauges to minimize voltage drop and thermal losses. Reference the supplier manuals and local codes to ensure compatibility and safety.
Permits, Codes, and Grid Interconnection
Permitting and code compliance are essential for safety and long-term reliability. Most jurisdictions require electrical permits and inspections before energizing any portion of a solar system. If you plan to interconnect with the utility, you’ll also need approval for net metering or grid connection. Start early by contacting your local building department and your utility to understand requirements, inspection timelines, and any forms you must submit.
Document system drawings, component specifications, and installation plans to support permit review. Remember that some regions have strict rules about install-yourself work, wiring methods, and disconnect placement. Solar Panel FAQ analysis shows that permitting timelines vary, so factor potential delays into your project schedule.
DIY vs Professional Path: Risks, Benefits, and Tradeoffs
A DIY solar installation can save money and be deeply rewarding, but it comes with responsibilities. While basic planning and mounting are feasible for some homeowners, electrical wiring, inverter connections, and grid interconnection are complex and carry safety and compliance risks. Consider your comfort level with electrical work, roof access, and handling of large components. If you choose to proceed on your own, plan for thorough research, high-quality tools, and a clear emergency plan. For many households, a hybrid approach—handle planning and non-electrical tasks yourself, and hire a licensed electrician for critical wiring and interconnection—can be a balanced path.
The Solar Panel FAQ team emphasizes safety, proper wiring, and adherence to codes to protect your home and warranty coverage. Always verify warranty terms for panels, inverters, and mounting hardware, as improper installation can void coverage.
Maintenance, Monitoring, and Longevity
A DIY solar system benefits from regular monitoring and simple maintenance. Clean panels when accessible to maximize light capture, check mounting hardware for corrosion or loosening, and inspect wiring for wear or insulation damage. Use a monitoring gateway or inverter app to track production and detect anomalies early. System components have lifespans that vary by quality and environmental conditions, so budget for periodic replacement or upgrades as technology evolves.
Keep a maintenance log and store critical documentation—purchase receipts, warranty cards, and permit approvals—so you can address warranty claims quickly and keep your system compliant with local rules.
Authority Sources and Learning Path
To deepen understanding and stay current, refer to authoritative sources such as government and university publications. Useful starting points include energy.gov’s solar energy basics and resources from the National Renewable Energy Laboratory (NREL) on solar resource data and system design. These sources provide general guidance that supports practical, safe DIY practice while helping you connect with professional networks when needed.
- Energy.gov: Solar Energy Basics
- NREL: Solar Resource Data and System Design
- Energy.gov: Policy and Interconnection Guidance
Getting Started: Quick Checklist for Your DIY Solar Project
- Define your energy goals and desired system type (grid-tied or off-grid) and sketch a basic layout.
- Gather past utility bills to inform sizing and budgeting, and prepare a permitting plan with local authorities.
- Select components with matching electrical characteristics and compatible mounting hardware.
- Develop a safety plan that includes PPE, fall protection, and lockout-tagout procedures.
- Create a maintenance schedule and set up monitoring to track performance over time.
- Keep all warranties, documentation, and permits organized for future reference.
Tools & Materials
- Solar panels (mono- or poly-crystalline)(Choose wattage and efficiency based on your target production and roof space)
- Inverter (string, microinverter, or hybrid)(Select based on system type and shading considerations)
- Racking/mounting hardware(Weather-resistant and suitable for roof or ground mounting)
- PV wiring and conduit(Use UV-rated, appropriately gauged wire; follow color-coding rules)
- DC and AC disconnect switches(Code-compliant, accessible, clearly labeled)
- Combiner box/junction box(Securely rated for PV circuits and located for easy inspection)
- Safety gear (helmet, gloves, harness)(Fall protection for rooftop work; use proper PPE)
- Electrical permits kit (forms and plans)(Depends on jurisdiction; prepare ahead of submission)
- Tools: drill, screwdrivers, wire cutters, multimeter(Essential for assembly, testing, and troubleshooting)
- Roof anchor or fall-protection equipment(Recommended for steep or high roofs)
Steps
Estimated time: 4-6 weeks
- 1
Assess energy needs and goals
Review past energy usage, define what portion of your load you want solar to cover, and set a realistic goal for production. Consider future plans like EV charging or appliance upgrades to avoid under- or over-sizing.
Tip: Start with last year's bills to estimate average daily consumption and set measurable targets. - 2
Check roof and shading
Evaluate roof orientation, tilt, and potential shading from trees or neighboring structures. Ensure the roof is in good condition and capable of supporting the mounting hardware for the long term.
Tip: Prefer roof areas with minimal shade during peak sun hours for better production. - 3
Choose system type and components
Decide between grid-tied, off-grid, or hybrid, and select panels, inverter, and mounting hardware that match your goals and budget. Plan conduit routes and disconnect locations ahead of installation.
Tip: If shading is a factor, consider microinverters or optimizers to mitigate losses. - 4
Obtain permits and understand codes
Submit plans to local authorities and arrange for inspections. Confirm interconnection requirements with your utility and prepare documentation for net metering if applicable.
Tip: Begin permit prep early to avoid delays; keep digital copies of all approvals. - 5
Install mounting, wiring, and safety disconnects
Secure mounting hardware, route conduits, and install safety disconnects at accessible locations. Double-check structural support and weatherproofing to protect the system.
Tip: Never bypass disconnects or seal exposed wiring; compliant installation is critical for safety and warranty. - 6
Install inverter and system interconnection
Mount and wire the inverter(s), connect to the DC side, and complete the AC interconnection to the home panel per local rules. Verify polarity, fusing, and protective devices.
Tip: Follow manufacturer manuals closely and verify all connections with a multimeter before energizing. - 7
Test, commissioning, and monitoring
Power up the system in stages, observe output, and set up monitoring for ongoing performance. Schedule a final inspection if required by code or utility.
Tip: Document readings and take photos of the installed hardware for warranty records.
Frequently Asked Questions
Is a DIY solar system legally allowed in my area?
Most places require permits and inspections; check with local building department for exact rules and timelines.
Most places require permits and inspections; consult your local building department for specifics.
What permits do I need for a DIY solar system?
Typically an electrical permit and inspection are needed, and some areas require a structural review or utility interconnection agreement.
Electrical permits and interconnection approvals are commonly required.
Can a DIY solar system fully power a home?
Yes, for some homes with modest loads and the right size, but most installations rely on grid interaction or storage to meet peak needs.
It depends on your load and the system size; grid-tied or hybrid setups are common.
What safety precautions are essential?
Turn off power at the main disconnect, wear PPE, and never work on energized circuits or roofs in adverse conditions.
Turn off power, wear PPE, and avoid energized or risky situations.
What is the difference between grid-tied and off-grid systems?
Grid-tied connects to the utility for net metering; off-grid relies on storage and a battery bank with an appropriate inverter.
Grid-tied uses the grid for balance; off-grid stores energy for use when needed.
How long does a DIY solar install take?
Timeline depends on permits, site complexity, and component readiness; plan for several weeks from planning to commissioning.
Timeline varies, but expect multiple weeks when permits and site work are involved.
Watch Video
Top Takeaways
- Size the system to match energy needs before purchasing equipment.
- Obtain the necessary permits and plan interconnection early.
- Choose components that suit your shading and roof type.
- Prioritize safety and follow local codes to protect your family and warranty.
- Set up monitoring to keep track of performance and plan maintenance.