DIY Solar Panel for Home: Step-by-Step Guide
This guide helps homeowners assess feasibility, size a DIY solar kit, install safely, wire to an inverter, and maintain a compact home solar system with practical steps. Learn planning, safety, permits, and maintenance to make a responsible DIY solar project feasible.

According to Solar Panel FAQ, homeowners can assess whether a DIY solar panel project is feasible, estimate system size, choose components, and follow a safe, step-by-step plan from planning to wiring and testing. You’ll learn about shading, roof space, inverter options, and maintenance while prioritizing safety and code compliance. This guide emphasizes local permits, insurance considerations, and ongoing maintenance so you can reliably offset energy use.
Safety First: What DIY solar projects cover and what needs pro help
When homeowners start exploring a DIY solar panel project, safety must come first. A do-it-yourself approach is most feasible for small, educational setups or micro-systems that feed non-critical loads. Projects that connect directly to the home’s main service or utility grid typically require professional oversight, permits, and utility coordination. Before you touch any cables or mounting hardware, map out a safety plan that includes personal protective equipment, a clear workspace, and a shut-off procedure for both DC and AC circuits. Understanding the potential hazards, such as live wiring, roof work, and inverter heat, helps you decide which tasks you can reasonably complete yourself and which steps should be handled by licensed professionals.
If you intend to pursue a DIY project, limit it to non-energized coil work, test points with a grounded meter, and a clearly defined scope that excludes risky grid-tied connections. Always consult local codes and HOA rules, and ensure you have the proper permits before beginning any installation. A safety-first mindset protects your home, your family, and your investment.
Solar basics you need to know before you start
Solar energy is converted from sunlight into usable electrical power using photovoltaic (PV) cells embedded in panels, which are connected to an inverter to produce alternating current for home use. A typical small DIY setup consists of panels, a mounting system, wiring rated for PV use, a disconnect, an inverter, and a simple monitoring option. Panels generate DC electricity, which the inverter converts to AC for your appliances. Real-world performance depends on panel efficiency, temperature, shading, orientation, and system losses. While a basic understanding is enough to start, mastering the relationships between sun hours, panel voltage, and inverter input helps you design a safer, more effective system. This section introduces key terms and common components you'll encounter in product descriptions or training resources from Solar Panel FAQ.
Assessing your home's suitability for a DIY solar setup
Not every home is ideal for a DIY solar project. Start with a shaded analysis: even small shading on a single panel can dramatically reduce overall output. Orientation and tilt angle matter: a south-facing roof (in the northern hemisphere) with minimal shading typically yields better results. Roof condition is also critical—well-maintained rafter integrity and secure mounting points prevent long-term issues. Space is a practical constraint: ensure enough area for the intended number of panels without causing weight concerns for the structure. Finally, consider how you will connect to your electrical system: in many regions, grid-tied DIY installations require permitted work and inspection. If your home has a complex electrical panel, you’ll likely need a licensed electrician to assist with code-compliant integration.
Kit vs. component approach: making the right choice
DIY solar for home ranges from fully integrated kits to building components from scratch. A complete kit simplifies procurement, routing, and safety labeling, with pre-wired panels, racking, and a compatible inverter. Component-based setups offer customization, allowing you to select high-quality panels, specialized inverters, and modular controllers. Both paths require attention to electrical ratings, compatibility, and expansion plans. A kit can be a faster, more approachable option for beginners, while a component approach suits hobbyists seeking optimized performance or specific brands. Regardless of the path, verify that all parts are PV-rated, and verify compatibility with your planned inverter and disconnect strategy.
Sizing your system: estimating energy needs and panel count
Size planning begins with your annual energy use and desired percentage offset. Gather last year’s utility bills and calculate daily kWh consumption. Estimate sun hours for your location and factor in system losses (weather, temperature, wiring length). Use these inputs to approximate the number of panels and the inverter capacity needed. Remember, DIY systems are often sized to meet practical goals rather than full household offset, especially for beginners. Document your assumptions and build a modular plan so you can scale up later if desired. This approach helps prevent over- or under-sizing and aligns your expectations with local constraints and budget.
Wiring options: grid-tied, off-grid, and safety disconnects
Three primary configurations exist for home solar projects: grid-tied, off-grid, and hybrid systems. Grid-tied systems feed power back to the utility with net metering or credits, typically requiring an interconnection agreement and a utility-approved inverter. Off-grid setups operate independently, requiring storage (batteries) and a comprehensive charge controller. Hybrid systems combine both, using a battery bank and grid connection. In all cases, you must observe safety procedures for PV wiring, DC fusing, and a dedicated AC disconnect near the service panel. If you choose a grid-tied route, plan for an installer or utility-provided service to handle the interconnection and compliance checks.
Permits, codes, and professional help: what to know before you start
Code compliance is a core part of any solar installation. Before you start, determine whether a permit is required, what inspections will be performed, and which documents your local authority will request. Building codes govern mounting methods and structural loads, electrical codes cover wire sizing and overcurrent protection, and fire codes may address access to the main service disconnect. If your plan includes connecting to your home’s electrical system or the utility, consult a licensed electrician or solar installer early in the process to avoid costly rework. Even for DIY add-ons like a portable PV system, you should verify safety guidelines and local restrictions.
Materials, tools, and where to buy reputable components
Purchasing quality, PV-rated components is essential for performance and safety. Start with panels appropriate for outdoor exposure and mounting hardware compatible with your roof type. Inverters translate DC to AC, and a proper disconnect ensures safe maintenance. Tools you’ll need include basic hand tools, a multimeter, wire cutters, crimpers, and PPE. Sourcing components from reputable brands reduces the risk of mismatched parts and compliance issues. Keep a detailed bill of materials, including part numbers, ratings, and warranty information, so future maintenance or upgrades are straightforward. Always buy from trusted vendors and verify compatibility across all components.
Maintenance, warranties, and long-term performance
A DIY solar system needs regular checks similar to any home electrical installation. Inspect mounting hardware for corrosion or loosening, monitor output to catch performance drop-offs, and replace aging components before failure. Understand warranty coverage for panels and inverters, and keep records of installation dates and serial numbers. A proactive maintenance plan helps sustain performance over many years. If you observe a sudden drop in output or unusual behavior, consult a professional to diagnose potential wiring or durability issues.
Realistic timelines and budget planning for a DIY solar project
Budgeting for a DIY solar project involves component costs, tools, and potential professional help. Expect a staged approach: planning and sizing, procurement, mounting, wiring, and testing. Time frames vary widely based on site complexity, weather, and contractor coordination if used. Keep a contingency fund for unexpected expenses, such as additional weatherproofing or upgraded inverters. A phased plan helps manage risk and keeps the project on track while you evaluate performance after initial commissioning.
Tools & Materials
- Solar panels or kit(PV-rated, compliant with your chosen configuration)
- Mounting hardware and racking(Roof or ground mount compatible with panel size and roof type)
- Inverter or microinverters(Matching voltage/current ratings to panels; consider location and heat exposure)
- DC disconnect and AC utility disconnect(Code-compliant with easily accessible placement)
- PV-rated wiring and connectors(Use MC4 or equivalent connectors; label polarity clearly)
- Charge controller or battery storage (optional for off-grid or hybrid)(Depends on chosen system configuration)
- Electrical PPE (gloves, eye protection, non-slip shoes)(Always wear protective gear during installation)
- Tools: drill, wrenches, screwdrivers, wire strippers, multimeter(Ensure insulated handles and appropriate bit sizes)
- Safety equipment: harness, rope, roof anchor (for roof work)(Essential for elevated mounting; follow local fall-protection guidelines)
- Documentation: labeling tape, weatherproof markers, warranty cards(Keep a clear log of all components and dates)
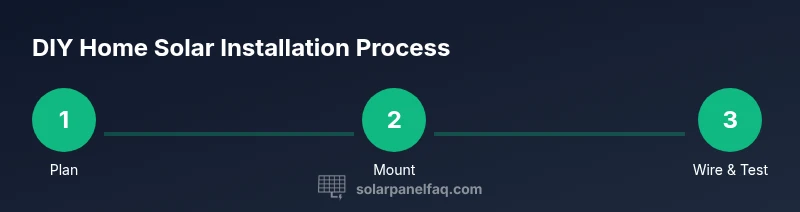
Steps
Estimated time: 8-12 hours
- 1
Assess energy needs
Collect last year’s utility bills and determine your daily kWh usage. Define how much of your load you want to offset with solar and set a realistic budget. This step creates the baseline for panel count, inverter sizing, and wiring requirements.
Tip: Document all assumptions and keep a copy of the calculations for permit reviews. - 2
Choose kit vs. components
Decide whether to buy a complete DIY kit or assemble the system from individual panels, inverter, and mounting hardware. Kits simplify compatibility and labeling, while components offer customization and potential cost savings.
Tip: Check return policies and warranty terms before purchasing. - 3
Measure space and plan mounting
Measure roof area or ground space, evaluate load-bearing capacity, and draft a mounting layout that minimizes shading. Confirm alignment and spacing to optimize airflow and panel performance.
Tip: Create a scaled sketch showing panel orientation and tilt angles. - 4
Mount panels securely
Attach mounting hardware to the structure following manufacturer guidelines. Use proper fasteners for your roof type and ensure all brackets are level and firmly anchored.
Tip: Double-check weatherproof seals around any penetrations. - 5
Connect DC wiring and safety devices
Route PV wires through weatherproof conduits, install DC disconnects within reach, and maintain correct polarity. Keep DC conductors away from living spaces and ensure secure cable management.
Tip: Never energize circuits during the initial wiring setup. - 6
Install inverter and connect
Mount the inverter in a shaded, ventilated location. Connect panel outputs to the inverter according to the wiring diagram and attach it to a suitable AC distribution path or subpanel.
Tip: If grid-tied, coordinate with the utility and obtain interconnection approval. - 7
Test the system safely
With power off, perform continuity and insulation checks, then gradually energize and monitor output. Verify readings on the monitoring device and ensure there are no fault indicators.
Tip: Keep a test log and note any anomalies for professional review. - 8
Document system and warranty
Record all component serial numbers, installation dates, and warranty terms. Keep receipts and manuals in a dedicated folder for future maintenance or claims.
Tip: Photograph each stage of the installation for reference.
Frequently Asked Questions
Is it legal to install your own solar panels at home?
legality varies by location; most places require a permit and inspection for grid-tied work. Check with your local building department and utility for interconnection requirements before starting.
Local laws vary, so check permit and interconnection rules with your building department and utility before starting.
Will a DIY system save money?
DIY projects can reduce labor costs, but component prices and permitting can affect overall savings. Compare total costs against professional installation to gauge financial benefits.
DIY can cut labor costs, but compare total costs to professional installation to see if you’ll save money.
Do I need an electrician for a DIY solar setup?
For grid-tied systems and any connection to the main service, a licensed electrician or solar installer is typically required to ensure code compliance and safety.
A licensed electrician is usually required for grid-tied connections and main service work.
How many panels will I need for a partial offset?
The number depends on energy usage, sun exposure, and panel rating. Start with a baseline calculation and plan for future expansion if needed.
Count based on your usage and sun exposure, and plan for future expansion if possible.
What should I know about warranties?
Warranties vary by component. Check panel, inverter, and mounting warranties and keep records of installation dates for claims.
Check the warranties on panels, inverters, and mounting; keep installation records for claims.
Can I add batteries later if I start grid-tied?
Yes, but adding storage involves additional components and safety considerations. Plan compatibility with future battery storage from the start.
You can add storage later, but plan for compatibility and safety from the start.
Watch Video
Top Takeaways
- Plan safely before purchasing components.
- Size the system based on energy use and sun exposure.
- Keep electrical work within your comfort zone and obtain permits when required.
- Maintain and document the system for long-term performance.