DIY Solar for Homes: A Practical Step-by-Step Guide
Plan, size, install, and monitor a safe DIY solar system for your home. This guide covers components, mounting, safety checks, permits, and ongoing maintenance to help homeowners generate clean solar power reliably.

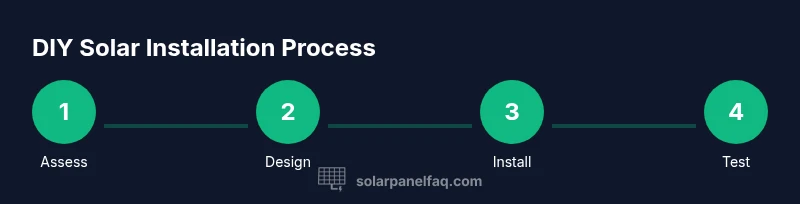
This guide helps homeowners assess feasibility, size a basic DIY solar kit, and install a non-grid-tied system safely. You’ll learn material choices, mounting basics, and essential safety checks, plus when to hire an electrician for grid-connected work. Expect a practical weekend project with clear steps and common-sense cautions. Keep safety first and follow local codes.
Assessing Your Home's Solar Potential
Before any purchase, evaluate how much sun your home receives, the condition and orientation of your roof, and your daily energy needs. The goal is to determine if a solar upgrade makes sense and what scale is reasonable for your budget. According to Solar Panel FAQ, most residential projects succeed when there is clear sun exposure and a structurally sound roof that can support the added weight of panels and racking.
Key factors include roof orientation (south-facing is typically best in the northern hemisphere), shading from trees or nearby structures, and roof age. If the roof is nearing replacement, plan that work first or include it in your cost estimates. Use tools like sun-hours calculators and shade analysis apps to estimate annual production for a hypothetical 5 kW kit. Gather your current electricity bill to compute your daily average kWh and identify peak-demand hours. This baseline helps you size panels, inverters, and storage options without overspending. You’ll also need to consider local climate, typical cloud cover, and seasonal variation, as these influence how consistently solar panels perform across the year. Remember that a DIY solar project grows best when you start with a realistic plan and a staged budget. This is a good moment to compare off-grid possibilities with grid-tied ambitions, so you know which path aligns with your energy goals and local regulations.
System Sizing and Configuration: Off-Grid vs Grid-Tied
Sizing a solar system starts with your daily energy use. Calculate the total kilowatt-hours (kWh) you consume each day and compare that with the average production you can expect from your location. For a DIY project, you’ll typically choose between an off-grid approach (with batteries) and a grid-tied approach (where excess power can be fed back to the utility under a permit). A rough rule of thumb is to multiply your daily kWh by the number of sun hours your location experiences, then add a safety margin for cloudy days and seasonal variation. Off-grid systems require battery storage, charge controllers, and potentially a larger inverter. Grid-tied systems may allow for simpler, cheaper components but require compliance with local interconnection rules and utility approvals. In any case, document your goals, budget, and timeline. This planning phase pays off in reduced waste and a smoother installation. The Solar Panel FAQ team notes that clarity at this stage reduces risk and increases long-term satisfaction.
Choosing Components: Panels, Inverters, Batteries, and Mounting
Choosing reliable components is essential for a durable DIY solar setup. Panels come in monocrystalline and polycrystalline types, with monocrystalline offering higher efficiency in a smaller footprint. Inverters convert DC from panels to usable AC; options include string inverters, microinverters, or a hybrid if you plan to store energy. Batteries add storage for off-grid or hybrid systems—choose lithium for higher energy density and longer life, or deep-cycle lead-acid for lower upfront cost. Mounting hardware should match your roof type (flat, metal, asphalt) and local wind loads. Don’t overlook PV-rated wiring, weatherproof seals, and a DC disconnect for safety. When planning, consider expandability—adding more panels later is common. The Solar Panel FAQ analysis suggests that selecting components with compatible voltage and current specs reduces compatibility issues and simplifies future maintenance. Keep a detailed parts list and reference schematics for future maintenance.
- Panels: Monocrystalline vs polycrystalline
- Inverters: String vs microinverters
- Battery storage: Lithium vs lead-acid
- Mounting: Roof vs ground mounts
- Wiring and safety: PV wires, DC disconnects, conduit
Pro tip: document all voltage and current ratings to ensure safe operation and future upgrades.
Mounting, Wiring, and Safety Basics
Mounting panels securely is as important as the electrical connections. Use rated mounting rails and hardware sized for your roof type, angle the panels to maximize sun exposure, and ensure clear drainage around any penetrations. When wiring, keep DC paths short and minimize voltage drop. Always isolate panels with a DC disconnect before working on the array, and never work on live circuits. If you’re considering grid-tied connections, this is the point where most jurisdictions require a licensed electrician and official inspections. For DIY enthusiasts pursuing off-grid solutions, focus on proper battery enclosure, venting for gas fumes (if using lead-acid), and robust cable management to prevent damage from weather, pets, or lawn equipment. Safety gear—gloves, eye protection, and fall protection for roof work—reduces this project’s risk significantly. Remember: some tasks, like AC connections and interconnection with the utility, require professional credentials. The aim is to complete a safe, reliable, code-compliant system that you can maintain with routine checks.
Permits, Codes, and Warranty Considerations
Local permitting processes and electrical codes govern solar installations. Start by contacting your city or county building department to learn what approvals are required for your system size and configuration. Inspections typically cover structural mounting, wiring methods, and electrical protection devices. Documentation helps protect your warranty and ensures future resale value. Many manufacturers require professional installation for their warranties to stay valid, especially for grid-tied systems. Even when pursuing a DIY off-grid project, keep receipts, photos, and test data to document compliance and performance. If you decide to expand in the future, confirm that your permits and permits from the utility account for the larger system. The Solar Panel FAQ team notes that understanding warranty terms and interconnection rules up front can prevent disputes and ensure long-term reliability.
Testing, Monitoring, and Maintenance
After installation, test the system thoroughly. Use a multimeter to verify voltages across panels, conductors, and the inverter. Check the battery health if applicable, and ensure the monitoring system (if installed) displays expected production. Schedule regular inspections—at least twice a year—to clean debris, inspect mounting hardware for corrosion, and verify weather seals around roof penetrations. Clean panels with soft brushes and water to avoid scratching the surface. For grid-tied systems, verify utility credits and meter readings. Record performance data to identify trends, such as gradual declines in production that may indicate panel dirt buildup or aging components. A proactive maintenance routine keeps your system efficient and extends its life.
Common Pitfalls and Cost Considerations
DIY solar can save money, but it’s easy to underestimate cost, time, or complexity. Common pitfalls include under-sizing the system, poor cable management, improper sealing around roof penetrations, and skipping inspections or permits. Always plan for expansion: many homeowners regret not leaving headroom for future energy needs. Costs can escalate quickly if you start with premium components or skip essential safety gear. Consider a staged approach: begin with a smaller, safe off-grid setup to validate performance before expanding. This approach minimizes risk and allows you to learn the basics without committing to a large upfront investment. Finally, compare the long-term savings versus installation costs and maintenance—your regional electricity rates and tax incentives may influence the total economics of your DIY solar project.
Tools & Materials
- Solar panels or a modular DIY kit(Total wattage should match your load and future plans)
- Off-grid inverter or microinverters(Choose compatibility with your panel voltage)
- Charge controller (for battery systems)(Avoid overcharging batteries)
- Battery storage (Li-ion or deep-cycle lead-acid)(Optional for storage; size based on needs)
- Mounting rails and racking(Roof or ground mount; ensure wind rating)
- PV wiring (weatherproof, UL-listed)(Use appropriate gauge for circuit)
- DC disconnect switch(Isolates panels during service)
- Junction boxes and conduit(Weatherproof and code-compliant)
- Safety gear (gloves, harness, goggles)(Personal protective equipment)
- Multimeter, voltage tester, basic hand tools(For testing and assembly)
- Consumables (sealant, brackets, screws)(Keep handy for weatherproofing)
Steps
Estimated time: 8-16 hours
- 1
Define energy goals
Calculate daily energy use from bills and set a target system size. Identify whether you want off-grid storage or grid-tied credits, and establish a budget for components and labor. This helps prevent scope creep and wasted materials.
Tip: Write down your top three energy goals to stay focused. - 2
Select system type and size
Choose off-grid, grid-tied, or hybrid. Use your daily kWh to estimate panel wattage and storage needs, accounting for climate and seasonal variation. Plan for future expansion by leaving headroom in the design.
Tip: Aim for 10-20% extra capacity to accommodate growth. - 3
Choose components and layout
Pick panels, inverters, and storage that are compatible in voltage and current. Decide on roof or ground mounting and sketch a layout showing panel orientation, wiring runs, and access for maintenance. Reference diagrams as needed.
Tip: Check manufacturer datasheets for exact voltage/current specs. - 4
Prepare mounting area
Clear the area; inspect roof structure or ground mount footing. Install rails or racking, ensuring a solid base with proper tilt to maximize sun exposure. Keep pathways clear for future cleaning and inspection.
Tip: Use a ladder safety plan and fall protection when working on roofs. - 5
Install panels and connect DC side
Mount panels onto rails, attach safety disconnects, and route PV wires. For non-grid-tied DIY, focus on DC side routing and sealing. If grid-tied, professional handling of AC interconnection is required.
Tip: Double-check connector polarity before final tightening. - 6
Configure storage and inverter
Connect the battery system to the charge controller (if used) and attach the inverter. Set voltage and timing parameters per manufacturer guidance. Keep the setup weatherproof and ventilated.
Tip: Keep a spare fuse and a quick-reference wiring diagram handy. - 7
Test, monitor, and adjust
Power up the system and monitor initial output. Compare actual production to expectations and adjust tilt or cleaning schedule as needed. Document performance for future improvements.
Tip: Use a kilowatt-meter to verify real-world production.
Frequently Asked Questions
What is DIY solar?
DIY solar refers to planning and installing a home solar setup without professional labor, within safety and local code limits. It often starts with off-grid or small-grid-tied configurations and requires careful component selection and permits.
DIY solar means planning and installing a home solar setup without a professional, within safety and local code limits.
Is DIY solar worth it for homeowners?
For many homeowners, DIY solar offers meaningful cost savings and learning opportunities. The trade-off is time, complexity, and potential warranty or permit considerations. A staged approach can maximize value while reducing risk.
DIY solar can save money but requires time and careful planning.
Can I install solar panels on my roof myself?
You can install panels yourself only if you are prepared for roof work, weatherproofing, and electrical safety. Many jurisdictions require licensed electricians for grid interconnection. We recommend off-grid or simplified systems for first-timers.
Roof installs can be done by hobbyists, but grid interconnection usually needs a licensed electrician.
What permits do I need for a DIY solar project?
Permits vary by location and system type. Check with your local building department for structural, electrical, and interconnection approvals. Keeping good records helps with warranty and future sales.
Permits depend on your area; contact local authorities for specifics.
Do I need a battery with solar panels?
Batteries are optional for off-grid systems or hybrids seeking storage. They add cost and maintenance, but improve reliability during outages or low sun. For grid-tied setups, storage is often optional depending on goals.
Battery storage is optional and depends on whether you want backup power.
What safety concerns should I know about?
Working on roofs and with electrical systems poses fall and shock risks. Use PPE, follow fall protection, and never work on live circuits. If you’re unsure, consult a professional for the critical steps.
Safety is paramount; use PPE and avoid working on live circuits if unsure.
Watch Video
Top Takeaways
- Define energy goals and budget before starting
- Size the system to daily use and climate realities
- Prioritize safety, wiring, and code compliance
- Document permits, warranties, and maintenance plan
- Monitor performance and plan for future expansion