Why Is My Solar Panel Not Working? A Practical Troubleshooting Guide
Urgent, practical steps to diagnose and fix a non-working solar panel system. Learn common causes, safe checks, and when to call a pro.

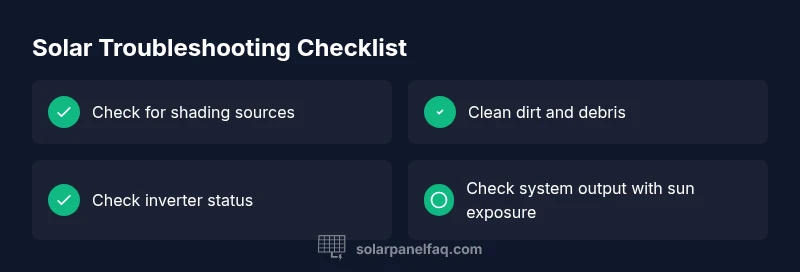
If your solar panel system isn’t producing expected power, start with safe, basic checks: inspect the inverter status and monitoring readings, verify no shading or debris on the panels, and confirm all DC disconnects and wiring are secure. Most problems spring from simple issues like shade, loose connections, or software glitches. This guide walks you through a safe, step-by-step diagnostic to restore performance.
Understanding why is my solar panel not working
When homeowners notice a drop in solar output or a total outage, they often ask why is my solar panel not working. The short answer is that many failures stem from easy-to-fix sources: shading from trees, dirt on the panels, faulty wiring, or inverter glitches. Before assuming a panel is dead, run through a structured check of the most common failure points. This section explains the typical failure modes, how they affect power generation, and what you can do to confirm or rule them out. Safety always comes first, so avoid live electrical work beyond basic inspections.
Quick safety checks you can perform (without tools)
You can begin with non-invasive checks that don’t require specialized equipment. Look for obvious hazards like fallen branches, heavy debris, or snow covering panels. Confirm the system’s main disconnect is in the ON position and ensure the monitoring app shows at least some data rather than a blank screen. If the system is on but producing little or no energy, note the time, weather, and any recent activity (cleaning, shading, or shade from new construction). Remember to turn off power if you need to handle wiring and consult the safety guidelines for your equipment. These initial checks help determine whether you’re dealing with a simple obstruction or a more complex system issue.
Inverter and monitoring dashboards: reading the signs
The inverter is the brain of most solar systems, converting DC to AC power. If the inverter screen is blank, flashing, or showing an error code, this points to an inverter or communication issue. Some inverters have diagnostic LEDs that blink in patterns; consult the user manual for the exact meaning. Monitoring dashboards (mobile apps or web portals) can reveal performance anomalies, such as a sudden drop in daily yield or a mismatch between produced energy and weather conditions. Logging these indicators will help you communicate the issue clearly if you call a professional.
Electrical connections and wiring: verifying integrity
Loose or corroded connections are a leading cause of reduced performance. Check the DC and AC disconnects, conduit seals, and any exposed wiring for wear, chafing, or discoloration. If you have a string inverter, an open circuit in a single panel won’t necessarily shut down the entire system, but it will reduce output. Do not handle live conductors beyond basic safety steps. If you detect burnt smells, heat, or damaged insulation, stop immediately and contact a licensed electrician.
Panel health and environmental factors: shading, dirt, and pests
Even healthy panels can underperform if they’re shaded by overhead branches, neighboring structures, or new installation features. Dust, bird droppings, pollen, or leaves on the surface can reduce production. In some climates, snow or ice can momentarily block sunlight. Inspect the mounting hardware for corrosion, loose racking, or panel microcracks suggested by subtle discolorations or hot spots on the frame. Cleaning should be done with water and a soft brush; avoid harsh chemicals that could damage coatings.
System-level causes: firmware, grid issues, and micro-inverters
Some outages or reductions are due to software glitches, firmware mismatches, or grid-related events that trigger safety shutdowns. If you have micro-inverters or power optimizers, check each unit’s status indicators; a single failed unit can drag down the string. Grid-tied systems may experience temporary curtailment during grid disturbances, which can appear as reduced output even when the sun shines brightly. Keep a log of error codes and timestamps to help a technician diagnose the root cause.
Common mistakes and when to call a pro
DIY fixes are suitable for obvious issues, but never attempt high-voltage work if you’re not trained. If you sense a hazard, the system lacks a clear diagnostic path after basic checks, or you’re uncertain about wiring integrity, contact a licensed solar technician. Schedule a professional diagnostic if the problem persists across multiple days, there’s a noticeable energy drop during stable weather, or the monitoring data shows unusual trends that you can’t explain. A pro can verify grounding, insulation resistance, and panel integrity with specialized equipment.
Cleaning, maintenance, and prevention
Regular maintenance extends the life of a solar system. Clean panels with a soft brush and water during dry periods to avoid streaks that reduce efficiency. Schedule inspections to verify mounting screws, rails, and racking aren’t loose. Consider a preventive check of the inverter’s heat sink, ventilation, and fan (if applicable). Keeping vegetation trimmed to prevent shading is a simple, effective prevention strategy. With routine care, you minimize downtime and maximize energy generation.
When to consider upgrades or replacements
If your panels are aged beyond their expected lifespan or if a key component (inverter, optimizers, or microinverters) shows consistent failure after professional service, upgrading may be more cost-effective than repeated repairs. Evaluate the system’s output against current energy needs and the potential savings of newer technology with higher efficiency or better monitoring. An upgrade plan should include compatibility checks with your existing roof, wiring, and utility interconnection.
Steps
Estimated time: 1-2 hours
- 1
Power down safely and verify basic status
Turn off the main disconnect according to the manufacturer’s safety instructions. Confirm the monitoring system shows data before you begin any physical inspections. This prevents accidental shocks and ensures your measurements are accurate.
Tip: Always wear appropriate PPE and never step on the panels. - 2
Check the inverter and monitoring readings
Look for signs of fault codes, unusual blinking patterns, or a dark screen. Consult the manual for exact meanings. Document any messages and compare against weather data to rule out weather-related fluctuations.
Tip: Take a photo of the error code for easy sharing with a technician. - 3
Inspect for shading and surface cleanliness
Walk the roof or ground-mounted array to identify new shade sources or debris. Clean the surface with a soft brush and water if dirt is present and safe to access. Avoid high-pressure water or harsh cleaners that could damage coatings.
Tip: Clean during cooler parts of the day to prevent rapid surface temperature changes. - 4
Evaluate wiring and DC/AC connections
Check visible cables for wear, loose connectors, or corrosion at terminations. If you’re not trained, skip internal wiring inspection and call a pro. Ensure all DC disconnects are secure before re-energizing the system.
Tip: Never touch live connectors; use insulated tools if you must manipulate non-energized parts. - 5
Test system output after re-energizing
Power the system back on and compare monitored output to expected values based on sun exposure. If output remains low, proceed to professional diagnostics.
Tip: Capture data over several sun hours to identify persistent issues. - 6
Seek professional evaluation when needed
If symptoms persist after basic checks, a licensed solar technician can verify grounding, insulation, and inverter health with specialized equipment.
Tip: Ask for a written scope of work and expected timelines.
Diagnosis: System isn't producing expected power after weather changes or at all
Possible Causes
- highShading from trees, new structures, or debris
- highInverter or monitoring device failure
- mediumLoose or corroded connections in DC/AC wiring
- lowPanel degradation, micro-crack damage, or aging hardware
Fixes
- easyInspect for shading and clear obstructions from panels
- easyCheck inverter status LEDs and error codes; note any fault messages
- mediumTighten or reseal DC disconnects and accessible wiring; replace damaged cables if found
- hardCall a licensed professional to test insulation resistance and inverter health; consider upgrade options
Frequently Asked Questions
What is the most common cause when a solar panel stops producing power?
The most frequent culprits are shading or debris on panels and inverter or monitoring issues. Eliminating shade and confirming inverter status often resolves the majority of cases.
Common culprits are shade or inverter problems. Start by checking for obstructions and inverter status to quickly diagnose common failures.
Can dirt and dust on panels really reduce output?
Yes. Surface dirt can block sunlight and reduce efficiency. Regular cleaning with a soft brush and water can restore performance without harming coatings.
Dirt can lower performance; cleaning helps restore output.
When should I call a professional for solar panel issues?
If basic checks don’t restore performance, if you find damaged cables, burning smells, or if there are fault codes you can’t interpret, contact a licensed solar technician.
If basics fail or you spot damage, call a professional.
Is it safe to work on my solar panels myself?
Only perform non-electrical checks like cleaning surface or clearing debris. Do not attempt to open inverters or handle energized parts without proper training and safety gear.
Avoid working on energized parts; safety first.
Do grid issues ever cause a solar system to stop producing power?
Yes. Grid disturbances or safety shutdowns can temporarily reduce or halt production. Your monitoring data will show reduced output during these events.
Grid issues can temporarily cut power; monitor and wait for stability.
Can upgrading components improve reliability?
Upgrades can improve reliability and efficiency, especially with aging inverters or microinverters. A professional can assess compatibility with your roof and existing wiring.
Upgrades may help, especially if components are aging.
Watch Video
Top Takeaways
- Start with safety and basic checks before diving deeper
- Inverters and shading are the most common culprits
- Document error codes and output trends for faster repair
- Call a professional when unsure or safety concerns arise