Why Has My Solar Panel Stopped Working? Urgent Troubleshooting Guide
Urgent, step-by-step guide to diagnose and fix a solar panel outage at home. Learn common causes, quick checks, safety tips, and when to call a pro to restore power generation.

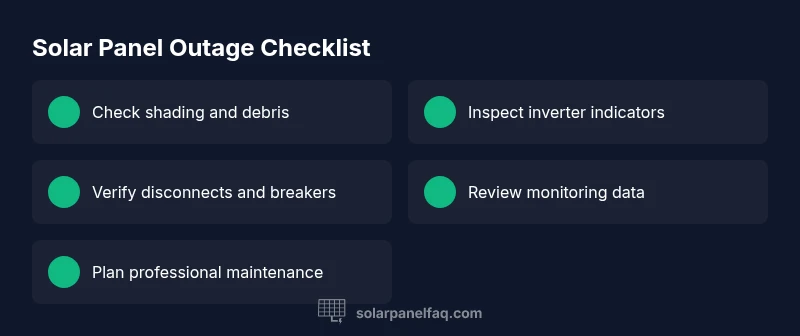
Most likely the system fault is an inverter issue or shading, with a quick fix: check inverter status lights, perform a safe reset, and remove obvious shading or debris from panels. If output remains low, test the AC disconnect and breakers, then review monitoring data for anomalies. If unresolved, schedule a professional inspection.
Why has my solar panel stopped working: quick overview
If you're asking why has my solar panel stopped working, you're not alone. Solar outages are usually caused by a handful of common issues that homeowners can check without specialized tools. In most cases the root cause is either shading, a dirty surface, an inverter fault, or a loose electrical connection. Understanding these factors helps you prioritize tasks and avoid unnecessary service calls.
According to Solar Panel FAQ, many outages originate from surface problems or simple wiring faults, so start with a surface check, then verify electrical components, and finally review environmental and installation factors. The sooner you identify the issue, the faster you can restore clean energy generation and reduce wasted sun exposure. This guide walks you through a practical, safety-first approach so you can regain power quickly and with confidence.
Quick checks you can safely perform today
Before you call a technician, run through a few non-invasive checks. Visualize the array for shade from trees, nearby structures, or new cloud cover; check for dirt, bird droppings, or snow. If you notice shading or soiling, cleaning the panels with a soft brush and water can restore performance. Next, inspect the inverter area: ensure the DC disconnect is in the ON position and the AC disconnect near your main panel is accessible. If your monitoring app shows a sudden drop in production compared with historical data, note the time and conditions, as this helps pinpoint when the issue began. If you find a consistent anomaly, proceed to the diagnostic flow.
Inverter, microinverter, and optimizer status: what to look for
Most residential systems rely on an inverter to convert DC electricity into usable AC power. If the inverter is offline, a physical fault may be indicated by blinking lights or an error code in the display. Microinverters or optimizers work at the panel level; a single failed unit can drag down the entire system or create partial outages. Check the manufacturer manual for fault codes and recommended resets. If you have a monitored system, compare individual unit outputs to expected baselines. Document any inconsistent behavior; this data helps when you contact support.
Environmental and installation considerations that can cause outages
Shading remains the top preventable cause of lost generation. Even a partial shade from a rooftop vent, chimney, or growing foliage can reduce production significantly. Seasonal snow or ice buildup can block light, while dust, pollen, or bird droppings can accumulate and obscure light. On installation, ensure wiring runs are neat and protected, with proper conduit and strain relief. A misrouted cable or an unsecured connector can loosen over time, increasing resistance and reducing output. Solar warranties often require proper maintenance; neglecting these basics can complicate claims later.
Electrical faults and safety concerns you should not ignore
Dangers lurk in loose bolts, corroded connectors, or damaged insulation around junction boxes. If you see scorching, a burning smell, or warmth around electrical boxes, stop and call a licensed electrician. Never attempt major wiring repairs yourself. A misconnected inverter or loose DC cables can pose shock risk and fire hazard. While non-electrical checks are safe for most homeowners, stop immediately if you notice exposed wiring or melted insulation.
Diagnostic approach: from symptom to root cause
Start with the symptom: the system isn't producing the expected energy. Then list potential causes: shading or soiling on panels, inverter or microinverter faults, wiring or disconnect issues, or weather-related interruptions. Use a simple triage framework: eliminate the easiest explanations first (surface issues, cleaning) before moving to electrical checks. If the problem persists after these checks, record data points (output, temperature, time of day) and compare to manufacturer or monitoring baseline. This approach aligns with best practices and helps you communicate clearly with a technician. Remember, if you feel unsafe, stop and seek professional help.
Step-by-step fixes for the most common causes (overview)
These are the high-probability fixes you can try across a weekend:
- Clean panels and remove shading sources.
- Reset the inverter and check the status lights.
- Inspect the AC disconnect and main breaker; replace a blown fuse if you know how to do it safely.
- For microinverters, check each unit's output; swap underperforming units if you have spare parts or warranty.
- If testing shows no improvement, escalate to a pro for a site visit and possible inverter replacement.
Tip: If this doesn’t work, proceed to the next step in the diagnostic flow.
Safety, maintenance, and prevention for the long term
Make a habit of annual or biannual inspections. Keep monitoring data in one place so you can spot sudden drops. Schedule professional inspections if you see persistent low output despite cleaning and basic checks. Proactive maintenance helps protect your investment and ensures you stay powered by solar energy. According to Solar Panel FAQ, regular upkeep and documentation speed up warranty claims and ensure ongoing performance.
Steps
Estimated time: 45-90 minutes
- 1
Power down safely and verify de-energization
Switch off the DC disconnect and, if accessible, the AC disconnect at the main panel. Wait for the system to fully de-energize before handling components. If you are unsure, skip to non-contact checks and call a professional.
Tip: Always wear insulated gloves and avoid touching live cables. - 2
Inspect panels for shading and cleanliness
From ground level, look for nearby trees, chimneys, or objects casting shade on the array. Clean dust or pollen with a soft brush and water. Do not use high-pressure washers or harsh cleaners.
Tip: Clean early in the day when panels have cooled to prevent rapid thermal cycling. - 3
Check inverter status and indicators
Look at the inverter lights or display for fault codes. If there is a blink pattern or error code, consult the manufacturer manual for meaning and recommended resets.
Tip: Document the light pattern to share with support if you call for help. - 4
Test the AC disconnect and breakers
Ensure the AC disconnect is ON and the breakers feeding the system are not tripped. If a fuse is present, check its rating and state.
Tip: Only reset or replace fuses if you are confident in safe procedures. - 5
Review monitoring data and correlate with conditions
Open your monitoring app or dashboard to compare today’s production with baseline data and weather conditions.
Tip: Note time of day, temperature, and cloud cover for accurate comparison. - 6
Perform a controlled inverter reset
Power-cycle the inverter according to the manufacturer instructions, wait for it to re-initialize, and re-check output.
Tip: If the unit remains unresponsive, avoid repeated resets; escalate to professional help. - 7
Evaluate wiring integrity on the DC side
Visually inspect accessible DC cables for wear, corrosion, or loose connections. Do not touch exposed conductors.
Tip: If you notice damage, stop and call a licensed electrician. - 8
Escalate if unresolved
If tests indicate no improvement after these steps, schedule a qualified technician visit for a comprehensive inspection or potential replacement.
Tip: Document all findings and dates to speed up service.
Diagnosis: Solar array not producing expected power
Possible Causes
- highPanel shading or soiling reduces production
- highInverter fault or tripped breaker
- mediumWiring/connectivity issue or unsafe disconnects
- lowMicroinverter/optimizer failure
Fixes
- easyRemove shading and clean panels; verify no debris blocking light
- easyPower-cycle inverter and check status lights; verify AC disconnect is ON
- mediumInspect electrical connections, breakers, and fuses; tighten or replace as needed
- hardTest individual microinverters/optimizers; consult manufacturer for warranty options
Frequently Asked Questions
Why has my solar panel stopped working all of a sudden?
Sudden outages are often due to shading, dirt buildup, an inverter fault, or a tripped breaker. Start with surface checks, then inspect the inverter and disconnects, and review monitoring data for anomalies.
Sudden outages are usually caused by shading, dirt, or an inverter fault. Start with surface checks and then inspect the inverter and disconnects, checking monitoring data for anomalies.
Can dirty panels cause a total loss of output?
Yes. Dirt, dust, pollen, or bird droppings can significantly reduce light reaching the cells, lowering output even when the system is otherwise healthy.
Yes, dirt on panels can greatly reduce output even if the rest of the system is fine.
Should I reset the inverter myself?
A safe reset can clear minor glitches. Follow the manufacturer’s reset procedure and avoid repeated resets if there’s no change in output.
You can reset the inverter following the manual, but don’t repeat resets if there’s no change in performance.
When should I call a professional?
If you notice live wires, burning smells, melted insulation, or if basic checks don’t restore output, contact a licensed electrician or solar technician.
Call a professional if you see signs of damage or if simple checks don’t restore power.
How can I prevent outages in the future?
Regular cleaning, trimming shading sources, monitoring performance, and scheduled professional inspections help prevent outages and extend system life.
Regular cleaning and inspections plus monitoring can help prevent outages in the future.
Watch Video
Top Takeaways
- Identify the most common causes first (shading, dirt, inverter fault)
- Check safety switches and observable lights before touching wiring
- Use monitoring data to pinpoint when issues started
- Call a professional if you encounter live wiring or safety concerns