Solar Panel Broken? Urgent Troubleshooting Guide (2026)
Urgent guide to diagnose and fix a solar panel broken condition. Learn safety steps, common causes, and when to call a pro with Solar Panel FAQ.

Immediate steps: If your solar array isn't delivering expected power, start with quick checks. Look for shade from trees or debris on panels, then inspect the inverter indicator lights and all wiring connections. A solar panel broken condition is commonly caused by dirt, loose cables, or a damaged module. Prioritize simple, safe actions to avoid unnecessary risk while you plan larger fixes.
Understanding the phrase 'solar panel broken' and what it means
When homeowners say the system is experiencing a solar panel broken condition, they usually mean one or more panels aren’t contributing as expected. It does not always imply a shattered pane or a complete failure of the entire system. More often, the issue is surface shading, soiling, a loose connection, or a degraded bypass diode, which can drag down performance without obvious visual damage. According to Solar Panel FAQ, a careful, safety-conscious inspection often reveals the root cause in minutes. Remember that a single underperforming panel can pull down the whole string, especially in series configurations. This section sets the stage for practical checks you can perform today, without specialized tools. The goal is to minimize risk while identifying whether the problem is minor (cleaning or reseating a connector) or major (panel replacement). Keep in mind that environmental factors, like seasonal shading from roofs or trees, can masquerade as a broken panel. Approach the issue methodically, documenting what you observe to share with a technician if needed.
If you notice persistent underperformance after basic checks, you’re likely dealing with a more complex fault such as a microinverter failure or a cracked module. In those cases, a measured approach—starting with the simplest fix—helps protect your investment and minimize downtime. This guide emphasizes safe handling, clear observations, and when to escalate to professional service. Solar panel broken conditions are solvable with a grounded plan and disciplined troubleshooting.
Quick safety checks you can perform today
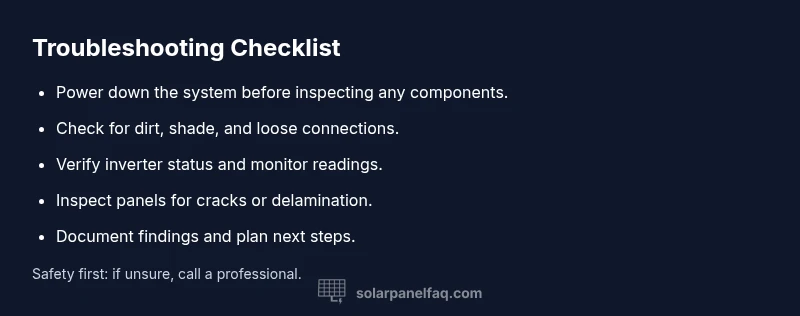
Before you touch any electrical components, power down the system according to the manufacturer’s instructions and wear eye protection. Do not step on panels or apply force to glass; panels can crack under pressure. A quick check list includes the following steps:
- Visually inspect each panel for cracks, chips, or discoloration on the glass surface. A visible crack can indicate a damaged cell or frame and may require replacement.
- Look for bird droppings, leaves, or shading that could reduce output. Cleaning the panel surface with a soft, damp cloth can improve performance if dirt buildup is the issue.
- Check all wiring connections at junction boxes and the inverter. Loose or corroded connections are a common cause of reduced performance and can be hazardous if left unrepaired.
- Observe the inverter status lights and monitoring app alerts. A flashing or red light often signals a fault that needs attention beyond simple cleaning.
- Do not attempt to disassemble panels or open electrical enclosures unless you are trained and authorized. If anything looks damaged or uncertain, stop and seek professional help. These steps prioritize safety while giving you actionable insights.
Document what you see and the exact symptoms (output levels, temperature, feeder string behavior) to help diagnose the issue later. If the problem seems obvious—like a cracked glass panel or a loose connector—plan the safest next steps for repair or replacement. The goal is to identify whether the fault is something you can address safely or if it requires a licensed technician.
Common causes of a solar panel broken condition
While the phrase solar panel broken is alarming, most causes are either preventable or fixable with the right approach. Here are the most frequent culprits, with notes on how to verify them quickly:
- Surface soiling or shading: Dirt, pollen, or leaves can dramatically reduce output. Verification: clean the glass surface and recheck performance after 24 hours of sun.
- Loose or corroded wiring: Connections at the panel, junction box, or inverter may loosen over time. Verification: gently reseat connectors and examine for signs of wear or corrosion.
- Damaged module or cracked glass: A direct impact, hail, or temperature stress can crack cells. Verification: look for visible cracks or delamination.
- Faulty bypass diodes or microinverter: Internal components can fail while the overall panel still appears intact. Verification: use manufacturer diagnostics or professional testing tools.
- Inverter or monitoring issues: Sometimes the solar panel broken signal comes from the inverter or software rather than the panel. Verification: compare string voltages and confirm inverter readings align with expected values.
Understanding these causes helps you triage quickly. Start with the easiest checks (cleaning, shading) before moving to more involved diagnostics (module damage, electrical faults). The goal is to rule out temporary conditions and isolate a fault you can fix now, or determine if professional intervention is required.
Diagnostic flow: symptom to solution
A structured diagnostic flow helps you move from symptom to root cause without guesswork. Start with observable symptoms, then test each potential cause in order of likelihood. This reduces the risk of unsafe actions and speeds up repair decisions. Key steps include:
- Symptom check: Are you seeing a sharp drop in output, zero output on one panel, or inconsistent performance across the array?
- Surface assessment: Is there visible dirt, bird droppings, or shade affecting the affected panel(s)?
- Electrical check: Are connections tight at the panel, conduit, and inverter? Are there any error codes or alarm indicators?
- Component testing: If safe and practical, test the panel’s voltage/current and test the inverter’s output and monitoring feeders.
- Decision point: If the fault is a minor issue (clean or reseat connections), recheck after a sun-filled cycle. If it’s a damaged module or failed electronics, plan a replacement or professional service. Always document findings and consider warranty implications.
If the diagnostic results indicate a dangerous fault (frayed wiring, exposed conductors, or a cracked module), stop immediately and contact a licensed technician. Safety must come first, even if the problem seems minor.
Step-by-step fixes for the most common causes
- Power down and isolate the system
- Title: De-energize safely and remove access
- Description: Turn off the inverter, disconnect the array per manufacturer instructions, and wear protective gear before touching any components.
- Tip: Use lockout/tagout if available to prevent accidental re-energization.
- Clean and recheck the panel surface
- Title: Clean dirt and debris
- Description: Gently rinse panels with water and wipe with a soft cloth. Allow panels to dry fully before retesting output.
- Tip: Do this on a cooler, overcast day to avoid thermal shock.
- Inspect and reseat all connectors
- Title: Tighten and reseat connectors
- Description: Check all connectors at the panel, junction box, and inverter; reseat them firmly but without forcing.
- Tip: Look for signs of corrosion or bent pins; replace damaged connectors.
- Test the inverter and monitoring
- Title: Validate inverter status
- Description: Read inverter display codes and compare with the manual; check monitoring portal data to confirm consistency.
- Tip: If the inverter shows fault codes, consult the manual or manufacturer support.
- Check for microinverter/bypass diode issues
- Title: Assess microinverters or bypass diodes
- Description: If you have microinverters, test each unit; a failed unit can reduce string output even if others are healthy.
- Tip: Document the serials and locations for warranty claims.
- Inspect for physical panel damage
- Title: Look for cracks or delamination
- Description: Visibly inspect the glass for cracks or edges; any damage may require replacement of the affected panel.
- Tip: Do not attempt to replace a panel yourself unless you’re trained.
- Re-test after fixes under sun
- Title: Re-check performance in sunlight
- Description: After fixes, let the system operate in sun for several hours and compare output to baseline.
- Tip: Track data over a few days to confirm stability.
- Plan next steps and warranty review
- Title: Decide on replacement or professional help
- Description: If the issue persists, schedule a professional evaluation and review the panel warranty terms.
- Tip: Keep a log of dates, fixes, and results for warranty records.
estimatedTime":
Steps
Estimated time: 1-2 hours
- 1
Power down the system safely
Turn off the inverter and disconnect the array per manufacturer safety instructions. Verify no voltage is present before touching components.
Tip: Lock out any switches to prevent accidental re-energization. - 2
Perform a visual inspection
Look for cracks, chips, discoloration, or delamination on the glass and frame. Note any loose mounting hardware.
Tip: Do not apply force on the glass or frame. - 3
Check wiring and connectors
Examine all connector pins, cables, and junction boxes for corrosion or looseness. Reseat where necessary.
Tip: Take photos before disconnecting to aid reassembly. - 4
Test the inverter output
With safe access, verify inverter readings and check whether the error codes correspond to a panel issue or inverter fault.
Tip: Consult the manual for exact fault codes. - 5
Assess shading and dirt
Remove debris and trim any nearby vegetation causing shade. Recheck after several sun hours.
Tip: Schedule regular cleaning to maintain efficiency. - 6
Inspect for physical damage
Check for cracked glass, loose frames, or water intrusion around the panel edges.
Tip: Cracked panels should be handled by professionals for safety. - 7
Document and plan repairs
Record findings and decide whether to replace panels or arrange professional service.
Tip: Keep warranty and purchase records handy. - 8
Restore power and monitor
Reconnect the system and monitor output to ensure stability over several sun cycles.
Tip: Log results and compare to baseline performance.
Diagnosis: Solar array shows reduced or no output from one or more panels
Possible Causes
- highSurface shading or dirt buildup
- mediumLoose or damaged wiring/connectors
- mediumDamaged panel (crack or delamination)
- lowFaulty microinverter or bypass diode
Fixes
- easyClean surface and remove shade sources; retest output
- easyGently reseat all connectors and inspect for corrosion
- mediumPerform a visual inspection for cracks and consult a pro for damaged modules
- hardTest or replace faulty inverter or diodes with professional help
Frequently Asked Questions
What counts as a solar panel broken condition?
A solar panel broken condition usually means one or more panels underperform due to visible damage, delamination, or electrical faults rather than complete system failure. It requires careful assessment to determine if repair or replacement is needed.
A broken condition means one or more panels aren’t performing, often due to damage or electrical faults, not a total system failure.
Can I fix a cracked solar panel myself?
Cracked panels should not be repaired by novices. Handling cracked glass can pose safety risks and may compromise the system’s warranty. Seek a professional replacement.
Cracked panels should be replaced by a professional to stay safe and preserve your warranty.
How do I test if a panel is functioning?
You can compare the voltage and current output of the suspected panel with a multimeter and the rest of the string under full sun. If the measurements are significantly lower, the panel or its connections may be faulty.
Test the panel’s output against the others in full sun; big discrepancies usually mean a problem.
When should I replace panels under warranty?
If the panel warranty covers damage or failure within its term, follow the manufacturer’s claim process. A professional inspection is often required to document the issue for warranty eligibility.
Check the warranty terms and file a claim if the panel fails under coverage.
Is shading the main cause of low output?
Shading is a leading cause of reduced output, especially on multi-panel strings. However, dirty surfaces, loose connections, or inverter faults can mimic shading effects.
Shading is a major culprit, but other issues can mimic its effect, so don’t assume shading is the only cause.
Watch Video
Top Takeaways
- Identify a solar panel broken issue quickly with safe checks
- Start with cleaning and shade removal before wiring tests
- Document findings to streamline professional help
- Call a licensed technician for damaged modules or inverter faults
- The Solar Panel FAQ team recommends seeking pro help for uncertain repairs