How to Clean Solar Panels on Roof: Safe, Step-by-Step Guide
Learn how to clean solar panels on the roof safely and effectively with a mild soap routine, proper equipment, and time-saving tips. This guide covers safety, methods, and maintenance to maximize energy output.

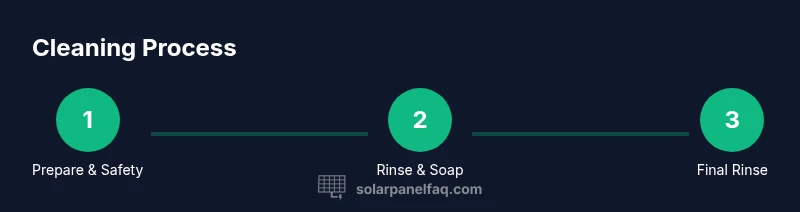
To clean solar panels on a roof, follow a safe, step-by-step approach that protects you and preserves efficiency. According to Solar Panel FAQ, start with access, weather, and orientation checks, gather non-abrasive supplies, then use a soft brush with mild soap. Avoid high-pressure water and wet, steep roofs for safety.
Safety and Planning Before You Start
Cleaning solar panels on roof can boost output, but safety comes first. Before grabbing hoses or a ladder, review access, weather, and panel orientation. According to Solar Panel FAQ, a well-planned approach reduces the risk of falls and damage while maximizing cleaning effectiveness. Start by choosing a dry, calm day and ensuring pets and children are away. Inspect the roof surface for loose shingles, moss, or slick spots, and decide whether you can reach the panels safely with a soft brush or if you should stop and call a professional. If you have doubts about slope, roof material, or electrical components, defer to a professional.
Then set up a simple safety system: use a harness if required by your local safety guidelines, secure a stable ladder with a spotter, and keep footwear with good grip. Do not work alone on a high or sloped roof, and never ascend on wet surfaces. Plan the sequence of cleaning so you don’t step directly on the panels, which can scratch the glass or dislodge mounting hardware. Finally, align your cleaning window with predictable shade or sun position to prevent rapid drying of soap and reduce streaks.
Frequency and Triggers for Cleaning
What triggers a cleaning? Dust, pollen, bird droppings, and seasonal debris all affect panel efficiency. In dusty or pollen-heavy environments, panels can accumulate grime more quickly, reducing light capture. The Solar Panel FAQ approach emphasizes regular checks during seasonal shifts and after major dust events, rather than a fixed schedule. If you notice a visible film on the glass or a measurable drop in performance, plan a cleaning when conditions are dry and mild. Rain may help remove some dirt, but it rarely restores peak efficiency on its own, especially on tilted roofs.
To determine the right cadence for your home, observe panels after long dry spells and after dust storms in your area. Keep a simple log of environmental conditions and performance, then adjust the schedule accordingly.
Tools, Materials, and Protective Gear
A successful roof cleaning relies on the right tools and safe clothing. Gather a soft-bristle brush, a non-abrasive sponge, a bucket of warm water, and a mild soap solution. A garden hose with a gentle spray nozzle helps rinse without blasting. Wear non-slip shoes, gloves, and eye protection, and have a fall-arrest kit if your roof is steep. Keep your ladder stable and use a spotter. Never use sharp tools or metal scrubbers on glass panes, and avoid bleach or solvent-based cleaners that can degrade coatings or seals.
Note: Always keep the cleaning circle small and do not drag dirty water across an entire roof surface. Clean one panel at a time and avoid standing on panels themselves to reduce risk of breakage.
Cleaning Methods: Water, Soap, and Gentle Scrubbing
The core cleaning method relies on gentle water, mild soap, and a soft brush. Start by rinsing the panels with clean water from the top edges to avoid pushing dirt into the gaps. Mix a tiny amount of mild dish soap into warm water; apply with a soft brush or sponge, working in slow, even strokes. Rinse again with clean water to remove soap residues. Never use abrasive pads, high-pressure spray, or solvents that can damage the glass or frame. Dry the surface with a lint-free cloth if desired, especially in dry climates where streaks are noticeable.
If panels are unusually dirty due to bird droppings or sap, let the soapy solution sit for a minute before scrubbing. Always keep the brush head flat to minimize edge wear on frames and seals.
Roof Type Considerations and Panel Arrangements
Roof type matters for both safety and cleaning technique. On metal or tile roofs, extra caution is needed to avoid slips and to prevent wedging brushes into ridges. For tilted panels, avoid stepping on the glass; instead, clean from the side with the brush at a shallow angle. If access is limited, consider a lightweight telescoping brush to reach panels without standing on them. Panel layout matters too: arrange cleaning motions to minimize stepping on modules and to preserve mounting hardware integrity.
In some installations, back-splash from water can reach wiring channels; be mindful of water entering junction boxes. If you notice exposed wiring or damaged seals, stop and consult a professional.
Common Mistakes and How to Avoid Them
Common mistakes include using high-pressure water, scrubbing too hard, and cleaning in direct sun or on hot panels. High pressure can crack glass or loosen fittings, while aggressive scrubbing can scratch coating. Wait for cooler parts of the day to reduce thermal expansion stress. For best results, use wrap-around motions rather than circular scrubbing, and test a small corner first before committing to larger areas.
Another pitfall is neglecting safety gear or climbing without a buddy. Always have a plan for retreat from the roof if conditions change, and never attempt to move across a wet or dusty surface without appropriate footwear.
Maintenance After Cleaning and Long-Term Care
After cleaning, inspect panels for micro-scratches, dirt streaks, or uneven coating. Wipe up water around mounting hardware to prevent corrosion and check that all seals are intact. Consider scheduling a professional inspection if you notice water intrusion or reduced insulation around cables. To maintain performance between cleanings, trim overhanging branches, reduce nearby dust sources, and position panels for optimal sun exposure. Keeping a simple maintenance log helps you track performance changes over time.
Environmental Impact and Practical ROI
Regular cleaning can help sustain panel efficiency, especially in dusty or polluted environments. While local rainfall contributes to natural cleaning, relying solely on weather may leave grime that quietly reduces output. A thoughtful cleaning routine balances water use and labor with expected gains, often resulting in more consistent energy generation over the long term. Solar Panel FAQ emphasizes practical, conservative cleaning that respects water use and environmental considerations.
Tools & Materials
- Safety harness and rope(Use according to local regulations; ensure proper anchorage.)
- Stable ladder(Non-slip feet; extend above roof edge by at least 1 step.)
- Soft-bristle brush(7-10 inch width; avoid stiff bristles that can scratch.)
- Non-abrasive sponge(For stubborn spots; avoid rough textures.)
- Bucket of warm water(Mild soap solution; rinse water separate.)
- Mild soap (dish soap)(Non-caustic; avoid solvents.)
- Garden hose with spray nozzle(Low-pressure only; avoid power washers.)
- Squeegee(For streak-free finish if desired.)
- Goggles or eye protection(Splash protection.)
- Slip-resistant footwear(Grip is essential on wet surfaces.)
Steps
Estimated time: Total time: 60-120 minutes
- 1
Assess the roof and safety setup
Before starting, survey the slope, surface, and access routes. Confirm weather and daylight, and decide whether you can reach the panels safely without stepping on glass. Prepare a fall-arrest plan or safety equipment as needed.
Tip: Test ladder stability on solid ground before climbing. - 2
Gather materials and PPE
Collect all cleaning supplies and safety gear in one reachable area. Wear non-slip footwear, gloves, and eye protection. Ensure that hoses, brushes, and soap are ready before you go up.
Tip: Do a quick check for any missing tools to avoid middle-task trips. - 3
Rinse panels from the top down
Use a gentle spray to rinse loose dirt and dust off the panels from the top edges toward the bottom. This reduces the risk of dragging grime later in the process.
Tip: Always rinse before applying soap. - 4
Apply a mild soap solution
Mix warm water with a few drops of mild dish soap. Apply with a soft brush, using light, even strokes. Avoid scrubbing hard on coatings or frames.
Tip: Keep soap away from edges where it can seep under seals. - 5
Rinse again to remove soap residue
Rinse thoroughly with clean water to prevent streaks and soap films. Start at the top again and move downward in straight lines.
Tip: Inspect for any remaining spots and address promptly. - 6
Check for damage and dry if needed
After washing, check the glass and frame for scratches, cracks, or loose mounting hardware. Dry the surface if you notice water spots that could leave mineral deposits in dry climates.
Tip: If you see damage, stop and consult a professional. - 7
Spot-clean stubborn residues
For bird droppings or sap, leave a brief dwell time with soapy solution, then gently scrub with the brush. Rinse and re-inspect.
Tip: Avoid scraping hard at any residue. - 8
Return to ground level and secure equipment
Carefully descend and pack away tools. Ensure ladders and anchors are secured. Keep the workspace clear to prevent tripping hazards.
Tip: Always de-energize and store chemicals properly. - 9
Plan the next cleaning window
Document the outcome and schedule future checks based on climate and dirt accumulation. Keep a simple log of conditions and results for reference.
Tip: Set a reminder for seasonal summers or dusty periods.
Frequently Asked Questions
Is it safe to clean solar panels on the roof by myself?
DIY cleaning can be safe if you use proper safety gear, dry conditions, and keep a steady stance. If the roof is steep or conditions are uncertain, hire a professional.
DIY cleaning can be safe with proper safety gear and calm weather; consider a pro if your roof is risky.
What cleaning solutions are safe for solar panels?
Use mild soap and clean water; avoid solvents, acidic cleaners, or strong chemicals that could damage coatings or seals.
Stick with mild soap and water; avoid harsh cleaners.
How often should I clean solar panels?
Frequency depends on climate and environment. In dusty or pollen-heavy areas, more frequent cleaning helps maintain performance.
Dusty areas may need more frequent cleaning to keep output high.
Can cleaning void my warranty?
Improper cleaning can cause damage and potentially affect warranties. Always follow manufacturer guidelines and consult a professional for doubts.
Follow the manufacturer’s guidelines to avoid warranty issues.
Is rain enough to keep panels clean?
Rain helps but often does not fully remove stubborn grime. Periodic cleaning improves efficiency in many environments.
Rain can help, but you may still need to clean periodically.
Watch Video
Top Takeaways
- Prioritize roof safety and use proper PPE.
- Use mild soap and a soft brush to avoid damage.
- Rinse top-to-bottom to prevent streaks.
- Inspect for damage after cleaning and plan next steps.