What Causes Solar Panels to Trip: Troubleshooting Guide
Urgent guide to diagnosing why solar panels trip. Learn common causes, safe inspection steps, and when to call a licensed pro to restore performance and protect your investment.

Solar panel trips are usually caused by electrical faults or safety protections—overcurrent, short circuits, ground faults, or inverter problems. Start with the main AC and DC breakers, then inspect for loose cables, corrosion, or moisture. Check the inverter for overheating or fault codes. If you cannot locate the fault, shut the system down and contact a licensed electrician.
Common reasons solar panels trip
When a solar array trips, it typically means a safety feature has activated or an electrical fault is interrupting power flow. The most frequent culprits include overcurrent events on the DC or AC side, short circuits in wiring or connections, and ground faults that trip protective devices. Inverter problems—such as overheating, fault codes, or internal component failure—are another common trigger. Weather-related factors like moisture intrusion, corrosion, or degraded insulation can also initiate trips, especially in older or poorly sealed systems. Understanding these categories helps you narrow down where to look first. According to Solar Panel FAQ, most trips begin with visible wiring issues or a trip indication on the inverter, so start there when you’re unsure. Keeping a maintenance log helps you spot recurring patterns that precede trips.
Additionally, consider the system layout. A misbehaving device in a string of panels or a compromised combiner box can cause cascading trips across the array. Document any recent changes or events (heavy rain, hail, high winds, or nearby work) since new faults often originate from external stressors. This awareness helps you decide whether a quick reset is safe or if a professional assessment is required.
Safety first: what to do before inspecting
Before touching any equipment, ensure you adhere to strict safety steps. Power down the AC disconnect and DC disconnect in the correct order, and lock out the switches if possible. Wear rubber-soled shoes and use insulated tools. Do not work on live circuits; never bypass a tripped breaker in an attempt to test components. If you observe burnt smells, cracked insulation, or water intrusion, evacuate the area and avoid contact with metal parts. In many regions, solar systems are connected to the grid, so safety protocols are even more critical to prevent electric shock or fire risk. If you’re unsure at any point, stop and call a licensed professional. Solar Panel FAQ recommends documenting fault codes and taking photos to aid later diagnosis.
Diagnostic approach: check list
A structured diagnostic workflow helps you stay organized when troubleshooting trips. Start with the simple checks and move toward more complex tests as needed:
- Inspect the main AC and DC breakers for tripped positions. Reset only if safe and permitted by local codes.
- Look for loose or damaged wires at the combiner boxes, disconnects, and conduits.
- Check for signs of moisture, corrosion, or scorching on panel connectors and enclosure seals.
- Review inverter status lights and fault codes; consult the manual for specific meanings.
- Verify that grounding and bonding connections are intact and compliant with code.
- If you use string inverters, ensure strings aren’t overloaded or mismatched. A mismatch often triggers overcurrent protection.
If this doesn’t reveal an obvious fault, move to more thorough checks or contact a professional. Solar Panel FAQ emphasizes documenting the sequence of events and codes seen during the trip to streamline expert evaluation.
Step-by-step troubleshooting flow
Follow this flow to diagnose trips efficiently while maintaining safety:
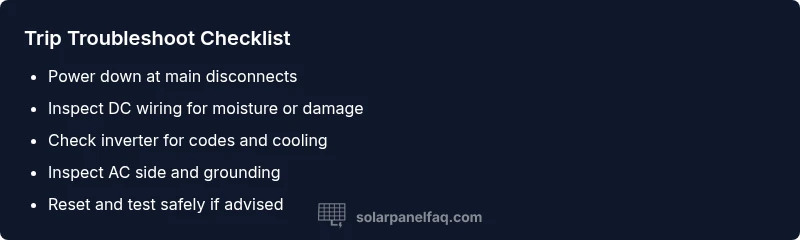
- Power down safely at the main disconnects. 2) Confirm all breakers are in the off position and note any residual voltage readings with a non-contact tester. 3) Visually inspect DC wiring for moisture or insulation damage; tighten any loose connections. 4) Examine the inverter for overheating, unusual sounds, or error codes; reference the manual. 5) Inspect AC wiring and the main service panel for signs of overheating or arcing. 6) If tests point to a specific component (inverter, DC cabling, or combiner box), isolate and replace or repair that part. 7) Restore power gradually and monitor for re-tripping. Always document findings. In uncertain cases, call a professional.
Pro tip: When in doubt, don’t bypass safety devices or bypass protective measures. A staged approach minimizes risk and prevents further damage.
In-depth checks: AC side vs DC side
On the DC side, trips often originate from panel enclosures, junction boxes, or string wiring. Check for loose torque on DC lugs, moisture intrusion in conduit, and damaged insulation between conductors. On the AC side, look for overheated breakers, loose neutral connections, and signs of arcing inside the main service panel. Both sides require careful testing with the system de-energized. If you’re seeing frequent trips, the problem could be a recurring fault rather than a one-off event, which increases the likelihood of an underlying equipment issue.
Documentation helps here: map which strings are connected to which inverters and note any recent environmental exposure that could have stressed components.
Preventing future trips: maintenance and best practices
Prevention is more cost-effective than repeated repairs. Schedule regular inspections of wiring, enclosures, and seal integrity to prevent moisture ingress. Clean dust and debris from inverter fans and vents to maintain cooling efficiency. Use surge protection and properly rated fuses or breakers for your system’s configuration. Ensure microinverters or optimizers are operating within their specified operating temperatures. Keep a maintenance log, update any degraded components promptly, and never operate beyond the system’s design parameters. A well-maintained system reduces the likelihood of trips and extends the life of solar equipment.
When to call a professional: safety and code compliance
If you observe burning smells, smoke, or any signs of component damage, stop work immediately and call a licensed electrician or solar technician. If breakers repeatedly trip after basic checks, or you suspect grounding or structural issues, professional assessment is essential. Even seemingly minor issues like moisture in a DC conduit can cause serious hazards if not addressed correctly. Solar Panel FAQ recommends scheduling a professional evaluation if the fault remains unresolved after basic troubleshooting or if you lack the proper tools or training.
Steps
Estimated time: 45-75 minutes
- 1
Power down safely
Shut off the system at the main AC and DC disconnects in the correct sequence. If possible, lock the switches to prevent re-energizing.
Tip: Always use insulated tools and wear rubber-soled shoes. - 2
Check breakers and fuses
Confirm none are physically damaged and reset if permitted by code. Note any breakers that trip again after reset.
Tip: Document breaker positions before and after reset. - 3
Inspect DC wiring
Visually inspect all DC cables, junctions, and combiner boxes for moisture, damage, or loose lugs. Tighten or replace as needed.
Tip: Do not touch live conductors; keep area dry. - 4
Examine the inverter
Check for overheating, unusual sounds, or fault codes. Refer to the manufacturer’s guide for code meanings.
Tip: Ensure adequate ventilation around the inverter. - 5
Check AC side and grounding
Inspect AC wiring, ground connections, and service panel for signs of arcing, corrosion, or loose neutrals.
Tip: Arcing is dangerous—pause work and call a professional if seen. - 6
Test system response
With power still off, re-energize gradually and monitor for re-trips. If it trips again, stop and schedule an expert inspection.
Tip: Avoid rapid cycling that can stress components.
Diagnosis: Solar system trips the main breaker or inverter shuts down unexpectedly
Possible Causes
- highOvercurrent on the DC or AC side
- highGround fault in the DC wiring or enclosure
- mediumLoose or damaged wiring connections
- mediumInverter fault or overheating
- lowMoisture intrusion in junction boxes or conduit
Fixes
- easyTurn off the system at the main disconnects and reset breakers if safe
- easyInspect DC wiring for loose connections and secure or replace as needed
- easyCheck inverter cooling, fan operation, and error codes; consult manual
- easyLook for moisture, corrosion, or damaged insulation in enclosures; address if found
- mediumCall a licensed electrician or solar technician for complex or unresolved issues
Frequently Asked Questions
What causes solar panel trips?
Trips are usually due to electrical faults or safety protections: overcurrent, short circuits, grounding faults, or inverter problems. Inspect both DC wiring and the inverter to locate the issue. If unresolved, seek a licensed professional.
Trips are typically due to faults like overcurrent or inverter problems. Check wiring and inverter codes, then call a professional if needed.
Is it safe to reset breakers after a trip?
Only reset breakers if you are certain the fault is cleared and it is safe to do so. If the trip recurs, stop and have a professional inspect the system.
Reset only if you’re sure the fault is gone; if it trips again, don’t continue. Call a pro.
Can weather cause solar trips?
Yes. Moisture, hail, or excessive heat can affect wiring and inverters, triggering trips. Post-storm inspections are wise to catch hidden damage.
Weather can cause trips, especially moisture and heat. Inspect after storms.
What should I check first if a trip occurs?
Begin with safety shutdowns, then inspect breakers, DC wiring, and inverter status. Document codes and visuals before proceeding to deeper tests.
First check safety, then breakers and inverter status. Note codes and photos.
Why is my inverter showing an error code?
Error codes point to specific faults. Refer to the manual for code meanings and pursue targeted checks or professional help if needed.
Inverter errors point to specific faults. Check the manual for codes and seek help if unresolved.
When should I call a professional?
If trips persist after basic checks, you observe physical damage, or you’re uncomfortable working with electricity, schedule a professional inspection promptly.
Call a pro if the problem persists or if you’re unsure. Safety first.
Watch Video
Top Takeaways
- Identify whether the trip is on DC or AC side first
- Check breakers, connections, and inverter codes safely
- Moisture and corrosion are frequent but fixable culprits
- Professional help is advised for recurring or uncertain trips