How to Tell If Solar Panel Is Bad: Troubleshooting Guide
Urgent, practical troubleshooting for homeowners to identify bad solar panels, with visual checks, electrical tests, and when to call a professional.

If your solar array isn’t delivering expected power, a panel may be bad. Start with the inverter status and string voltages, then perform a quick visual inspection for cracks, delamination, or heavy soiling. Compare readings to the manufacturer specs and shade patterns; if results don’t improve after basic checks, contact a licensed installer. This guide helps you safely diagnose and decide on next steps.
Recognizing the Red Flags: What a Bad Solar Panel Might Do
A bad solar panel can fail to deliver expected power, degrade output over time, or cause inverter warnings. According to Solar Panel FAQ analysis, early self-diagnosis can prevent unnecessary service calls. In this section you will learn the most common indicators, from visual damage to performance gaps, and how to verify them with safe checks. Start with a patient, methodical approach rather than guessing. The goal is to determine whether the issue lies with the panel itself, or other parts of the system such as wiring, the inverter, or shading conditions. Remember: how to tell if solar panel is bad is about isolating the panel’s condition from the rest of the solar system.
Quick Visual Checks You Can Do Right Now
Visible damage like cracks, delamination, or discoloration, as well as heavy soiling or stubborn frost, can reduce output. Use your monitoring app or inverter display to see if a panel reports a fault code or abnormally low voltage. Also check for gaps in the array where shadows fall during peak sun hours. Solar Panel FAQ recommendations emphasize starting with simple checks to avoid unnecessary climbs on the roof. If panels are dirty, rain inspection may suffice, but ensure you follow safety precautions before cleaning.
Understanding Performance Metrics: Voc, Isc, Vmp, and Pmp (Without Getting Lost)
Solar panels are rated by electrical performance under standard test conditions. Voc and Isc reflect open-circuit voltage and short-circuit current, while Vmp and Pmp indicate voltage and power at maximum power point. If you notice a discrepancy between the expected maximum output and real-world results, compare readings against your panel’s nameplate and the array’s design. Keep in mind that temperature, shading, and inverter losses can skew numbers. The goal is to identify whether the panel itself is underperforming, or if other factors are at play. This section uses plain language to help homeowners understand what the numbers mean and why variations occur.
Safe Electrical Tests: Inverter, Junction Box, and Wiring
Any electrical test should prioritize safety. Begin by inspecting the inverter for fault codes and ensure it is grounded. If you’re comfortable, measure the DC voltage at the panel terminals (on a sunny day) and compare with expected values after disconnecting the string from the array. Do not touch exposed conductors, and never perform tests when wet. If you see alarming voltage, heat, or burning smells, stop immediately and call a licensed technician. This is where the troubleshooting separates from DIY risk.
Open-Circuit vs. Under-Load Testing: Why It Matters
Open-circuit tests reveal the panel’s potential with no load, while under-load tests show performance under typical conditions. A panel that reads fine open-circuit but underperforms under load often points to shading, microcracks, or a wiring issue in the string. Use a clamp meter if available to monitor current while the system operates. This approach helps you pinpoint whether the problem follows a specific panel, an entire string, or the inverter itself.
Common Causes of Panel Degradation and Failure
Several factors contribute to decline, including dirt, bird droppings, and hard weather, plus physical damage from hail or impact. Aging seals can allow moisture in, corroded connectors create resistance, and microcracks reduce performance over time. In some cases, a warranty claim is the most sensible path. Distinguish panel faults from inverter or monitoring issues by testing individual panels or strings. This section covers the major culprits so you can triage effectively.
A Practical Diagnostic Process: Step-by-Step Flow
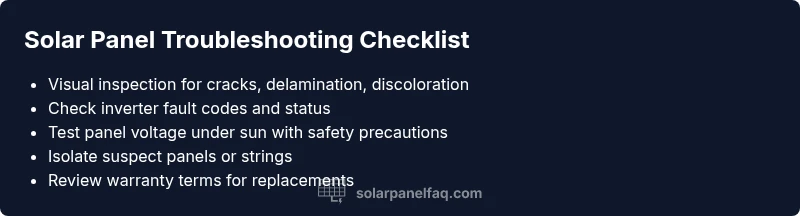
Follow a logical sequence: start with surface cleaning and visual checks, then inspect wiring and inverter status, then perform voltage/current tests under load, and finally isolate panels to assess performance one by one. If a single panel consistently underperforms, it is a strong sign of a bad panel and may qualify for warranty replacement. Always document readings with dates and photos for reference when talking to a technician or manufacturer.
Safety First: Testing Without Hazard
Prioritize safety at every step. Never work on the roof during wind or rain, use a proper ladder, wear PPE, and turn off power when required. If you’re unsure or uncomfortable with any test, stop and hire a licensed installer. Professionals have equipment to safely lift panels and measure under controlled conditions. Implement a buddy system and follow manufacturer guidelines for cleaning, wiring, and maintenance to avoid voiding warranties.
From Diagnosis to Action: Repair, Replacement, or Warranty?
Decide based on the persistence of poor performance, damage evidence, and warranty coverage. If a panel is physically damaged or underperforming after thorough checks, replacement is often the most reliable option. If still under warranty, contact the manufacturer or installer for a replacement. The Solar Panel FAQ team emphasizes documenting your findings and following warranty procedures to maximize your protections and minimize downtime.
Preventive Maintenance: Extend Panel Life and Performance
Develop a routine to keep panels clean, free from shade from future growth, and free of debris. Schedule periodic checks of wiring connections and inverter health. Keep a maintenance log with dates, readings, and any observed issues. Routine care reduces future risk and makes it easier to spot changes in performance. The goal is steady, predictable energy production rather than erratic fluctuations.
Steps
Estimated time: 60-90 minutes
- 1
Pre-check safety and gather tools
Begin by turning off the DC side if required and ensure you have PPE, a ladder, a voltmeter, and a flashlight. Confirm weather is safe and that you won't be working on wet surfaces. This step reduces risk before any testing.
Tip: Never rush safety checks; a short precaution today prevents serious injuries. - 2
Visual inspection of panels
Look for cracks, delamination, or discoloration. Check for dirt build-up that could block light. Photograph any damage for future reference and warranty claims.
Tip: Take close-up photos and a wide shot to capture context. - 3
Check wiring and junction boxes
Inspect DC connections for loose pins, corrosion, or insulation damage. Ensure cables are properly secured and not chafed.
Tip: Use protective gloves and avoid touching live conductors. - 4
Test inverter status and fault codes
Read the inverter display or app for fault codes. Note any error codes and consult the manual or manufacturer support for fixes.
Tip: Ignore codes that resolve after a reset; document the behavior. - 5
Measure panel voltage under sun
With proper safety, measure voltage at the panel terminals and compare to nameplate values. Do this only if you are confident in handling live circuits.
Tip: Do not touch exposed conductors; test on a sunny day. - 6
Isolate a suspect panel or string
Disconnect a single panel or string to compare performance. Look for changes in output when isolated to identify the faulty unit.
Tip: Label cables clearly to avoid mix-ups. - 7
Decide on next steps
If underperformance persists, contact a licensed professional or pursue warranty replacement. Gather readings, photos, and dates for documentation.
Tip: Keep warranty contacts handy and prepare a concise fault description.
Diagnosis: Panel string shows reduced output or no output under standard test conditions
Possible Causes
- highShading or soiling on panels
- mediumLoose or corroded connections
- highInverter fault or monitoring issue
- mediumDamaged cells or microcracks
- lowWiring damage in the DC strings
Fixes
- easyClean the panels and remove debris; ensure no shade blocking the sun
- easyCheck and reseat connectors at junction box and inverter; inspect for corrosion
- easyReset the inverter or check fault codes; contact manufacturer for guidance if code persists
- mediumTest individual panels for underperformance and inspect for microcracks; replace faulty panels
- mediumInspect wiring for damage; repair or replace damaged DC cables by a qualified electrician
Frequently Asked Questions
What are common signs that a solar panel is failing?
Common signs include reduced output, visible damage, corrosion on connectors, and fault codes on the inverter. If you notice persistent underperformance after cleaning and checking connections, a professional evaluation is recommended.
Look for reduced energy, visible damage, or inverter fault codes; if it keeps underperforming, get a professional check.
Can a dirty panel cause low output?
Yes. Dirt, dust, bird droppings, or snow can significantly reduce light reaching the cells, lowering output. Regular cleaning under safe conditions can restore performance.
Dirty panels can cut output; cleaning helps, but ensure safety.
Is it safe to inspect rooftop panels myself?
Roof inspections carry fall risks; always follow safety guidelines, use proper PPE, and consider hiring a professional if you are not trained for working at height.
Roof work can be dangerous—use PPE or hire a pro.
When should I replace a panel under warranty?
If a panel shows persistent underperformance or physical damage despite safe checks, and is within warranty terms, contact the manufacturer or installer for a replacement.
If under warranty and faulty, seek a replacement.
What safety steps are essential before testing?
Turn off the DC system when required, wear PPE, and avoid testing wet surfaces. If unsure, stop and call a licensed technician.
Safety first: PPE, dry conditions, and avoid touching live parts.
Watch Video
Top Takeaways
- Identify issues through safe, structured checks
- Differentiate panel faults from inverter or shade causes
- Follow warranty steps before replacement
- Document findings for faster service
- Prevent future faults with regular cleaning and checks