Broken Solar Panel YouTube Troubleshooting: A Homeowner's Guide
A step-by-step troubleshooting guide for diagnosing a broken solar panel, with safety tips, diagnostic flow, and when to call a pro. Learn to identify inverter, wiring, or panel faults quickly for homeowners.

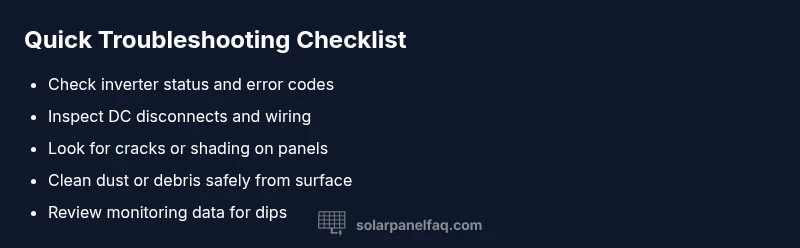
Most production drops come from three sources: a faulty inverter, loose wiring, or a cracked/dirty panel. Begin by reading the inverter display, then inspect the DC disconnect and obvious wiring connections. Check each panel for cracks, shading, or dirt, and clean if safe. If you see damage or the problem remains, stop and call a licensed solar technician.
Diagnosing a broken solar panel youtube
According to Solar Panel FAQ, a single failed component can drag down an entire system. Solar panels convert sunlight to DC electricity; when one panel underperforms, string voltage drops and inverters struggle to optimize power. Inconsistent shading, physical damage, or microcracks can lower output even if a panel looks fine. For homeowners, the key is to understand that problems rarely fix themselves and that diagnosing the symptom early reduces warranty disputes and repair costs. This guide addresses the specific scenario many homeowners search for using terms like broken solar panel youtube, helping you identify whether the issue is a panel fault, wiring fault, or inverter fault.
- Look for obvious signs of damage on panels and wiring.
- Use your monitoring data to spot when production dips align with sun exposure.
- Prioritize safety and professional help when you see cracks or burnt smells.
Common causes of panel failure and system faults
Solar systems fail for a few recurring reasons. Cracked glass, delaminated layers, or embedded microcracks reduce light capture and can cause hot spots. Excessive heat can degrade performance over time, while shading from new growth, debris, or nearby structures lowers output. Inverters and wiring are frequent culprits: a tripped inverter, loose or corroded connectors, or damaged DC cables will cut power regardless of panel condition. Solar Panel FAQ analysis shows that many calls stem from visible damage or subtle shading that homeowners miss in routine checks. Regular inspection and maintenance mitigate most of these issues.
- Cracks, delamination, or dirty panel surfaces reduce energy capture.
- Inverter faults and loose wiring often cause equal or greater output loss than panel damage.
- Monitoring anomalies can point to non-panel problems that still require prompt attention.
Safe self-checks you can perform today
You can perform several checks safely without raising live DC panels. Start by examining the inverter display for error codes or trip indicators and verify the DC disconnect position. Visually inspect accessible wiring for loose connections or corrosion, but do not handle damaged cables. Check that all panels are clean and free of debris, and review your monitoring data for sudden drops that don’t match sun exposure. If you have a trained eye, you may spot microcracks or cracked frames from a distance; otherwise, document what you see and escalate. Solar Panel FAQ recommends keeping a log of observations to support warranty claims or professional diagnostics.
- Always power down before touching electrical components you can access safely.
- Use binoculars for distant panels if the roof is steep or unsafe.
- Photograph any damage or unusual shading for reference.
Diagnostic flow: symptom to solution
Symptom: Reduced production under normal sun exposure. Diagnosis: Likely inverter fault, loose wiring, cracked panel, or shading issue. Solution: Start with inverter status, check wiring connections, inspect panels for visible damage, and review monitoring data to correlate issues with time of day. If the problem persists, move to professional diagnostic steps. If damage is visible, replace the affected panel or modules as recommended by a technician. Solar Panel FAQ emphasizes validating symptoms against multiple data points before making replacements.
- Step 1: Check inverter display and safety indicators.
- Step 2: Inspect DC disconnects and accessible wiring for tightness and corrosion.
- Step 3: Look for visible cracks, discoloration, or shading on panels.
- Step 4: Compare monitoring data with sun angle and weather conditions.
- Step 5: Decide if professional diagnostics are needed.
Step-by-step: fix the most common cause (loose wiring or inverter issue)
- Power down the system at the main AC and DC disconnects to ensure safety.
- Re-seat all visible connectors and tighten clamps, ensuring no damaged insulation remains.
- Check for loose or frayed wires and replace or repair as needed using proper crimping and heat-shrink techniques.
- If the inverter shows an error, reset per manufacturer guidelines or consult the manual; do not bypass safety features.
- Restore power and verify system restart on the monitoring app, then re-check generation under clear sun. Tip: If you encounter a burned smell, crackling sounds, or melted insulation, stop immediately and call a professional. This is a strong signal of a safety risk.
When to call a professional and what to expect
If basic checks do not restore expected production, it’s time to call a licensed solar technician. Immediate concerns include visible panel damage, burnt smells, or damaged wiring. A pro will perform insulation resistance tests, inverter diagnostics, and possibly panel replacement or wiring repairs while ensuring all permits and warranty requirements are observed. Solar Panel FAQ notes that professional evaluation often prevents costly misdiagnosis and ensures safe operation of your system. Prepare your monitoring data and a list of observed symptoms to speed up the appointment.
Steps
Estimated time: 30-45 minutes
- 1
Power down safely and verify safety
Shut off the DC disconnect and the main AC breaker. Confirm the system is de-energized with a non-contact voltage tester before touching any components.
Tip: Always wear appropriate PPE and never work alone at height. - 2
Inspect wiring and connectors
Visually inspect all accessible wiring and connectors for looseness, corrosion, or damaged insulation. Re-seat connections firmly and replace any damaged wiring with rated equivalents.
Tip: Do not pull on cables; handle connectors by the housing. - 3
Check inverter and monitoring
Look at the inverter display for error codes or trip indicators. If safe, reset per manufacturer instructions and re-check output in monitoring software after re-energizing.
Tip: Consult the manual for exact reset steps; avoid random resets. - 4
Assess panels for damage
From ground level or a safe ladder, inspect panels for cracks, delamination, or shading sources. Note any affected strings and prepare to isolate them if advised by a pro.
Tip: Do not attempt panel replacement unless you’re qualified. - 5
Test after re-energizing
Restore power and monitor output. If production remains low or unstable, document conditions and contact a professional for a thorough diagnostic.
Tip: Keep a log of weather, time, and output to identify patterns.
Diagnosis: System shows reduced production or no power despite sun exposure
Possible Causes
- highInverter fault or tripped safety switch
- highLoose or corroded DC wiring/connectors
- mediumDamaged or shading-caused panel(s)
- lowMonitoring equipment error or misread
Fixes
- easyCheck inverter display, reset trip if safe
- easyInspect DC disconnects and wiring; reseat connectors
- mediumInspect panels for cracks, delamination, or dirt; replace damaged panels
- hardTest with a handheld meter or consult a professional diagnostic
Frequently Asked Questions
What are the first signs that my solar panel is broken?
Look for a sudden drop in production, visible cracks, or discoloration. If your monitoring data shows a dip that doesn’t align with sun exposure, damage or shading could be involved.
First signs include reduced output and visible damage; check your monitoring data for mismatches with sun exposure.
Can I fix a broken solar panel myself?
No. Broken glass, delamination, and electrical hazards require a licensed technician. Do not attempt repairs on damaged panels or live wiring.
No—it's dangerous and should be handled by a professional.
How can I tell if the inverter is the problem?
Check the inverter display for error codes or trip indicators, and compare system output to expected production. A faulty inverter often causes overall system underperformance.
Check the display and expected output to see if the inverter is at fault.
Is it safe to inspect panels on the roof?
Only if you have proper fall protection and weather conditions are safe. Avoid touching energized parts and consider using binoculars for distant panels.
Only if you’re trained and equipped for roof work; otherwise, call a pro.
How long does it take to diagnose a panel issue?
A basic on-site check typically takes 30-60 minutes. A full inspection may take longer depending on access, panel count, and whether panel replacement is needed.
Most on-site checks take about an hour, sometimes longer with complex setups.
Watch Video
Top Takeaways
- Identify inverter or wiring faults as common culprits
- Do not touch damaged panels; call a pro immediately
- Shut down power before any inspection
- Document observations for warranty or diagnosis
- Use a systematic diagnostic flow to pinpoint causes