Is it ok to connect solar panel directly to battery? A practical guide
Explore whether you can connect a solar panel directly to a battery, the risks of bypassing a charge controller, and how to choose the right controller, cables, and safety gear for safe solar charging and storage.

Can you connect a solar panel directly to a battery? Generally, no. Without a charge controller you risk overcharging, excessive heat, gas buildup, and reduced battery life. A properly matched solar charge controller or regulator is required to safely manage voltage, current, and battery health, making the system safer and more reliable.
Understanding the landscape of panel-to-battery charging
The idea of wiring a solar panel straight to a battery pops up often for do-it-yourself enthusiasts. The basic physics are simple: a panel converts light into electrical energy, while a battery stores it as chemical energy. But solar cells don’t regulate voltage or current on their own. If you connect a panel directly to a battery, you risk dumping high voltage and current into the battery, which can lead to overheating, thermal runaway in extreme cases, and irreversible damage over time. The question often asked is: is it ok to connect solar panel directly to battery? In most residential or semi-permanent setups, the answer is no. You need a control mechanism that adapts to changing sunlight and battery state. Solar Panel FAQ emphasizes that a properly sized charge controller is essential for safety and longevity.
Why a controller matters for safety and longevity
A charge controller acts as a gatekeeper between the solar panel and the battery bank. It prevents overcharging by limiting the voltage and current that reaches the battery, protects against backflow when the sun goes down, and often includes temperature compensation to adjust charging at different ambient temps. Without this regulation, an illuminated panel can push current into a battery that’s already near full, causing gassing, loss of electrolyte, and accelerated aging. In addition to protection, controllers enable smarter charging profiles (bulk, absorption, float) that optimize battery health over many charge cycles. Solar Panel FAQ’s guidance here highlights that controllers aren’t optional gear; they are required for safe, reliable operation.
Direct connections: when they might seem tempting—and why they’re risky
Some hobbyists imagine a direct panel-to-battery hookup for cost savings or simplicity. In tiny, low-voltage, current-limited situations with a matched battery chemistry, a very limited setup might technically work for a short test. However, even small miscalculations can push the battery beyond its safe operating window. Risks include excessive current that causes rapid heating, hydrogen gas generation, venting, and potential fire hazards. These situations also bypass essential protections, such as reverse polarity protection and over-discharge safeguards. For homeowners, the practical takeaway is clear: use a controller designed for your panel’s Voc and Isc and your battery type.
Selecting the right controller: the first critical step
Choosing the right controller involves matching the panel’s open-circuit voltage (Voc) and short-circuit current (Isc) to a controller that can handle those values plus your battery bank’s voltage. PWM controllers are simple and affordable for smaller systems, while MPPT controllers are more efficient in converting excess voltage into usable charging current, especially in cooler or high-voltage conditions. The controller should be rated for your battery chemistry (lead-acid, AGM, gel, lithium) and include proper protection features like fusing and reverse polarity protection. If you’re unsure, consult the manufacturer’s spec sheets and plan to oversize by a safe margin to accommodate sun fluctuations.
Wiring best practices: getting it right the first time
Cable sizing matters as much as the controller. Use appropriately gauged wires to carry the expected charging current with minimal voltage drop. Install a properly rated fuse or circuit breaker close to the battery to protect wiring from short circuits. Run panels and batteries in well-ventilated, dry spaces and avoid exposing wires to sharp edges, heat sources, or moisture. Always disconnect loads before attaching panels or batteries, and never touch live conductors with bare hands. Safety first, and you’ll avoid common pitfalls that plague DIY solar projects.
Monitoring and maintenance: turning a setup into a long-term solution
Once wired and activated, monitor voltage, current, and temperature during initial charging cycles. Most modern controllers log data and provide alarms if the voltage or current exceeds safe values. Regular maintenance includes inspecting cables for insulation wear, cleaning dust from panel surfaces to maintain efficiency, and checking battery electrolyte levels (for flooded lead-acid) or health indicators (for sealed chemistries). Keeping to a routine ensures the system remains safe and efficient over years. Solar Panel FAQ recommends documenting all settings and measurements so you can troubleshoot quickly if performance changes.
Practical takeaways for homeowners
- In most home installations, you should not connect a solar panel directly to a battery. Use a properly sized charge controller.
- Select MPPT for larger or higher-voltage arrays to improve efficiency, especially under varying light conditions.
- Size cables and fusing to the expected charging current.
- Follow safety precautions and manufacturer guidelines, and consider professional installation for complex systems.
A safe, scalable alternative approach
If you’re aiming for a safe, scalable system, start with a solar panel array feeding a battery bank through a controller, and then use a separate inverter/balance of system as needed. This approach protects the battery and improves reliability, particularly for long-term storage and home backup use. Solar Panel FAQ stresses that modular designs with proper controllers are easier to troubleshoot and expand in the future.
Tools & Materials
- Solar panel(s)(Match Voc/Isc to system goals)
- Battery bank (lead-acid, AGM, GEL, or Li-ion)(Deep-cycle preferred; voltage aligns with controller)
- Charge controller (MPPT or PWM)(Rated for panel specs and battery chemistry)
- Fuse or circuit breaker(Placed near the battery positive terminal)
- Appropriate gauge DC cables(Low-voltage drop under expected current)
- MC4 connectors and adapters(Ensure weatherproof connections to panels)
- Multimeter / solar meter(For verifying voltage and current)
- Insulating tape and cable clamps(Secure wiring and prevent movement)
- Ventilation for battery area(Reduce gas buildup for flooded lead-acid)
- Safety gear (gloves, eye protection)(Personal protection during setup)
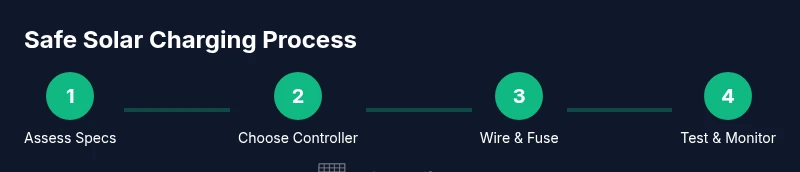
Steps
Estimated time: 30-60 minutes (excluding obtaining parts)
- 1
Assess system goals and specs
Identify your panel’s Voc and Isc, the battery bank voltage, and the intended load. This ensures you pick a controller with adequate headroom and a reasonable charging profile for your chemistry. Having this baseline helps avoid overspecifying or undersizing components.
Tip: Document the exact panel model and battery type to keep specs consistent across parts lists. - 2
Choose a compatible charge controller
Select a controller rated for your panel voltage and current and compatible with the battery chemistry. Prefer MPPT when you have higher panel voltages or longer wiring runs, as it improves efficiency by converting excess voltage into usable current.
Tip: If in doubt, choose a controller with a safety margin (10-20%) beyond the nominal specs. - 3
Install fusing and safety devices
Place a properly rated fuse or circuit breaker on the battery side, as close to the battery terminal as possible. This protects cables from short circuits and makes troubleshooting safer.
Tip: Use a fuse rating corresponding to the maximum expected charging current. - 4
Wire panel to controller input
Connect the panel’s positive and negative leads to the controller’s PV input, following the correct polarity. Minimize cable length and secure connectors to avoid movement in wind or during maintenance.
Tip: Keep PV wiring dry and avoid stepping on cables; use weatherproof routing if outdoors. - 5
Wire controller to battery bank
Connect the controller’s battery output to the correct battery terminal in the bank, observing polarity. Use the fuse between the controller and the battery side and ensure all connections are tight and clean.
Tip: Before connecting, double-check that the controller is set to the correct battery voltage and chemistry. - 6
Configure charging parameters
Program the controller with the correct charging profile (bulk/absorption/float), as well as temperature compensation if supported. This helps avoid overcharge and ensures longevity of the battery.
Tip: If your battery is Li-ion, verify that the controller supports lithium charging profiles. - 7
Test and verify operation
With everything connected, measure panel voltage, battery voltage, and charging current. Confirm the controller shows charging and that there’s no overheating or abnormal alarms.
Tip: Run a controlled test by shining light gradually and watching the current rise without overshoot. - 8
Establish ongoing monitoring
Use the controller’s data log or a separate monitor to track voltage, current, and battery health over time. Schedule periodic inspections of wiring and connections.
Tip: Set up alerts for voltage or current anomalies to catch issues early.
Frequently Asked Questions
Can I connect a solar panel directly to a battery without a controller?
In most cases, no. A direct connection risks overcharging, overheating, gas formation, and shortened battery life. A properly sized charge controller mitigates these risks and extends battery health.
Usually not. A controller is needed to prevent overcharging and protect the battery.
What size charge controller do I need for my panel and battery?
Sizing depends on the panel’s voltage and current and the battery bank’s voltage. MPPT controllers can handle higher voltages efficiently, while PWM controllers are simpler. Check manufacturer specs and add a safety margin.
It depends on your panel’s volts and amps and your battery voltage; consult the specs.
What happens if I bypass the controller?
Bypassing the controller can push excessive current into the battery, cause overheating, venting, and long-term damage. It also eliminates protections against backfeed and unsafe charging.
You risk overheating and battery damage by bypassing the controller.
Can diodes replace a controller to prevent backflow?
Blocking diodes can reduce backflow but introduce voltage drop and heat. They don’t regulate charging and are not a substitute for a proper charge controller.
Diodes aren’t a full substitute for a controller; they add voltage loss.
Are Li-ion batteries safe to connect directly to a panel?
No. Li-ion cells require precise charging profiles and BMS protection. Without them, there’s a high risk of thermal runaway. Always use a controller compatible with Li-ion chemistries.
Directly connecting Li-ion is unsafe without proper control and protection.
Is it safe to monitor charging without specialized equipment?
Basic monitoring helps, but dedicated controllers provide alarms, data logs, and protections. For safety and efficiency, rely on the controller’s built-in features and optional meters.
Use the controller’s monitoring features for safety and reliability.
Watch Video
Top Takeaways
- Use a charge controller between panel and battery in nearly all setups.
- MPPT controllers improve efficiency under many conditions.
- Size cables and fuses to the expected charging current.
- Follow safety guidelines and manufacturer specs for battery chemistry.