What size solar panel to charge a 12V 100Ah battery
Learn how to size a solar panel for a 12V 100Ah battery. This guide explains the formula, sun hours, and controller considerations to help homeowners choose the right panel.

Why Sizing Panels Correctly Matters for a 12V 100Ah Battery
According to Solar Panel FAQ, properly sizing your solar panel setup is essential for maximizing charging efficiency, extending battery life, and avoiding undercharging or wasting energy. When you know the target charge rate and the typical daily sun you receive, you can chose a panel size that aligns with those conditions. This matters especially for homeowners who rely on solar as a primary energy source or want quick, reliable top-offs between cycles. A properly sized system reduces the time your battery spends at partial states of charge and lowers the risk of deep discharges that shorten a battery’s lifespan. By understanding the relationship between panel wattage, sun hours, and depth of discharge, you can plan a setup that performs consistently across seasons.
How to Calculate Panel Size (Simple Formula)
Sizing a solar panel for a 12V battery starts with a straightforward formula and a few practical assumptions. The goal is to determine the wattage of panel needed to replenish the energy you typically use between charges. The core formula is:
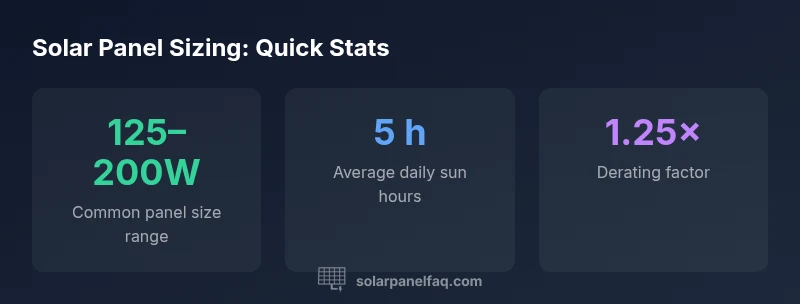
- panelW = batteryAh * 12 * (DoD/100) * 1.25 / sunHoursPerDay
Where: DoD is depth of discharge (as a percentage), sunHoursPerDay is the average daily peak sun hours, and 1.25 accounts for common losses from wiring, controller, and temperature. After computing panelW, round up to the nearest standard panel size. For example, with a 100Ah battery, 50% DoD, and 5 sun hours per day, panelW ≈ 150W. This gives a practical starting point for most locations.
Important Considerations: Sun Hours, DoD, and Controller Losses
Sun hours vary by geography and season, so the same battery may need a different panel wattage in Florida than in Washington. Your DoD also shifts the calculation: charging to 100% isn’t always desirable; many systems target 50–80% DoD for longevity. Lash-ups using PWM vs MPPT controllers matter because MPPT controllers extract more energy from higher voltage panels, especially in cold weather or long runs. Don’t omit losses from wiring, connectors, and the battery’s own characteristics; the 1.25 factor in the formula is a commonly used cushion, but real-world results can be higher or lower depending on setup and temperature.
A stable, correctly sized charger-controller pair improves efficiency and reduces the time needed to reach the desired state of charge. If you’re unsure about your controller’s max input or whether a panel’s Voc could exceed it in cold conditions, plan for a margin and consider MPPT for better performance in variable conditions.
Practical Examples: 100Ah Battery in Different Climates
Let’s translate the formula into tangible scenarios. In a sunny location with about 6 hours of peak sun and a 50% DoD, a 150–180W panel is a sensible target. In a milder area with 4–5 sun hours, you might lean toward 180–240W to complete a full recharge in a day, assuming generous DoD and efficient components. If you only receive 3–4 sun hours across short winter days, you’ll likely need 200W+ or a two-panel array to accomplish daily recharges. Always validate with local radiation data and seasonal changes. The math stays the same; the inputs change with your conditions.
How to Size for Multiple Panels and Arrays
When a single panel can’t meet your daily energy needs, you can add panels in parallel or series to increase wattage or voltage to your charge controller. For 12V battery systems, wiring panels in parallel keeps voltage near the 17–22V range while increasing current, which a given MPPT controller can handle. Series wiring raises voltage; you must ensure your controller’s input voltage rating isn’t exceeded. A practical approach is to start with a single 150–200W panel, monitor performance, and scale by adding panels in parallel until you reach your daily energy target. Routes for monitoring include simple energy meters or inverter-telemetry to track SoC (state of charge).
Choosing Panels and Budget Considerations
Panel choices vary by efficiency, durability, and cost. Most homeowners next to a roof or yard will see common off-the-shelf sizes at 100W, 125W, 150W, and 200W. For a 12V, 100Ah battery, budgeting around mid-range panels (125–200W) offers a good balance of cost and performance. If you expect variable weather or frequent cloudy days, consider a slightly larger array for reliability. Don’t forget mounting hardware, wiring, and a quality charge controller. Budgeting for maintenance and potential future expansion is wise; solar panels often maintain output for decades, while inverters and controllers may require periodic upgrades.
Setup, Wiring, and Safety Best Practices
Safety matters when installing solar. Start by choosing a shaded, clean mounting location with secure racking. Use proper gauge wiring sized for current, and install a weatherproof combiner box and fuse or breaker as required by local code. A robust, properly grounded system reduces shock risk and fire hazards. For 12V battery charging, always include a dedicated charge controller between panels and the battery. Avoid bypassing safety components to save cost, as that can create dangerous overcharging or thermal issues. Regularly inspect connections for corrosion, loose lugs, and damaged insulation, especially in coastal or humid environments.
Common Mistakes and Quick Fixes
Common errors include overestimating sun hours, ignoring temperature derating, and selecting panels that push voltage beyond the controller’s rating. Quick fixes: use the formula with a conservative DoD (e.g., 40–60%), verify the controller’s max input voltage, and keep panels clean and angled to maximize sun exposure. When in doubt, run a small pilot system and track real-world performance for several weeks before committing to a larger installation. This hands-on approach helps tailor the sizing to your exact location and usage pattern.