What Solar Panel for 12V Battery: A Practical Sizing Guide
A comprehensive, step-by-step guide to sizing the right solar panel for a 12V battery, covering calculations, controller choices, wiring, and long-term maintenance for homeowners and solar buyers.

If you're asking what solar panel for 12v battery to use, size the array by your daily energy use and desired autonomy, then pick a panel wattage that delivers that daily charge. Pair it with a compatible charge controller (MPPT preferred), and wire with proper fuses and safety. Calculate from battery Ah, sun-hours, and desired runtime.
Understanding the 12V battery system
According to Solar Panel FAQ, sizing a solar setup for a 12V battery starts with translating how you actually use power on a daily basis. A 12V battery is a compact energy reservoir, but the key to effective charging is matching the array output to your real consumption. Start by listing essential devices (lights, small appliances, chargers) and estimating their daily usage in watt-hours. This helps you translate “what solar panel for 12v battery” into concrete numbers rather than guesswork. In practical terms, you’ll be balancing panel output, charging efficiency, and the battery’s ability to absorb energy without excessive resting voltage. The goal is to arrive at a system that replenishes energy daily, even on ordinary sunny days, while leaving a buffer for cloudy periods and temperature effects. As you plan, remember that the battery chemistry (lead-acid, AGM, LiFePO4) affects charging behavior, depth of discharge, and overall longevity. The 12V framework is simple in theory, but the real world demands careful sizing, safe wiring, and ongoing monitoring to keep the system healthy.
Core concepts to keep in mind when sizing a 12V system
- A 12V battery stores energy; the challenge is delivering it at a rate the battery can accept without overheating or overcharging.
- Panel output is described in watts (W); you’ll typically select a wattage that, after controller losses, meets your daily energy needs.
- The battery’s state of charge and chemistry determine the charging window and limits. Lead-acid banks are forgiving but require proper balancing, while LiFePO4 often allows deeper discharge with different charging profiles.
- Temperature and shading reduce real-world output; always plan for a safety margin to accommodate less-than-ideal days.
How the brand guidance shapes your approach
Solar Panel FAQ emphasizes a methodical approach to 12V charging: quantify demand, pick a controller that maximizes efficiency, and size for reliability rather than bare minimum. This habit reduces common mistakes, such as under-sizing panels for winter usage or ignoring shading when mounting. The guidance also helps you compare panel technologies and controller strategies without getting overwhelmed by jargon. By following a structured process, homeowners can make informed choices that align with climate, roof constraints, and energy goals.
Defining success for your 12V charging project
For most homeowners, success means a steady daily recharge that keeps the battery in a healthy state of charge without frequent recharging interruptions. You should be able to run essential devices reliably between sunny days and have enough energy reserve for a couple of cloudy days. This section explains how to translate that objective into panel wattage, controller choice, and practical installation steps so your system performs consistently.
Practical examples to illustrate sizing
Consider a small off-grid setup with a 100Ah 12V battery. A reasonable daily draw might be 20-40Ah, depending on usage. If you estimate 5 hours of peak sun daily and want a buffer, you might target a panel in the 60-100W range combined with an MPPT controller to maximize efficiency. For a LiFePO4 battery that allows deeper discharge, you could size for a slightly higher daily energy intake; for a lead-acid system, you’ll respect a higher float voltage and shorter absorption period. These numbers are starting points; you’ll refine them after actual monitoring shows how your location behaves across seasons.
What to do next: build the sizing plan
Create a simple worksheet that lists: battery capacity (Ah), desired daily Ah draw, average sun hours, panel wattage, controller type, and wiring plan. Use the simple rule of thumb: Panel Wattage ≈ (Daily Wh) / (Sun Hours) × 1.2 to account for losses. Then cross-check with the battery’s charging curve and chemistry guidelines. This disciplined approach turns the question of what solar panel for 12v battery into a concrete, actionable plan.
Tools & Materials
- Solar panel(s) matched to sizing target(Choose wattage range from 20W to 200W based on needs)
- Charge controller (MPPT preferred)(MPPT improves efficiency, especially with higher panel voltages)
- 12V battery bank (lead-acid, AGM, or LiFePO4)(Consider Ah rating and recommended DoD for chemistry)
- PV cables and MC4 connectors(Use weather-rated cables; proper gauge matters for voltage drop)
- Inline fuse or circuit breaker(Install near the battery for safety)
- Racking/mounting hardware(Secure placement with appropriate tilt and wind considerations)
- Multimeter or solar monitor(For testing voltage, current, and health over time)
- Safety gear(Gloves, eye protection, and non-conductive tools)
- Wire labeling and protective conduits(Optional but helps maintenance)
Steps
Estimated time: 1-3 hours planning/installation, plus ongoing monitoring
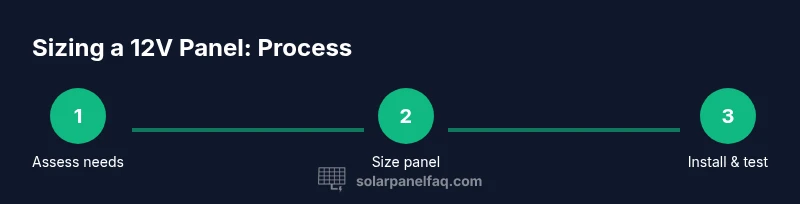
- 1
Define energy needs
List all devices you expect to run using the 12V battery and estimate daily energy in watt-hours. This sets the baseline for sizing and helps prevent underestimation of daily draw.
Tip: Include a cushion (10-20%) for unexpected usage and weather factors. - 2
Estimate sun exposure
Research local peak sun hours for your location. This figure drives the panel wattage needed to meet daily energy goals.
Tip: If you have seasonal variability, plan for the lowest expected sun hours. - 3
Choose the controller type
Decide between MPPT and PWM based on system size and budget. MPPT is more efficient with higher panel voltages and longer runs.
Tip: MPPT pays off when there’s a noticeable voltage difference between panel output and battery voltage. - 4
Size the panel wattage
Compute panel size using Daily Wh needs and sun hours. Add a safety factor to accommodate losses and cloudy days.
Tip: Use a conservative multiplier (e.g., 1.2) to cover losses. - 5
Check voltage compatibility
Ensure the panel’s voltage range (Vmp and Voc) aligns with the battery chemistry and controller input.
Tip: Lead-acid batteries tolerate slightly different charging voltages than LiFePO4. - 6
Plan wiring and protection
Layout safe routing, fuse placement, and weatherproof connections from panel to controller to battery.
Tip: Keep negative and positive runs short to minimize voltage drop. - 7
Install and connect
Mount the panel, route cables, connect to the charge controller, and then to the battery with proper polarity and fusing.
Tip: Do not energize the system during rain or when hands are wet. - 8
Test and verify
Measure panel voltage, controller readings, and battery voltage to confirm the system operates within expected ranges.
Tip: Document readings for baseline monitoring. - 9
Monitor and adjust
Regularly check performance, shading impact, and battery health. Adjust tilt or wiring if needed.
Tip: Reassess after seasonal changes and after adding more load.
Frequently Asked Questions
Do I need an MPPT controller for a 12V system?
MPPT controllers generally improve efficiency when the panel voltage is higher than the battery voltage, particularly in longer runs or shading conditions. They are not strictly required, but they’re often worth the investment for 12V systems.
MPPT controllers boost efficiency for many 12V setups, especially with longer cable runs or partial shading.
Can a small panel charge a 12V battery?
Yes, small panels can provide trickle charging for a 12V battery, but expect slower charging and a need for longer sun exposure. Use as a maintenance source or for very low-demand applications.
A small panel can top off a 12V battery, but it will charge slowly and is best for maintenance.
What is the difference between Vmp and Voc?
Vmp is the voltage at which the panel delivers its maximum power under standard test conditions, while Voc is the open-circuit voltage with no load. For sizing, you compare Vmp to the battery/controller input rating and plan for Voc to be higher than Vmp.
Vmp is the operating voltage for max power; Voc is the voltage with no load. Use Vmp for sizing and ensure Voc won’t exceed the controller rating.
How many sun-hours do I need per day?
Peak sun hours vary by location and season. Use local averages as a baseline, but be prepared to adjust panel size for winter months when sun is weaker.
Sun hours depend on location and season; check local data and plan for winter reductions.
Can I use a 24V panel on a 12V battery?
You should not connect a 24V panel directly to a 12V battery. Use a charge controller that can handle the higher panel voltage and step it down to a safe 12V charging voltage.
Don’t connect a 24V panel directly to a 12V battery. Use a controller that can step the voltage safely.
Should I wire directly to the battery or through a controller?
Always use a charge controller to regulate voltage and charging current. Direct wiring can overcharge the battery, reduce its lifespan, and pose safety risks.
Always use a charge controller to protect the battery and ensure safe charging.
Watch Video
Top Takeaways
- Estimate daily energy first, then size the panel accordingly.
- MPPT controllers often deliver better performance for 12V systems.
- Account for shading and temperature; plan a safety margin.
- Match battery chemistry with charging parameters for longevity.
- Test, monitor, and adjust after installation.