Solar Panel with Sun: A Practical Home Guide for You
Learn how sun exposure affects solar panels, optimize tilt and placement, and safely plan a home solar upgrade in 2026 with practical steps, tips, and maintenance guidance.

You're about to learn how to evaluate sun exposure for a solar panel system, optimize panel placement for peak output, and plan safe installation steps or professional help. This guide covers estimating daylight hours, positioning the panels, and avoiding common mistakes to maximize energy production.
What solar panel with sun means for your home
According to Solar Panel FAQ, a solar panel with sun refers to a photovoltaic system that uses sunlight to generate electricity. Output depends on sun angle, irradiance, and temperature. The better the sun exposure over the day, the more energy your system can produce. This block lays the groundwork by explaining how light is converted to usable power and why consistent sun at the right angle matters for performance. You will see how simple changes to placement and orientation can have meaningful impacts on your home electricity bills and comfort, especially in a 2026 context where roof space and efficiency goals are front and center.
Sun angle, tilt, and orientation: maximizing exposure
Panel performance hinges on sun angle relative to the panel surface. Tilt and azimuth position influence how much sunlight the module collects during different seasons. For most homeowners, aiming the panel face toward true south in the northern hemisphere or true north in the southern hemisphere provides strong year-round exposure. Tilt is often set to balance winter and summer sun angles; a modest tilt can significantly reduce shading losses and improve energy yield. Consider local latitude as a starting point, then adjust after monitoring performance during peak sun months. Small tweaks can yield noticeable gains in daily energy production.
Shading and seasonal changes: how sun path affects output
Shading from trees, chimneys, or adjacent structures can dramatically reduce output. A sun path diagram helps predict seasonal shading and identify hours when panels receive the most light. Even partial shading on one module can impact the whole string’s performance, so plan for clear morning and afternoon exposure. Seasonal changes, such as winter sun lower in the sky, may require different tilt or repositioning. In many climates, regular pruning of nearby foliage and adjusting tilt seasonally can maintain higher average output across the year.
Roof vs ground mounting: choosing a mounting approach
Roof mounts save space and blend with a home’s aesthetic, while ground mounts offer flexibility for tilt and shading control. Roof mounting requires structural assessment, waterproofing, and adherence to local codes. Ground mounts can simplify maintenance and future upgrades but demand more yard space and concrete footings. Regardless of the choice, ensure proper rainwater drainage, wind load considerations, and access for inspection. If you’re unsure, consult a licensed installer to evaluate your roof integrity and mounting options.
Tilt and azimuth: practical ranges by latitude
Latitude largely determines the ideal tilt and azimuth. A common rule of thumb is to tilt panels at an angle roughly equal to the latitude for year-round performance, with small adjustments for seasonal optimization. In milder climates, a lower tilt may improve summer energy capture, while higher tilts favor winter sun. Azimuth should aim for optimal sun exposure around local solar noon, typically close to true south in the northern hemisphere. Use a sun path tool or professional advice to set initial angles and measure performance over several weeks.
Sizing, permits, and safety: planning before you start
Before installation, determine system size based on energy needs and available roof or ground space. Check local permitting, electrical codes, and interconnection requirements with your utility. If the project involves roof work or electrical wiring, hiring a licensed professional is strongly recommended to ensure safety and code compliance. Gather permits, obtain product warranties, and review safety procedures for working at height and with high-voltage components. A well-planned project reduces risk and accelerates the path to a reliable solar upgrade.
Wiring basics and safe planning
Electrical connections require careful attention to safety and code compliance. Expect to evaluate conduit runs, junction boxes, and disconnects, while ensuring proper inverter sizing and load calculations. Do not attempt hazardous wiring without training; instead, work with a licensed electrician who can verify wire gauges, overcurrent protection, and grounding. This section outlines high-level considerations to help homeowners partner effectively with pros, understand what to ask, and avoid common missteps that can affect performance or safety.
Monitoring and maintenance for long-term performance
Once installed, monitor performance via the inverter, meter, or a solar monitoring app. Regular inspections should check for physical damage, loose hardware, and shading changes from trees or debris. Cleaning panels occasionally to remove dust or bird droppings can help maintain efficiency, but avoid harsh cleaners. Track energy production against expectations and adjust tilt or shading management as needed. Proactive maintenance ensures you capture expected savings over the system’s lifetime.
Common mistakes and how to avoid them
Common missteps include underestimating shading, setting the tilt too aggressively for one season, or ignoring local permitting requirements. Failing to account for roof condition or wind loading can lead to expensive repairs. Always verify warranty terms and rely on qualified installers for structural modifications and electrical work. Proper planning, measurement, and documentation minimize risk and maximize long-term performance.
Tools & Materials
- Safety gear (escape-free harness, gloves, eye protection)(Essential for elevated work; follow local safety rules)
- Ladder and fall protection(Stable support and secure anchoring)
- Measuring tape and compass or smartphone sun tool(For accurate tilt and azimuth planning)
- Level and marker/laser(To ensure level rails and proper alignment)
- Drill, bits, and basic screwdrivers(Mounting hardware installation)
- Mounting rails or racking system(Choose based on roof type or ground mount)
- Conduit, junction boxes, and weatherproof connectors(Safe electrical routing)
- Inverter sized to system and meter for monitoring(System interface and data logging)
- Utility access and permit documents(Permits and interconnection paperwork)
- Screwdriver/wrench set and pliers(General assembly and adjustments)
- Shading analysis tools or apps(Helpful for planning but not mandatory)
Steps
Estimated time: 2-6 days depending on scope and permits
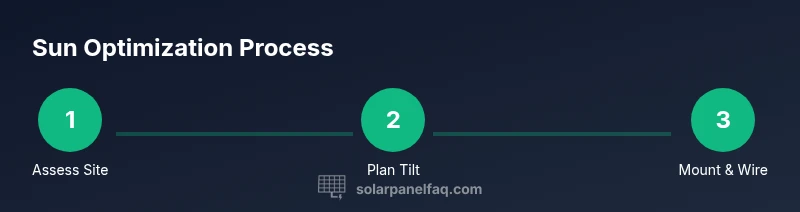
- 1
Assess sun exposure
Evaluate how much sun your site receives across the day and seasons. Record peak sun hours and identify obvious shading sources. This helps determine if a roof or ground mount is best and guides tilt decisions.
Tip: Use a sun path diagram for your location to visualize sun angles. - 2
Document current shading
Check for trees, chimneys, or other obstructions that shade the area at different times. Document changes through seasons to understand long-term impact on production.
Tip: Take photos at multiple times of day for a shading profile. - 3
Choose mounting approach
Decide between roof mounting or a ground-mounted system based on space, structure, and access for maintenance. Each option has different code, warranty, and cost implications.
Tip: Consult a licensed installer to verify roof structure and waterproofing needs. - 4
Determine tilt and orientation
Set initial tilt near your latitude with adjustments for seasonal balance. Align panels toward the optimal azimuth to maximize sunlight during peak hours.
Tip: Avoid extreme tilts that could cause wind stress on the mounting. - 5
Plan wiring layout
Outline conduit routes, disconnect locations, and how the array will connect to the inverter and meter. Ensure pathways stay clear of moving parts and hazards.
Tip: Pre-plan cable lengths to minimize excess slack and reduce trip hazards. - 6
Secure permits and safety plan
Submit permits as required by your locality and coordinate with the utility for interconnection. Develop a safety plan for height work and live electrical components.
Tip: Document all steps and keep copies of permits and warranties. - 7
Install mounting and rails (if DIY)
Attach mounting hardware, level the rails, and verify wind load ratings. If roof work is involved, ensure proper waterproofing and flashing to prevent leaks.
Tip: If in doubt about structure or waterproofing, hire a pro. - 8
Connect wiring and equipment
Route conduits, connect panels to the combiner box, and connect the inverter. Install a ground fault protection device and ensure all connections are weatherproof.
Tip: Use a licensed electrician for electrical connections beyond basic components. - 9
Test, monitor, and adjust
Power up the system and verify voltage, current, and inverter readings. Compare with expected output and adjust tilt or shading management if needed.
Tip: Set up monitoring to track performance and detect anomalies early.
Frequently Asked Questions
What is the best tilt for solar panels in my area?
The optimal tilt depends on your latitude and seasonal goals. A tilt near latitude provides steady year-round performance, with slight adjustments for summer or winter emphasis. Local climate and roof orientation also influence the final setting.
The best tilt depends on your location and climate. A tilt near your latitude provides steady year-round performance, with small seasonal tweaks.
Can I install solar panels myself?
DIY installation is possible for some ground-mounted systems with basic electrical knowledge, but roof mounts and electrical connections typically require licensed professionals. Always check local codes and warranties before proceeding.
DIY is possible for some setups, but roof mounts and wiring usually require a licensed pro. Check local codes and warranties.
How do I reduce shading on my panels?
Identify and trim shading sources such as trees and nearby structures. Reposition panels if feasible or prune vegetation seasonally. In some cases, relocating to a less shaded area or adjusting the tilt can help.
Trim shading sources or reposition panels. If possible, adjust tilt or move to a better location to improve exposure.
What maintenance do solar panels require?
Clean panels periodically to remove dust and debris and inspect mounting components for corrosion or loose hardware. Monitor electrical outputs and address anomalies promptly with a professional.
Clean occasionally and check hardware. Monitor outputs and contact a pro if you see anomalies.
Do I need permits to install solar panels?
Most jurisdictions require a permit for roof or ground-mounted solar installations and interconnection with the utility. Missing permits can lead to fines or disconnection while selling the home.
Yes, you usually need permits and utility interconnection approvals.
How long do solar panels last?
Most panels carry warranties of 25 years or more and can continue producing electricity beyond that. Efficiency degrades slowly over time, but modern panels retain a large share of their output for decades.
Most panels are warrantied for 25 years and keep producing power for many years beyond that.
Watch Video
Top Takeaways
- Plan around sun exposure and avoid shading
- Choose mounting method that fits your home and space
- Tilt and orientation impact year-round output
- Permits and professional help are often necessary
- Monitor performance to maximize savings