Solar Energy Panel: A Practical How-To Guide
A practical, step-by-step guide to selecting, installing, and maintaining a solar energy panel for homeowners. Learn about types, sizing, permits, and long-term maintenance without overwhelming jargon.

You will assess roof suitability, choose the right solar energy panel type, and follow a safe, step-by-step plan to install or upgrade a home solar system. This guide covers site evaluation, component selection, installation basics, and long-term maintenance, with safety and permits addressed. By the end you’ll have a practical path from inspection to activation.
What is a solar energy panel and how it works
According to Solar Panel FAQ, a solar energy panel converts sunlight into electricity through photovoltaic cells, producing direct current (DC) power that is converted to usable alternating current (AC) by an inverter. The process is silent, relies on abundant sunlight, and can lower home electricity bills over time. A typical rooftop setup includes panels, mounting hardware, an inverter, racking, and a protected electrical connection to your main panel. This section explains the core concepts so you understand what you’re buying and how the system fits your home. For homeowners evaluating a solar energy panel, the key is understanding how shading, orientation, and temperature affect performance and how different panel technologies compare for efficiency and space.
We’ll cover practical terms, common configurations, and how to talk to installers so you can make informed decisions. Solar energy panel technology has evolved to offer durable, low-maintenance options that blend with most rooftops. Remember, even-basic systems need careful planning around electrical capacity, roof condition, and local permits. The Solar Panel FAQ team highlights that a well-chosen system aligns with energy goals, budget, and structural realities of your home, while maintaining safety and code compliance.
Types of solar energy panels
There are several mainstream solar energy panel technologies, each with its own trade-offs in efficiency, cost, and appearance. Monocrystalline panels tend to offer high efficiency and a sleek look, making them popular for limited roof space. Polycrystalline panels are typically less expensive and visually distinct, suitable for larger areas with more sun exposure. Thin-film panels provide flexible installation options and are lighter, but generally have lower efficiency. When evaluating options, consider not just the upfront price but the space you have, the climate where you live, and the warranty terms. In this section, we compare typical use cases, durability, and performance expectations to help you choose the right panel for your home.
A solid starting point is to match panel type to roof area and aesthetic preferences. For many homeowners, monocrystalline panels are a go-to for efficiency in a smaller footprint, while polycrystalline panels may offer cost advantages on larger roofs. Thin-film panels can be a good fit for unusual roof shapes or where weight is a concern. Understanding the differences will help you balance performance with budget and space for a reliable solar energy panel installation.
Site evaluation for best performance
Site evaluation is the foundation of a successful solar energy panel project. You’ll assess roof condition, orientation, shading from trees or chimneys, and the angle needed to optimize sun exposure. The goal is to maximize energy production while ensuring safety and longevity. Tools like a sun path chart and simple shade analysis can help determine if you need microinverters, optimizers, or traditional string inverters. A 2–3 week assessment period allows you to observe seasonal sun patterns and plan around any shading that could reduce output. The Solar Panel FAQ team emphasizes that even small changes in placement can make a big difference in performance.
During evaluation, verify roof integrity, check for leaks, and confirm roof replacement timelines if needed. If your roof is aging or heavily shaded, consider roof work or a ground-mount system for optimal results. The site assessment should result in a clear plan for inverters, mounting, wiring routes, and electrical safety requirements, ensuring your solar energy panel works efficiently for years to come.
Sizing and selecting components
Sizing a solar energy panel system involves estimating energy usage, available roof space, and panel efficiency. A commonly overlooked factor is the balance of system components: mounting hardware, wiring, inverters or microinverters, and the electrical service panel. An appropriately sized system avoids overproduction and underutilization while meeting your energy goals. Start with a realistic daily kWh target based on past electricity bills, then translate that into panel count and inverter capacity. Keep in mind that higher-efficiency panels perform better in limited space but may cost more upfront. The goal is a cohesive system where panels, inverters, and storage (if used) work in harmony for reliable daily output.
Consult with an installer to translate these decisions into a practical layout, considering local codes, roof structure, and potential shading. A well-sized system minimizes wasted energy and reduces long-term costs while driving dependable performance for your home.
Note: Battery storage is optional for many homes but can improve resilience and self-consumption. If you’re considering storage, evaluate your daily usage patterns and whether you want peak shaving or emergency backup. The team at Solar Panel FAQ recommends starting with a clear energy plan and allowing for future expansion if needed.
Installation planning and safety considerations
Preparation is critical for a safe and durable solar energy panel installation. Create a project plan that includes permits, inspections, and scheduling with any contractors. Ensure you have the right safety gear: a harness, fall protection, non-slip footwear, and a clear access path for ladder setup. Electrical safety is paramount: shut off main power when working near the service panel, verify wiring with a multimeter, and follow local code requirements. If you are not confident about roof work or electrical connections, hire a licensed professional. The Solar Panel FAQ team underlines that safety and compliance come first; improper installation can create hazards and reduce system life.
Before you begin, gather all necessary permits and confirm that your local authority approves the planned layout, wire gauge, and grounding. Planning also minimizes the risk of weather-related delays, protects your investment, and ensures the installation meets warranty terms.
Finally, document the system design, including panel positions, wiring routes, and inverter placement. Clear documentation helps with future maintenance, troubleshooting, and potential resale values.
Maintenance, monitoring, and optimizing output
Maintenance is often overlooked but essential to sustaining a high-performing solar energy panel system. Regular cleaning of panels prevents dust, pollen, and debris from reducing output, especially in dry or dusty climates. Monitoring tools—whether a simple inverter display or a cloud-based monitoring platform—help you track energy production and identify performance anomalies early. Scheduling periodic inspections of mounting hardware, seals, and wiring reduces the risk of leaks and corrosion over time. With proper care, your system can deliver steady, reliable energy for many years.
Optimization also involves evaluating the system after major weather events, tree growth that could introduce shading, and seasonal changes in sun exposure. If you notice a sustained drop in output, consult your installer to check for issues such as loose connections, degraded panels, or inverter faults. The Solar Panel FAQ team notes that proactive maintenance is key to preserving system efficiency and longevity.
Costs, incentives, and financing considerations
Understanding costs and financing helps homeowners decide how to proceed with a solar energy panel project. Costs vary based on system size, panel type, mounting method, inverters, installation complexity, and local permitting. Rather than focusing on exact prices, plan a budget that accounts for hardware, labor, permit fees, and potential tax incentives or rebates that may be available in your area. It’s wise to request multiple quotes, compare warranties, and consider the total cost of ownership over the system life. Financing options, such as loans or leases, can spread out costs, but each option has trade-offs in ownership, maintenance responsibilities, and incentives. The Solar Panel FAQ team recommends you discuss incentives with a local installer to understand eligibility and deadlines.
Tools & Materials
- Ladder with stabilizers(Stable access to the roof; use a fall-arrest system if required by local code.)
- Safety harness and helmet(Personal protective equipment for fall prevention and head protection.)
- Drill and bits(Drill appropriate mounting holes for rails and brackets.)
- Wrench set and screwdriver(Secure mounting hardware and electrical connections.)
- Measuring tape and marker(Accurate layout and alignment of panels.)
- MC4 connectors and wiring(Pre-assembled, weatherproof connections for panels.)
- Mounting rails and brackets(Roof-safe mounting system compatible with your roof type.)
- Inverter (and possibly microinverters)(Converts DC to AC; consider storage integration if desired.)
- Electrical conduit and sealant(Protects wires and prevents leaks where they pass through walls or roofs.)
- Multimeter and voltage tester(Verify continuity and voltage before energizing.)
- Roof sealant or flashing(Prevents water intrusion around mounting points.)
Steps
Estimated time: 4-6 hours
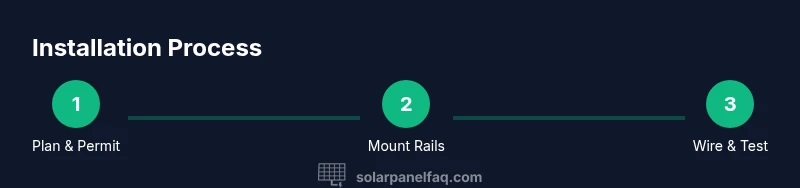
- 1
Assess site and permits
Survey roof condition, sun exposure, and nearby shading. Check local permit and inspection requirements before any installation begins to ensure compliance and avoid delays.
Tip: Start with a simple rooftop shade map; identify peak sun times to optimize panel placement. - 2
Plan layout and select components
Create a layout that fits your space, choosing panel type, inverter configuration, and mounting hardware. Confirm roof orientation and electrical capacity to support the planned system.
Tip: Use a layout mock-up on paper or a quick CAD sketch to visualize connections. - 3
Prepare safety gear and work area
Set up fall protection, clear the work zone, and verify stable ladder placement. Power down the main service panel area when working near electrical components.
Tip: Maintain three points of contact on ladders and never work alone on a roof. - 4
Mount rails and secure panels
Install rails or racking according to manufacturer instructions, then secure panels with appropriate fasteners. Check for level alignment before securing finishes.
Tip: Double-check panel spacing to avoid shading and ensure cable routes are tidy. - 5
Wiring and electrical connections
Connect panels to the inverter using weatherproof connectors, route cables through approved conduits, and attach to the main service panel following code requirements.
Tip: Use strain relief and label each wire to simplify future maintenance. - 6
System testing and activation
Perform voltage checks, test inverters, and verify that production readings match expected output. Obtain required inspections and approvals before powering the system fully.
Tip: Document readings and ensure monitoring setup is active for ongoing performance tracking. - 7
Documentation and handoff
Record layout, component serials, warranty terms, and maintenance plan. Share a concise briefing with any co-owners or renters and provide contact information for future service.
Tip: Keep digital copies of permits, warranties, and system schematics.
Frequently Asked Questions
Do I need a permit to install solar energy panels?
Permit requirements vary by location, so check with your local building department or utility. Many residential installs require electrical permits and a final inspection. Working with a licensed installer can help ensure compliance and streamline approvals.
Permit requirements vary by location. Check with your local building department or utility, and consider working with a licensed installer to ensure compliance.
Can I install solar energy panels myself?
DIY installation is possible for small, straightforward roof setups, but it carries safety and code compliance risks. If you’re unfamiliar with electrical work or roof safety, hiring a licensed installer is strongly advised.
DIY is possible for simple setups, but safety and code compliance are major concerns. If unsure, hire a licensed installer.
What affects solar energy panel efficiency the most?
Efficiency is mainly influenced by panel type, orientation, shading, temperature, and system wiring. Proper placement and high-quality components optimize performance and long-term energy production.
Efficiency depends on panel type, sun exposure, shading, temperature, and wiring quality.
How long do solar energy panels last?
Most panels are designed for long life with warranties that cover many years. Regular maintenance and proper installation help maximize lifespan and performance.
Most panels last many years with proper maintenance and a good install.
Is roof integrity important before installing panels?
Yes. If the roof needs replacement soon, consider delaying installation or combining it with a roof replacement to avoid extra costs and rework.
Roof condition matters—address any needed roof work before installing panels.
What maintenance is required after installation?
Regularly clean panels, monitor performance, and inspect mounting hardware and wiring for signs of wear or damage. Schedule professional inspections if you notice output changes.
Keep panels clean, monitor output, and check mounts. Schedule professional checks if you notice changes.
Watch Video
Top Takeaways
- Choose the right solar energy panel type for your roof space.
- Plan permits, safety, and wiring before starting.
- Regularly monitor and clean panels to maintain output.
- Partner with a qualified installer for complex installations.