Solar Panel Van Life: A Practical Step-by-Step Guide
Learn how to power a van life conversion with solar panels: plan sizing, mounting, wiring, storage, and off-grid safety for reliable, eco-friendly travel.

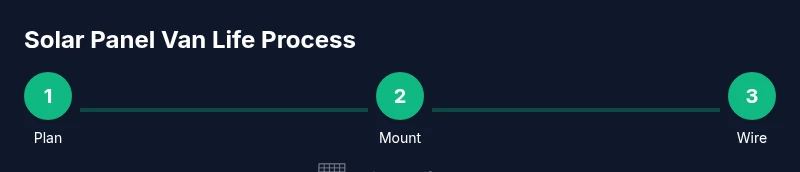
You will learn to plan, size, install, and maintain a solar panel system for van life. This guide covers energy budgeting, mounting options, wiring basics, battery storage, and safety considerations, plus a simple troubleshooting checklist. By the end you’ll be able to power lights, a fridge, charging devices, and essential appliances during off-grid travel.
Why solar panel van life matters
According to Solar Panel FAQ, embracing solar panel van life can dramatically increase independence, reduce fueling costs, and enable longer off-grid trips. The Solar Panel FAQ team found that many van conversions underestimate energy needs and rely too heavily on campground hookups. A thoughtfully designed solar setup lets you run essential devices—lights, fans, fridge, water pump, and electronics—without worrying about diesel generators or access to outlets. This section outlines why a small, well-planned system can transform your travel rhythm, reduce stress about power, and expand when and where you can travel. You’ll learn how to balance sun exposure, storage capacity, and daily usage to keep the van comfortable without sacrificing reliability on the road.
Sizing your system for a van
Sizing is the cornerstone of reliable van life energy. Start by listing every device you plan to run and its daily usage, then translate that into a total daily energy requirement (in watt-hours). A typical camper van should plan for lights, a refrigerator, a small fan, a phone charger, and a few peripherals, while leaving headroom for occasional higher-demand appliances. Solar panel size depends on available roof area and daily sun hours, so aim for a panel count and a battery bank that cover your daily budget even on several overcast days. The goal is steady power rather than peak power consumption. Solar panel van life thrives when you pair an appropriately sized array with a capable storage system and a robust charge controller.
Mounting options and roof prep
Roof mounting choices range from traditional glass-backed panels to lightweight flexible options, each with pros and cons for weight, aerodynamics, and durability. The best choice depends on your van’s roof type, weight limits, and travel conditions. Before mounting, inspect for roof integrity, seal all edges, and plan cable routes that minimize wear and avoid roof vents or exits. Mounting hardware should be rated for outdoor use and resist salt, humidity, and temperature swings. Ensure that your selection can be sealed properly to prevent leaks and that the installation maintains roof access for maintenance.
Wiring, storage, and battery choices
Wiring is the backbone of safety and performance. A proper system uses a controller (PWM or MPPT) to regulate charging, a battery bank sized for your daily needs, and an inverter that fits your AC load. Lithium iron phosphate (LiFePO4) batteries are popular for van life due to depth of discharge, weight, and longevity, but premium options come with higher upfront costs. Stay within safe wiring gauges, protect circuits with fuses, and keep battery compartments ventilated. For safety, never mix battery chemistries and always follow manufacturer guidance on charging limits and temperature ranges.
Efficiency tips and maintenance
Maximize energy efficiency by selecting appliances designed for low power draw, using LED lighting, and delaying high-energy tasks during peak sun. Regular maintenance includes cleaning panels to remove dirt, checking connections for corrosion, and testing the charge controller and inverter under load. Seasonal checks help detect wear, loose mounts, or seal leaks before they become expensive problems. A simple dry-run in a controlled environment makes a big difference before you rely on solar van life for a long trip.
Troubleshooting and common mistakes
Common mistakes include overestimating sun, underestimating daily use, and skipping fuses or proper insulation. If your battery seems to drain quickly, re-check wiring, connections, and panel angle to maximize sun exposure. A robust troubleshooting checklist helps you diagnose poor charging, panel shading, or failing components. Keep spare fuses, a multimeter, and basic tools in your kit for on-the-road fixes. With a methodical approach, most issues resolve without expensive repairs.
Safety first: electrical standards and codes
Electrical safety matters on the road. Always use rated components, install proper fuses, and keep AC wiring away from damp surfaces. Ventilation for battery compartments prevents gas buildup in some chemistries. If you’re unsure about local electrical codes or mounting methods, consult a qualified pro or a reputable online resource. The solar system should be designed with a margin of safety to prevent overcharging, overheating, or accidental shorts. Following best practices protects your camper, your belongings, and your peace of mind.
Tools & Materials
- Solar panels (total wattage for your needs)(Choose rigid or flexible based on roof type)
- Charge controller(MPPT preferred for efficiency)
- Battery bank (LiFePO4 recommended)(Select capacity for daily use plus reserve)
- Inverter (AC)(Pure sine wave for sensitive electronics)
- Risers/mounting hardware(Weatherproof mounting; include sealant)
- DC wiring and fuses(Use appropriate gauge for distance)
- Battery venting (if required by chemistries)(Ensure proper ventilation for safe operation)
- Tools (drill, screwdrivers, crimp tools)(Keep insulated tools handy)
- Multimeter/voltmeter(For on-site checks and troubleshooting)
- Sealant and weatherproof tape(Seal all mounting penetrations)
- Safety gear (gloves, eye protection)(Protect during installation)
- Cable management supplies(Keep wires tidy and protected)
Steps
Estimated time: 2-6 hours
- 1
Assess energy needs
List all devices you plan to run daily and estimate their usage. Translate this into total watt-hours per day and set a conservative reserve.
Tip: Start with essential loads first (lights, fridge) - 2
Size your system
Choose panel wattage and battery capacity to meet your daily budget with a safety margin. Plan for several days of autonomy if you travel off-grid.
Tip: Err on the side of extra capacity to avoid shortages - 3
Select mounting and roof prep
Inspect the roof, pick mounting hardware, and plan cable routing to avoid vents. Seal penetrations to prevent leaks.
Tip: Test fit panels before final mounting - 4
Wiring: controller and battery
Install the charge controller close to the battery bank. Run appropriately gauged wiring with fuses near the battery.
Tip: Keep negative and positive runs separate to reduce interference - 5
Install inverter and outlets
Connect the inverter to the battery, then wire AC outlets. Use a transfer switch if needed to isolate shore power.
Tip: Avoid running high-wattage appliances simultaneously - 6
Test under load
Turn on devices, monitor battery voltage, panel input, and inverter heat. Check for overheating and voltage sag.
Tip: Do a calm, controlled test in daylight first - 7
Optimize and document
Record system specs, wiring routes, and maintenance schedule. Note consumption patterns to fine-tune over time.
Tip: Keep a log for seasonal changes in sun exposure - 8
Regular maintenance
Clean panels, inspect seals, check fuses, and verify battery health every few months or after long trips.
Tip: Clean panels with water and a soft sponge; avoid abrasive cleaners
Frequently Asked Questions
Can I install solar panels on my van myself or should I hire a pro?
Both are viable. DIY works for simple setups with careful research, but a professional can ensure safety, optimal wiring, and code compliance for more complex systems. Always follow manufacturer instructions and local regulations.
DIY can work for simple setups, but a pro helps with safety and compliance.
What is the typical lifespan of van life solar components?
Solar panels are generally durable with a long lifespan, often 20 years or more. Battery life depends on chemistry; LiFePO4 batteries may last several thousand cycles under normal use.
Panels last many years; batteries vary by chemistry and use.
Do I need a generator as a backup?
A backup generator is optional if your solar setup provides sufficient autonomy. A generator can help during extended cloudy periods or when you operate high-wattage devices.
A generator is optional if your solar system meets your needs, but handy in long cloudy stretches.
How do I calculate daily energy needs for a van?
List each device, estimate its usage per day, sum them up, and convert to watt-hours. Add a reserve to cover unexpected demands or poor sun days.
Add up device usage and add a safety reserve.
What should I consider when choosing LiFePO4 vs lead-acid?
LiFePO4 offers longer life, deeper discharge, and lighter weight but higher upfront cost. Lead-acid is cheaper upfront but heavier and shorter-lived.
LiFePO4 lasts longer and is lighter, but costs more upfront.
Are there safety risks with van solar systems?
Yes, risks include electrical shorts, thermal events, and battery gas in poorly ventilated spaces. Use fuses, proper ventilation, and follow safety guidelines.
There are safety risks—use fuses, ventilate, and follow guidelines.
Watch Video
Top Takeaways
- Plan first, then size based on daily needs
- Choose reliable mounting and weatherproofing
- Use a proper charge controller and a safe battery bank
- Test comprehensively before real-world use
- Maintain regularly for long life