Solar Panel Charger for Cell Phone: A Practical How-To Guide
Learn to choose, set up, and safely use a solar panel charger for your cell phone. This step-by-step guide covers panel size, USB outputs, battery buffering, and real-world tips for off-grid charging and emergency readiness.

You will learn how to choose and use a solar panel charger for your cell phone, including selecting panel size, battery buffering, and USB output. This guide covers safety features, real-world charging times, and how to optimize sun exposure for reliable performance. By following these steps, you can charge a phone off-grid or during emergencies with confidence.
Why a solar panel charger for cell phone makes sense
For homeowners and travelers seeking resilience, a solar panel charger for cell phone offers a compact, quiet way to keep critical devices powered. In emergencies, a phone is often the only lifeline. A well-chosen setup can reduce dependence on grid power during outages, camping trips, or remote work. According to Solar Panel FAQ, a lightweight, pocket-friendly panel can power a phone when grid power is unavailable, especially when paired with a small buffer battery. This section explains why a portable solar charger is more than a gadget—it’s a practical, affordable power source for everyday life and worst-case scenarios.
Key takeaways: compact design, off-grid utility, and the value of pairing with buffering options.
How solar panel chargers work
Solar panel chargers rely on photovoltaic cells to convert sunlight into electrical energy. The device outputs a regulated 5V USB signal suitable for most cell phones, with built-in protection to prevent voltage spikes. A charger may include either an integrated regulator or a separate regulator module within a portable battery bank. The core concept is simple: sunlight → DC power → regulated USB output → phone battery. In practice, shade, panel orientation, and temperature can affect efficiency, so understanding these factors helps you optimize charging times and maintain battery health.
What to watch for: regulator type, USB-C vs USB-A compatibility, and weather sealing. If your panel lacks regulation, results can vary and may stress the battery.
How to choose the right solar panel charger
Choosing the right solar panel charger involves balancing portability, output, and reliability. Start with your typical use: short emergency charges vs. daily off-grid charging. Consider these criteria:
- Output and compatibility: Most phones charge from a 5V USB port. Look for panels that specify a regulated USB output and compatible cables (USB-C, Lightning, or Micro-USB).
- Power and efficiency: A small, foldable panel in the 5-20W range is common for pocket-ready devices. Higher-wattage panels charge faster but are less portable.
- Regulation and protection: Ensure the charger has built-in overcurrent and short-circuit protection and a stable output even as sunlight changes. -Durability and weatherproofing: IP rating or rugged construction helps if you’ll use the panel outdoors. Foldable designs are convenient, while rigid panels may be more robust for frequent use. -Storage and accessories: A carrying case, cables with the right connectors, and a buffering battery can reduce charging time during cloudy periods.
Pro tip: If you expect variable sun or longer outages, pair the panel with a small power bank to smooth the power curve and deliver consistent charging to your phone.
Safe charging practices and protection features
Safety is essential when charging devices with solar power. Tap into built-in protections and follow best practices to avoid battery wear or heat risk. Look for features like short-circuit protection, overvoltage protection, and reverse-current protection. Avoid direct contact between hot panels and skin, and never leave a charging setup unattended in extreme heat or moisture. Use a properly rated cable and keep connectors dry to prevent corrosion.
Always store equipment in a cool, dry place when not in use. If your panel becomes excessively hot during midday sun, shade it briefly and allow it to cool before resuming charging to protect both the phone and the charger.
Real-world usage: setup, timing, and optimization
In real-world scenarios, sun exposure and weather conditions drive performance. To maximize charging efficiency: orient the panel toward the sun, keep it clean, and angle it to capture reflected light when possible. If you’re using a buffering battery, place the bank between the panel and the phone so the phone experiences a steady 5V output. Cloud cover reduces output significantly, but a buffering battery can help deliver a more stable charge during intermittent sun.
Typical charging times vary with sun quality and device battery state. A phone with a near-empty battery in full sun may reach 50-70% in a couple of hours on a mid-range panel, while more modest panels might require longer. Use the phone’s charging indicator to monitor progress, and consider supplemental means of power when you anticipate extended cloudy periods.
Maintenance, care, and troubleshooting
Regular care extends the life of a solar panel charger. Clean the panel surface with a soft, damp cloth to remove dust, pollen, or dew. Inspect cables for wear and ensure seals remain intact after outdoor use. If charging seems slow or inconsistent, test with a known-good cable and angle, verify that the panel is clean, and check for shade or obstructions.
If you experience frequent drops in output, consider adding a small buffering battery or a regulator with higher efficiency. For troubleshooting, keep a simple setup: panel → regulator (if separate) → USB cable → phone. This helps isolate where the issue lies, whether in sunlight, wiring, or the device itself.
Tools & Materials
- Solar panel charger for cell phone(Compact 5-20W foldable panel recommended; ensure built-in protection and USB output)
- USB charging cable compatible with your phone(Choose USB-C for most new devices; Lightning for iPhones; Micro-USB for older models)
- USB power bank / buffering battery (optional)(Buffers power for cloudy days and improves stability)
- Multimeter or USB tester (optional)(For checking voltage and current during setup)
- Adjustable stand or mount(Helps track sun and reduces shade)
- Waterproof pouch or protective case(Keeps connectors dry during outdoor use)
Steps
Estimated time: 60-90 minutes
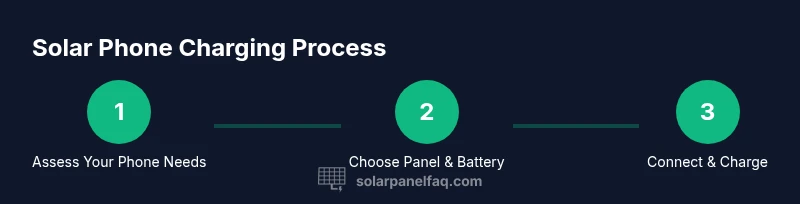
- 1
Assess device charging needs
Identify your phone model, cable type, and typical daily charging goals. Determine if you prefer a simple direct-panel setup or a buffered system with an energy bank for reliability.
Tip: Write down your daily usage pattern to choose the right panel and buffer capacity. - 2
Gather essential gear
Collect the solar panel charger, the appropriate USB cable, any buffering battery, and protective accessories. Ensure all components are compatible and that cables are free of damage.
Tip: Check cables for wear and replace if frayed to avoid charging interruptions. - 3
Position the panel for optimal sun
Place the panel in direct sunlight with a clear path to the sky. If possible, use an adjustable mount to maximize exposure as the sun moves.
Tip: Aim for the panel to face true south in the northern hemisphere or true north in the southern hemisphere. - 4
Connect the charger to the device
If using a buffering bank, connect the panel to the bank first, then connect the bank to the phone. Use the correct USB cable and ensure a snug connection.
Tip: Avoid pulling cables; steady connections reduce voltage drop. - 5
Monitor charging and safety
Watch the phone indicator to verify charging rate. Keep the panel cool and dry, and unplug if you notice overheating or a burning smell.
Tip: If output drops, reorient the panel or remove obstructions. - 6
Extend capability for cloudy days
If outcomes are poor in shade, connect a buffering battery bank to smooth power delivery. Consider storing the battery in a cool, dry place.
Tip: A buffering bank can dramatically improve average charging speed in variable weather. - 7
Store and maintain equipment
After use, cool components, wipe the panel, and store cables neatly in a case. Check for wear before storage and keep connectors dry.
Tip: Regular maintenance reduces failure risk when you need power most.
Frequently Asked Questions
Can I charge my phone directly from a solar panel without a regulator?
Direct charging from an unregulated panel can damage your phone’s battery due to voltage fluctuations. Always use a panel with built-in regulation or connect through a regulator or buffering battery.
Avoid direct charging from an unregulated panel; use regulation or a buffering battery to protect your phone.
What size solar panel do I need for a phone?
Most phones use standard USB charging at 5 volts. A small 5-20W panel is typically sufficient for emergency or regular off-grid charging, depending on sun and battery health.
A small panel, around 5 to 20 watts, is usually enough for most phones under good sun.
How long does it take to charge a phone with solar power?
Under optimal sun, a phone may reach 50-70% in a couple of hours. Cloudy weather or lower-wattage panels extend charging times considerably.
In bright sun, expect a couple of hours for a good charge; cloudy days slow things down.
Is a battery pack necessary for solar charging?
Not strictly, but a buffering battery smooths power delivery and can improve performance during variable sunlight or when you need multiple charges.
A battery bank is helpful for steadier charging when sun isn’t constant.
Are solar phone chargers safe to leave outdoors?
Yes, if the unit is weatherproof and used within its rating. Avoid exposure to water and extreme heat, and store when not in use.
Yes, with proper weatherproofing and safe storage.
Watch Video
Top Takeaways
- Choose a regulator-equipped panel for safe USB charging
- Pair with a buffering bank for reliability in variable sun
- Keep cables protected and dry for longevity
- Optimize sun angle to speed up charging
- Use a dedicated case to protect gear in outdoor use