Solar Panel Camping Charger: The Complete Guide
Learn how to choose, size, and use a solar panel camping charger for off-grid trips. This step-by-step guide covers setup, safety, maintenance, and real-world scenarios to keep your devices powered outdoors.

You will learn how to select, size, and deploy a solar panel camping charger for off-grid trips, including how to estimate energy needs, match panels to devices, and safely manage storage and charging in outdoor environments. This quick guide also highlights practical setup tips and maintenance to keep your gear powered in the field.
Understanding a solar panel camping charger
A solar panel camping charger is a portable solution that converts sunlight into electrical energy to power or recharge devices while you’re away from the grid. Most systems combine a solar panel, a charge controller, and a storage option such as a power bank or small battery pack. Some units come with built-in batteries, while others are modular, requiring a separate external power source. For outdoor enthusiasts, the main advantages are quiet operation, replenishable energy, and the ability to stay connected in remote locations. According to Solar Panel FAQ, well-designed camping chargers balance portability with output, ensuring you can run essential devices like phones, GPS units, and small lights without dragging heavy equipment across trails. When you search for a “solar panel camping charger,” you’ll see a spectrum from compact 10–20W models to larger 60–100W kits. The best choice depends on your device load, sun exposure, and how long you’ll be away from power.
In practice, a solar panel camping charger is not a single gadget but a tiny energy system. It typically includes a panel (or panels), a controller to regulate voltage and current, and a storage option to keep energy available after sunset. The sun’s angle, weather, and shade all affect performance, so planning ahead is essential. The goal is reliability: enough wattage to charge your most-used devices without overburdening your pack. This mindfulness helps you avoid undercharging critical gear and ensures you’re ready for longer trips when solar efficiency varies with season and terrain.
For homeowners considering portable solutions, a camping charger’s flexibility is a key selling point. It lets you experiment with off-grid principles in a low-risk way, learning how different panel sizes, battery capacities, and controller types interact in real-world conditions. A practical starting point is to map out your typical camp loads, estimate daily energy needs, and choose a setup that comfortably exceeds that baseline. The Solar Panel FAQ team emphasizes that the right camping charger should feel like a natural extension of your kit, not a burden to carry or complicated to use.
noteForMarkdownContentOnlyForAIDisplayUsingMarkdownInBodyBlocks
Tools & Materials
- Portable solar panel (folding or rigid)(60W–120W panel is common for camping use; consider foldable models for packing efficiency)
- Battery storage (power bank or portable lithium battery)(Prefer LiFePO4 or high-quality lithium with BMS for safety and longevity)
- Charge controller (or built-in MPPT in panel)(MPPT improves efficiency, especially in variable sun)
- USB-C and USB-A cables with compatible connectors(Ensure cables match your devices’ charging ports)
- DC adapters or car charger (optional)(Useful for charging laptops or devices with DC input)
- Mounting hardware or stakes(Keeps panel steady in wind; ideal for uneven ground)
- Dry storage bag or protective case(Protects gear from dust and moisture)
Steps
Estimated time: 60-90 minutes
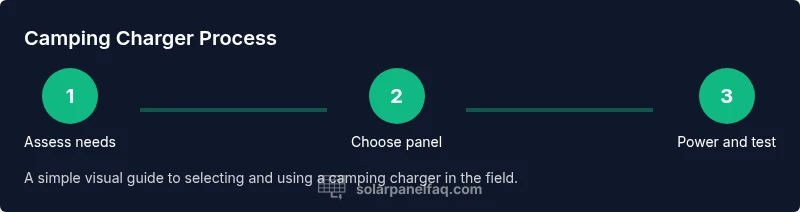
- 1
Assess your device charging needs
List all devices you plan to charge on trips (phones, GPS, headlamps, cameras). Estimate daily energy for each and total it to set a target charging output. This helps you pick a solar panel camping charger with enough capacity without overpacking.
Tip: Start with your most energy-hungry device and build a reasonable charge plan around it. - 2
Choose panel type and storage strategy
Decide between a foldable or rigid panel and whether to include built-in storage or an external battery. MPPT controllers tend to yield better performance in varying sun; a built-in battery keeps everything compact.
Tip: MPPT controllers improve real-world charging efficiency, especially on cloudy days. - 3
Pair panel with a storage solution
If you don’t have a built-in battery, select a portable power bank or small battery pack. Ensure the battery’s voltage matches the controller output and is capable of delivering USB-C or USB-A charging as needed.
Tip: Check battery discharge rates to avoid bottlenecks when charging multiple devices. - 4
Connect the system components
Connect the panel to the charge controller, then link the battery storage, and finally attach device chargers. Keep cables tidy to reduce wear and avoid tangles during setup.
Tip: Use waterproof connectors if you’ll be exposed to dew or rain. - 5
Position the panel for optimal sun
Place the panel in direct sunlight with minimal shade. Tilt to maximize sun exposure based on your location and season. Small adjustments can significantly boost charging rates during peak sun hours.
Tip: Aim for a slight tilt toward the sun’s path for best results. - 6
Start charging and monitor indicators
Turn on charging and monitor indicators on the controller and battery. Check for consistent current flow and watch for any overheating or abnormal voltage changes.
Tip: If you see rapid heat buildup, shade the panel temporarily to cool down. - 7
Charge devices safely
Connect devices to the output ports and avoid exceeding the battery’s safe discharge rate. Use protected cables and keep a close eye on heat when charging laptops.
Tip: Avoid long, continuous charging in extreme heat for battery longevity. - 8
Pack down and protect your gear
After use, disconnect in reverse order, fold or pack the panel securely, and store the battery in a dry place away from direct sunlight.
Tip: Dry exposure can damage internals; ensure moisture is kept out during transit. - 9
Document usage and plan ahead
Note how long charging took and energy delivered. Use this data to fine-tune future trips and ensure you meet daily needs more efficiently.
Tip: Keeping a simple log helps you optimize setup for different itineraries. - 10
Review safety and maintenance
Regularly inspect cables for wear, clean dust from panels, and check seals on weatherproof enclosures. Perform periodic safety checks before each trip.
Tip: Periodic checks prevent unexpected breakdowns in the field.
Frequently Asked Questions
What is a solar panel camping charger?
A solar panel camping charger is a portable system that converts sunlight into electricity to charge devices while outdoors. It combines a panel, a controller, and usually a storage option to provide power away from the grid.
A portable solar setup that charges your devices off-grid.
What wattage do I need for camping?
Wattage depends on your device load. For light use (phones, GPS, light), a modest panel with a storage battery is often sufficient; for laptops or cameras, a larger setup may be preferred. Start with a plan based on your daily energy needs.
Start with your must-charge devices and scale up from there.
Can I charge while using devices?
Yes, many camping chargers support pass-through charging or charging from a battery while you use devices. This lets you power devices and store energy simultaneously, but check the controller’s specifications to avoid overloading.
Yes, but check capacity to avoid overloading.
Are solar chargers weatherproof?
Most camping chargers are designed to be weather-resistant, but performance can drop in shade, heavy clouds, or rain. Look for IP ratings and proper sealing of the battery and controller to ensure resilience.
Most are weather-resistant, but check IP ratings for protection.
How long does it take to charge a phone?
Charge time depends on panel size, sun strength, and the device. A typical phone may take longer on a cloudy day, but a well-matched system should reach a full or near-full charge by midday on clear days.
Charge time varies with sun and panel, expect longer on cloudy days.
What maintenance is required?
Regularly inspect cables, clean dust from the panel surface, and store batteries in a cool, dry place. Check seals and connectors periodically to prevent moisture intrusion.
Keep it clean, dry, and checked for wear.
Watch Video
Top Takeaways
- Identify your energy needs before buying.
- Choose MPPT for better field performance.
- Match panel and battery to your devices.
- Protect gear from moisture and heat.
- Monitor and log charging for future trips.