How to Use a Mini Solar Panel: A Practical Guide
Learn how to safely use a mini solar panel to power small devices, charge batteries, and understand essential setup, wiring, and maintenance.

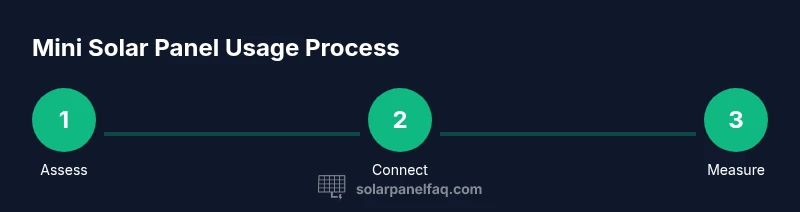
How to use a mini solar panel is a practical, step-by-step process for powering small devices and charging batteries with daylight. Start by matching the panel’s voltage and current to your load, then connect through a diode or regulator for safe operation. For storage, pair with a battery and a low-power regulator; never bypass protection.
What is a mini solar panel and why it matters
A mini solar panel is a compact photovoltaic device designed to convert sunlight into electrical energy at a low, usable voltage. For homeowners, its appeal lies in low cost, quiet operation, and the ability to charge small devices without grid power. Mini panels are typically sold with a label showing the nominal voltage (often in the 3-6V range) and a current rating. They work best in direct sun, but can produce energy in diffused light with reduced output. They are not a full home energy solution; rather, they are ideal for experiments, charging USB devices, building DIY power banks, or keeping a battery topped up for emergency use.
According to Solar Panel FAQ, mini solar panels offer a simple entry point to off-grid power for small devices. Understanding the basics helps you select the right panel, connect it safely, and avoid common pitfalls like overvoltage, short circuits, or relying on shade-prone roofs. First, identify your target device and the panel’s ratings and always regard the panel as a supplement, not a primary power source.
Electrical basics you should know
To get the most from a mini solar panel, you need a grounding understanding of voltage, current, and power. The panel creates a voltage when exposed to sunlight, and the current it can deliver depends on sun intensity and panel size. The product label shows the nominal voltage and maximum current; aim for a device that matches or is slightly under that voltage to avoid damage. When you connect a load, you’ll be operating in the wattage range that depends on light conditions—which is why many hobbyists add a regulator or small charge controller for stable output. A simple approach is to use a diode to prevent backflow when the panel is shaded and a regulator to convert the voltage to a USB-friendly 5V for charging phones or small gadgets. If you intend to store energy in a battery, a proper charge controller becomes essential to protect the battery from overcharge and to manage voltage and current into the storage device.
Safety considerations and protective components
Safety is essential when working with any solar setup. Always work on a non-conductive surface, keep connections dry, and avoid exposing exposed wiring to sharp edges. Do not connect a mini solar panel directly to mains-powered devices or high-current loads. Use protective components such as a blocking diode to prevent reverse current in low-light conditions, and prefer a regulator or charge controller when storing energy in a battery. Solar Panel FAQ emphasizes avoiding bypassing protective parts and keeping the panel in a weather-resistant enclosure when used outdoors. If you anticipate rain or heavy dew, store or cover the panel and disconnect the load to prevent corrosion and electrical faults.
Wiring to loads and storage: step-by-step overview
Connecting a mini solar panel to a load or storage system involves several deliberate choices about direction, protection, and voltage regulation. Start by choosing a safe connector method (diode-protected wiring or a proper DC connector). Then integrate a regulator for USB devices or a small charge controller if you plan to charge a battery. Always verify polarity before connecting; reversing leads can damage both panel and device. Keep the connections tight and insulated, and test the circuit with a multimeter under sun before connecting a live device. For storage, use a battery and ensure the controller limits the charging current to the battery’s safe level. This approach minimizes risk and extends the life of both the panel and the storage device.
Real-world use cases: camping, toys, and small devices
Practically, a mini solar panel excels at charging a small USB power bank, keeping a bike light topped up, or powering a tiny garden sensor. Campers often pair a small panel with a regulator to deliver consistent 5V USB power to phones or headlamps during daylight hours. For hobby projects, a mini panel can trickle-charge a 12V battery for a portable speaker or weather station; a diode and regulator keep voltage within safe limits. For kids’ toys, a low-voltage panel can run LED strings or small fans with careful current limiting. Always keep expectations reasonable—these panels struggle with heavy loads or rapid changes in cloud cover and shade.
Maintenance, troubleshooting, and common mistakes
Regular inspection is simple and effective: check for corrosion at connectors, clean dust from the panel surface, and ensure mounting hardware remains secure. Common mistakes include connecting without a regulator to a battery, ignoring polarity, or exposing the panel to water without protection. If output seems low, reorient toward the sun, check for shading, and test open-circuit voltage with a multimeter. Troubleshooting also means verifying the load’s voltage tolerance and confirming that protective diodes or regulators are functioning. Following these practices helps sustain performance and prolong the life of your mini solar panel.
Tools & Materials
- Mini solar panel (3-6V nominal)(Ensure the panel’s rating matches your intended device or battery system.)
- Blocking diode or ideal diode(Prevents reverse current when panel is shaded.)
- USB regulator or DC-DC converter(Converts panel output to USB-friendly 5V or other needed voltage.)
- Charge controller (optional for battery storage)(Needed to safely charge and protect a storage battery.)
- Wiring (14-22 AWG) with insulated connectors(Use safe, labeled connectors; avoid loose or frayed wires.)
- Multimeter(For measuring open-circuit voltage and loaded current.)
- Load or battery to connect to(Your target device or storage battery.)
- Non-conductive mounting surface(Helpful for stable positioning outdoors.)
Steps
Estimated time: 45-60 minutes
- 1
Identify goals and panel ratings
Define what you want to power and confirm the panel’s voltage and current ratings align with that load. This helps you select appropriate regulation and storage options. If you plan to store energy, plan for a battery and charge-control approach.
Tip: Always verify device voltage against panel output before connecting. - 2
Gather components and safety gear
Lay out all required items on a non-conductive surface. Check wires for insulation damage and prepare your testing tools. Have protective gloves handy when handling exposed connectors.
Tip: Organize parts to minimize tangled cables and accidental shorts. - 3
Position the panel for optimal sun
Place the panel in direct sun, oriented to maximize exposure through the middle of the day. If needed, adjust the angle to maintain steady output as the sun moves. Borderline shade can dramatically reduce current.
Tip: Aim for a 30–45 degree tilt toward the sun for most setups. - 4
Make in-line connections with protection
Connect the diode in series with the positive lead, then attach the regulator or charge controller as appropriate. Ensure correct polarity and secure connections to avoid arcing.
Tip: Double-check polarity before applying power to avoid damaging devices. - 5
Test with a load and measure output
With the load connected, measure the panel’s voltage and the current being delivered. Check for stable output and ensure the regulator is not overheating. Adjust connections if readings vary widely.
Tip: If voltage is collapsing under load, reduce the load or improve sun exposure. - 6
Monitor, maintain, and adapt
Periodically inspect connections, keep surfaces clean, and replace any damaged components. Monitor performance across sun conditions and weather changes, adapting placement as needed.
Tip: Seasonal changes can affect output; re-evaluate panel angle and placement.
Frequently Asked Questions
What is a mini solar panel?
A mini solar panel is a small photovoltaic device that converts sunlight into low-voltage electricity. It’s designed for charging tiny devices or batteries and serves as an educational, low-cost entry point into solar power. Output varies with sun, panel size, and wiring. It is not a full home power solution.
A mini solar panel is a small solar cell kit that makes low-voltage electricity from sunlight for charging tiny devices; it’s great for learning and simple tasks.
Can I charge USB devices directly from a mini solar panel?
You can charge USB devices if you include a regulator that steps the panel’s voltage to a stable USB level (typically 5V). Directly connecting a panel to a USB device can damage it due to fluctuating voltage. A regulator or dedicated USB charger ensures safe, consistent power.
Yes, but use a regulator to keep the USB voltage steady and protect your device.
Do I need a charge controller?
A charge controller is recommended if you plan to store energy in a battery or want to limit charging current. It protects the battery from overcharge and helps manage safe voltage levels. For simple, non-storage use, you can operate directly through a regulated path to a small load.
If you’re storing energy in a battery, use a charge controller; otherwise, a regulator may suffice.
What affects the energy output of a mini solar panel?
Output depends on sun intensity, panel orientation, temperature, and shading. The same panel can produce drastically different current throughout the day or between sunny and cloudy days. Check the panel’s rating and test under your typical conditions to estimate real-world performance.
Sun exposure and shading have big effects on how much power you’ll get.
Is it safe to use indoors with lights on?
Mini solar panels are designed for outdoor sun exposure, but they can operate indoors if there is sufficient ambient light. Output will be minimal compared to direct sunlight. Avoid relying on indoor lighting as a primary energy source and ensure safe dry conditions.
They work, but indoors the power is usually small; better outdoors in sun.
What maintenance is required for a mini solar panel?
Keep the panel clean, free of dust and debris, and check connectors for corrosion. Inspect wires for wear, and ensure waterproof housings if used outdoors. Regular testing with a multimeter helps catch aging components early.
Keep it clean, check connections, and test the output periodically.
Watch Video
Top Takeaways
- Match panel voltage to the load you intend to power.
- Use protective diodes and a regulator for safe operation.
- Test outputs under sun conditions to gauge real-world performance.
- Inspect and maintain connectors and panel surface regularly.