Micro Solar Panel: A Practical Guide for Homeowners
Discover how micro solar panels work, where to use them, and a step-by-step setup for safe, efficient charging of small devices.

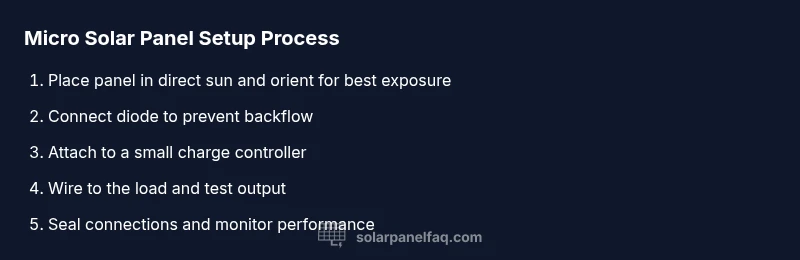
A micro solar panel is a small, portable photovoltaic array designed to charge tiny devices and power low-watt tasks. To use one safely, place it in direct sunlight, pair it with a diode and a small charge controller, and connect only compatible loads. It's ideal for charging phones, cameras, and microcontrollers in off-grid or emergency scenarios.
What is a micro solar panel?
A micro solar panel is a compact photovoltaic array designed for portability and lightweight charging. Its small size makes it suitable for handheld devices, camping gear, or emergency kits where a full-sized solar array would be overkill. In contrast to larger rooftop panels, micro panels deliver modest power but excel in versatility and convenience. The Solar Panel FAQ team notes that these panels are especially useful for hobbyists, students, and homeowners who want hands-on experience with solar energy without committing to a full installation. When you handle a micro solar panel, you’re dealing with a tiny energy harvesting device that converts sunlight into electrical energy, then channels that energy to a load via simple protective components. The main advantage is obvious: portability and immediacy. The caveat is that the output is limited, so it’s not a substitute for home-scale power but rather a practical, educational, or pocket-sized energy source.
Quick context for homeowners and beginners
Micro solar panels are often flexible or rigid, comprised of small cells wired in series or parallel. They can be used to charge USB-powered devices, small batteries, or to run low-energy sensors in a garden or shed. Because of their size, you’ll often pair them with a diode to prevent backflow and with a tiny charge controller to regulate voltage and prevent device damage. Across real-world use cases, many users value the ability to deploy these panels in unexpected places—on backpacks, tents, or small solar-powered gadgets—without the need for a fixed mounting system.
Tools & Materials
- micro solar panel(Choose a compact, lightweight panel suitable for portable charging.)
- diode (to prevent backflow)(Schottky diode recommended for low forward voltage and quick response.)
- small charge controller(A basic PWM or small MPPT controller sized for low current.)
- DC connectors/adapters(Ensure connectors match the panel terminals and the controller input.)
- alligator clips or patch cables(Useful for quick testing and temporary connections.)
- multimeter or USB voltmeter(Optional but helpful to verify output before connecting a device.)
- weatherproof enclosure or protective housing(Optional for outdoor use to protect connections from moisture.)
Steps
Estimated time: 45-60 minutes
- 1
Define charging goal
Identify the device or battery you want to charge with the micro solar panel. Clarify expected load and runtime to select an appropriately sized panel and controller.
Tip: Start with a simple load, such as a USB-powered battery pack, to validate the setup. - 2
Gather hardware
Collect the panel, diode, controller, connectors, and testing tools. Check compatibility to avoid mismatched voltages or connectors.
Tip: Lay out all parts on a non-conductive surface before starting. - 3
Position the panel for sun
Place the panel in direct sun with a clear view to the sky. Angle and orientation affect output; aim toward the sun during peak hours.
Tip: Avoid shading from trees or nearby structures that move during the day. - 4
Make safe electrical connections
Connect the diode in series with the panel, then connect to the charge controller input. Finally, wire the controller to your load or battery.
Tip: Double-check polarity before applying any load to prevent damage. - 5
Test output
Power on and inspect the controller’s display or indicators. Use a multimeter to verify voltages are within safe charging ranges for your device.
Tip: If readings look off, disconnect and re-check connections and polarities. - 6
Monitor and store
Regularly inspect for wear, dust, or corrosion. When not in use, store the panel in a dry, shaded area to prolong life.
Tip: Keep connectors dry and dry-run tests to catch loose wiring before actual use.
Frequently Asked Questions
Can a micro solar panel charge a phone?
Yes, with proper protection and a suitable controller, a micro solar panel can charge a phone or small device. You’ll want a battery or store-and-release approach to avoid stressing the device during charging.
Yes, you can charge a phone with a micro solar panel if you use a controller and appropriate protection.
Do micro solar panels work in cloudy weather?
Cloudy conditions reduce output, but micro solar panels can still generate energy when light is present. Expect lower, inconsistent charging rates and plan accordingly.
They work, but with reduced output on cloudy days; expect slower charging.
Are micro solar panels waterproof?
Many micro panels are designed for light moisture exposure, but you should not rely on them in heavy rain. Use protective housing for outdoor use.
Some are weather resistant, but protect from heavy rain.
Can I connect multiple micro panels together?
Yes, you can connect panels in parallel to increase current, or in series to increase voltage, but you must match controller capacity and ensure safe wiring.
You can combine panels, but ensure your controller handles the combined output.
How long will a micro solar panel last?
Lifespan depends on exposure and build quality. Regular maintenance, dust removal, and proper storage extend usefulness and performance.
With proper care, micro solar panels can last many seasons; keep them clean and dry.
Watch Video
Top Takeaways
- Define your charging goal before buying.
- Always include a diode and a controller.
- Direct sun and correct orientation maximize output.
- Regular checks extend panel lifespan.