How to Use a Portable Solar Panel: A Practical Guide
Learn step-by-step how to safely set up, connect, and monitor a portable solar panel for camping, emergencies, or RV use. Includes safety tips, wiring basics, and real-world setup examples.

This guide helps you safely set up, orient, connect, and monitor a portable solar panel to charge batteries and run small devices. You’ll learn wattage basics, connector types, when a charge controller is needed, and how to plan for sun, shade, and weather. This practical approach makes portable solar power usable anywhere you go.
What is a portable solar panel and when to use it
A portable solar panel is a compact, often foldable device that converts sunlight into usable electrical energy. It is ideal for camping, RV trips, boating, remote work sites, or emergency backup power. When people ask how do you use a portable solar panel in the field, the answer is to position it to receive direct sun, connect it to a battery or load with the correct voltage, and monitor performance. Keep its rating in mind: panels range from about 5W to 200W, which determines how much energy you can harvest and how quickly you can recharge devices or batteries. For homeowners, this means setting expectations about charge time and the size of energy storage you need. In this guide, you’ll learn practical steps to make portable solar power a reliable ally in daily life.
Safety first: electrical and sun safety guidelines
Safety is the foundation of successful portable solar use. Always dry your hands before handling connectors, avoid installing panels where they can be struck by water, and never touch exposed wires. Use only certified connectors and a compatible charge controller when charging a battery. If you’re in direct sunlight, wear sunglasses and take breaks to avoid heat fatigue. Keep kids and pets away from cables and panels. A mindful setup reduces the risk of shocks, short circuits, or accidental battery damage, ensuring you get the most out of your portable solar investment.
How portable panels convert sunlight: basics of PV cells and power output
Photovoltaic (PV) cells inside a solar panel convert photons from sunlight into electricity. The panel’s power rating, expressed in watts (W), indicates how much energy it can generate under ideal sun. The output is affected by sunlight intensity, panel temperature, shading, and wiring efficiency. Voltage remains relatively stable, while current varies with sun exposure. In practical terms, a 50W panel will produce less than 50W under cloudy skies or at dawn/dusk. Understanding these basics helps you predict charging times and plan battery storage accordingly.
Choosing units and connectors: wattage, voltage, and compatibility
Portable panels range from a few watts for USB-powered devices to several dozen watts for charging small batteries. When selecting a panel, match its output to your battery or device voltage (commonly 12V for car-sized batteries or 5V/9V for USB devices). Look for connectors like MC4 for panel-to-panel or panel-to-controller connections, and USB ports on newer models for direct charging of small devices. A quality charge controller (PWM or MPPT) improves efficiency, especially in variable sunlight or when charging larger batteries.
Setting up for a campsite, RV, or home backup
Choose a sunny location with a clear view of the sky and minimal shading. Angle the panel toward the sun by adjusting the tilt to roughly latitude plus 10-15 degrees for peak daily output. If you’re on uneven ground, use a portable stand or a stable surface to prevent movement and damage. Keep cables neatly organized to avoid tripping hazards, and use a protective cover when transporting. For RV or campsite use, align panels to a stable frame and avoid bending the cable unnecessarily.
Connecting to batteries and devices safely
Use a charge controller between the panel and the battery to prevent overcharging and to optimize charging efficiency. Verify polarity before connecting—reversing leads can damage equipment. If you’re charging devices directly, ensure the device voltage matches the panel’s output and use appropriate adapters. Never connect a high-wattage device directly to a small panel without a controller or energy storage, as this can cause voltage spikes and equipment damage.
Monitoring output: how to read a solar panel's performance
Track the panel’s performance with a multimeter or a dedicated solar monitor. Check open-circuit voltage (VOC) and operating voltage (Vmp) to assess whether the panel is functioning within expected ranges. Record current (amps) and calculate approximate wattage (W = V × A) to estimate charging progress. Be mindful that wind, temperature, and partial shading can cause fluctuations—document changes across different times of day and weather conditions.
Maintenance, storage, and troubleshooting
Keep panels clean and free of dust, bird droppings, and tree debris. Clean with a soft cloth and water; avoid abrasive cleaners. Store panels in a dry, cool place away from direct sunlight to prolong lifespan. If output is lower than expected, check for shade, dirty surfaces, loose connections, or damaged cables. Inspect the battery health and ensure the charge controller is functioning properly. Regular checks prevent surprises during critical times.
Real-world scenarios and planning your system
For a weekend camping trip with phones, lights, and a small cooler, a 50W panel paired with a 12V battery and a PWM controller often suffices. For longer trips or higher power needs, consider a higher wattage panel or modular setup that scales with sun hours and battery capacity. Always plan for cloudy days by estimating required storage and having backup charging options, such as a power bank. This proactive planning makes portable solar a reliable energy source.
Tools & Materials
- Portable solar panel (foldable or rigid)(Rated wattage 5–200W depending on model)
- Charge controller (PWM or MPPT)(Protects battery from overcharging; MPPT offers higher efficiency)
- 12V battery or power bank(Storage buffer for charging devices and higher-demand loads)
- MC4 cables and connectors(Standard solar connectors for panel-to-controller connections)
- Alligator clips or battery clamps(Useful for RV or car hookups and quick tests)
- Multimeter or solar monitor(For measuring voltage, current, and sanity-checking output)
- USB-C/USB-A adapter cable(Direct charging for small devices when panel supports USB output)
- Sturdy stand or incline mount(Optimizes sun exposure and reduces panel movement)
- Weatherproof bag or protective cover(Protects panel during transport and storage)
Steps
Estimated time: 60-90 minutes for full setup, testing, and basic troubleshooting
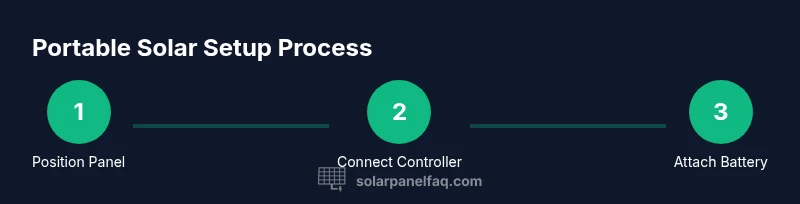
- 1
Unfold or set up the panel
Open a foldable panel or place the rigid panel on a stable surface. Ensure the front surface is clean and free of obstructions that could block sunlight. This initial setup prepares the panel for safe handling and optimal sun exposure.
Tip: Check that the panel is fully deployed and not touching anything that could shade the cells. - 2
Position toward the sun
Orient the panel to face the sun, adjusting tilt to maximize exposure. A tilt angle of latitude plus 10-15 degrees often yields the best average output across the day. Reorient as the sun moves for peak performance.
Tip: If you’ll be stationary for a while, secure the panel to prevent movement from wind. - 3
Connect to the charge controller
Attach the panel’s output leads to the input terminals of the charge controller, observing correct polarity. The controller manages charging to the battery and protects both components from damage.
Tip: Double-check polarity and secure connections before exposing to sun. - 4
Connect to the battery or storage
Link the controller’s battery output to the storage battery or power bank. If you’re using a battery, ensure it matches the system’s voltage. Avoid connecting directly to devices with the controller disengaged.
Tip: Keep battery terminals clean and dry to prevent corrosion. - 5
Verify output and safety
Turn on the system and measure voltage at the battery terminals with a multimeter. Confirm the values align with the battery’s specs and the controller’s display. Look for steady readings without rapid spikes.
Tip: If readings are erratic, recheck connections and eliminate shading. - 6
Charge devices or load
Charge USB devices directly if your panel provides USB output, or draw from the battery to power equipment via an appropriate inverter or DC load. Avoid overloading the panel beyond its rating.
Tip: Prefer charging smaller devices first to evaluate system stability. - 7
Monitor performance in real conditions
Observe how weather, temperature, and shadows affect output. Maintain logs if you’re optimizing a larger system. This information helps you predict daily energy availability.
Tip: Note times of day with the best performance for future trips. - 8
Pack up safely
Disconnect devices, store cables neatly, and fold or secure the panel for transport. Cool, dry storage helps extend panel lifespan and keeps connectors in good condition.
Tip: Avoid stacking heavy items on top of the panel. - 9
Troubleshoot common issues
If output is low, check for shading, dirty surfaces, loose connections, or a degraded battery. Replace damaged components and consult the manufacturer’s safety guidelines before use.
Tip: Start with simple checks: shade, then cleanliness, then connections.
Frequently Asked Questions
What is a portable solar panel and what can it power?
A portable solar panel is a compact device that converts sunlight into electricity. It can power small devices and charge batteries; larger loads require higher wattage or additional panels. Always match output to your device’s voltage and current needs.
Portable solar panels convert sunlight into electricity and are great for charging phones, lights, and small devices, especially when paired with a battery. For bigger loads, you’ll need a larger setup.
Do portable solar panels work in cloudy weather?
Yes, but output drops significantly. Light visibility still yields some energy, and using a battery can help stabilize supply during lower sun.
They work in cloudy conditions but produce less energy; a battery helps store what you generate for later use.
Should I use a charge controller with a portable solar panel?
Yes. A charge controller protects your battery from overcharging and optimizes charging, especially with MPPT models.
Yes, use a charge controller to protect the battery and improve charging efficiency.
Can I charge devices directly from a portable panel?
Some panels offer USB outputs for direct charging of small devices. Ensure the output matches the device voltage and current requirements.
Some panels can charge devices directly via USB, but check voltage and current first.
How should I store a portable solar panel when not in use?
Store in a dry, cool place and avoid heavy pressure on foldable models. Clean surfaces before storage and protect connectors.
Store in a dry place, keep it clean, and protect the connectors when not in use.
Is it safe to leave a charging system unattended?
Do not leave charging systems unattended where there’s risk of moisture or flammable materials. Disconnect when charging is complete.
No; always monitor charging and disconnect when finished.
Watch Video
Top Takeaways
- Understand panel wattage and system needs before purchase
- Always use a charge controller when charging a battery
- Position and angle for sun exposure to maximize output
- Protect connections and keep equipment dry
- Monitor performance and adjust setup for conditions