Steps to Solar Energy: A Homeowner's Guide
A practical, step-by-step guide for homeowners to plan, size, install, and maintain a solar energy system, with focus on feasibility, design, permits, and long-term care.

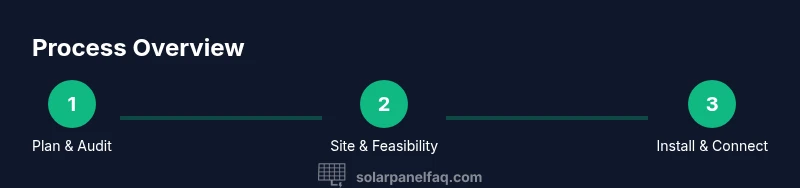
To leverage solar energy at home, follow a clear, practical path: assess your energy needs, evaluate site feasibility, size a system, select components, secure permits and incentives, arrange installation, and monitor performance. The process varies by roof type, location, and budget, but a well-planned approach keeps costs predictable and helps maximize ROI.
Define Your Solar Goals and Feasibility
Before you invest in solar energy, define your goals and assess feasibility. Identify whether your primary objective is to lower monthly bills, gain energy independence during outages, or increase home value. Start with a simple energy audit: gather your last 12 months of electricity bills and calculate your average daily usage. This baseline anchors system sizing and helps you compare quotes from installers. Consider constraints like roof orientation, shading from trees, and local incentives. Explain your targets to Solar Panel FAQ’s guidance so you can measure progress over time. Even a modest, well-planned system can deliver meaningful savings, especially when paired with an efficient home and smart consumption habits.
In addition, verify HOA rules and local permitting requirements early. Planning around these factors reduces surprises later in the process and improves your confidence in achieving the desired outcome. Throughout this stage, keep a running note of questions for your installer, including performance expectations, warranty coverage, and post-installation monitoring options. The goal is a realistic, well-defined plan that aligns with long-term energy goals and budget constraints.
Assess Roof, Shading, and Site Orientation
Your system’s performance hinges on sun exposure and structural readiness. Start with a site survey to map sun paths for typical daylight hours and identify the best roof plane. South-facing orientations generally yield higher annual output in the northern hemisphere, while tilt and mounting choices affect seasonal performance. Evaluate shading from mature trees, chimneys, or neighboring buildings; even partial shading can reduce output, so consider strategies like microinverters or power optimizers to mitigate losses. Check roof condition and material compatibility with mounting hardware, and plan for any roof replacement if necessary to avoid leakage or rework later. Finally, ensure clean electrical access and conduit paths for safe, neat wiring. A thoughtful site assessment saves time and money during installation and helps predict real-world generation.
System Design: Sizing, Components, and Layout
Sizing is the bridge between your energy needs and hardware choices. Start with your annual energy usage and local sun hours to estimate a target system size in kilowatts, then determine how many panels and what inverter topology will deliver that output. Panel types differ in efficiency and space requirements: monocrystalline tend to deliver higher performance per square foot, while polycrystalline can be more budget-friendly. Inverter options include string inverters, microinverters, or power optimizers, each with trade-offs for shading tolerance, monitoring capability, and cost. Plan a layout that minimizes shading impact and accommodates future expansion, if desired. Don’t forget mounting options (roof or ground) and safety features, such as DC disconnects and proper ventilation for equipment. A well-designed system balances production, cost, and reliability while aligning with long-term goals.
Financial Pathways: Costs, Incentives, and ROI
Financial planning shapes the feasibility of adopting solar energy. Decide whether you will pay upfront, finance with a loan, lease the system, or pursue a power purchase agreement (PPA). Each option carries different ownership, maintenance responsibilities, and incentive eligibility. Federal and local incentives can significantly reduce upfront costs and improve long-term returns; net metering policies and utility rates influence how quickly you recoup your investment. Warranties matter: panels commonly carry long-term performance warranties, with inverters offering separate coverage. Although exact payback periods vary by region and consumption, a solid plan that factors incentives, electricity price trends, and system maintenance minimizes risk and maximizes savings over time.
Permitting, Interconnection, and Utility Roles
Navigating permits and interconnection is essential to a smooth installation. Begin with building and electrical permits as required by your local jurisdiction. An interconnection application with your utility ensures you can export excess power and receive net metering credits where available. Utilities may require a smart meter, an electrical disconnect, and specific clearance for equipment and wiring. Your installer can handle much of the paperwork, but be prepared for review and scheduling of inspections. Timelines depend on locality, but proper preparation reduces delays and ensures a compliant, safe connection to the grid.
Hiring versus DIY: Choosing the Right Path
Most homeowners opt for professional installation to ensure safety, code compliance, and warranty integrity. Licensed installers bring local knowledge on permitting, grid interconnection, and system commissioning. DIY solar is possible for highly skilled homeowners with electrical licenses and structural know-how, but it carries significant safety risks and may void warranties if not done to code. If you pursue DIY, limit work to non-volt tasks, use certified components, and rely on tested mounting systems. In general, professional installation reduces risk, ensures optimal performance, and streamlines the permitting process.
Installation Timeline and On-site Process
From planning to commissioning, most projects follow a structured timeline. Expect ordering and permits first, then site preparation and roof mounting, followed by wiring, inverter installation, and grid interconnection. Weather, permit approval, and utility queue times can add to the timeline. On-site coordination between roof crews, electricians, and inspectors is essential for safety and efficiency. A detailed project plan with milestones and a communication schedule helps keep everyone informed and reduces surprises. After commissioning, a brief test run confirms performance and sets up monitoring credentials.
Operation, Maintenance, and Monitoring
Post-installation care focuses on keeping performance high and inputs clean. Regular cleaning reduces soiling and shading effects, especially in dusty or coastal environments. Periodic inspections should check for loose mounting hardware, degraded seals, and any signs of wear. Monitoring software provides real-time production data and alerts you to anomalies, enabling proactive maintenance. Warranty coverage typically applies to hardware for many years, while inverters may require service or replacement as they age. A simple maintenance routine maintains efficiency and protects your investment.
Authoritative sources
For reliable, up-to-date guidance, consult official sources and major publications:
- U.S. Department of Energy: Solar Energy Technologies Office (https://www.energy.gov/eere/solar)
- National Renewable Energy Laboratory (NREL) – Solar Resource Data (https://www.nrel.gov)
- Solar Energy Industries Association (SEIA) – Net metering and policy overview (https://www.seia.org)
Tools & Materials
- Solar panels (modules)(Select panels with adequate efficiency and warranty length; consider space requirements)
- Racking/mounting system(Roof or ground mount; ensure compatibility with roof type and wind load requirements)
- Inverter (string, microinverters, or power optimizers)(Choose based on shading and monitoring needs)
- DC disconnect and AC disconnect switches(Safety requirement; required for service and maintenance)
- Junction boxes, conduit, and wiring(Proper gauge and insulation; meets electrical codes)
- Monitoring system(Helps track production and detect issues; can be integrated with inverter)
- Permits and inspections(Local building/electrical permits and utility interconnection approvals)
- Safety gear(Ladder, harness, gloves, eye protection, and fall protection as needed)
Steps
Estimated time: 4-8 weeks
- 1
Assess energy needs and goals
Collect 12 months of energy bills and summarize total consumption. Define what success looks like (cost savings, energy independence, or environmental impact) and set a realistic target for the system.
Tip: Have your latest bills handy when talking to installers to speed up sizing estimates. - 2
Evaluate site feasibility
Survey roof orientation, tilt, shading, and structural integrity. Determine the best mounting location and whether a roof replacement should be coordinated with installation.
Tip: Use a shade analysis tool or app to quantify shading across seasons. - 3
Size the system and select components
Estimate system size in kilowatts based on usage and sun hours. Choose panel type, inverter topology, and mounting options that suit your site and budget.
Tip: Consider future growth in energy use when sizing; avoid undersizing your system. - 4
Plan financing and incentives
Review cash purchase, loan, lease, and PPA options. Identify federal, state, and local incentives to reduce upfront costs.
Tip: Ask about warranties, maintenance plans, and transferability of incentives with ownership changes. - 5
Secure permits and interconnection
Submit required building and electrical permits and initiate utility interconnection. Prepare for inspections and meter changes if needed.
Tip: Your installer can often manage much of the permitting process to reduce delays. - 6
Choose installation path
Decide between professional installation and DIY, weighing safety, codes, and warranty implications.
Tip: If unsure, consult a licensed installer before attempting electrical work. - 7
Install and commission
Install mounting, wiring, and the inverter; complete interconnection and perform final commissioning tests.
Tip: Verify monitoring is active and test a full system shutdown and restart to confirm reliability. - 8
Monitor and optimize performance
Track production versus expectations, clean panels as needed, and schedule periodic inspections for maintenance.
Tip: Set up alerts for performance deviations to catch issues early.
Frequently Asked Questions
What is the first step to adopting solar energy?
Begin with an energy assessment and clearly defined goals. Gather your past utility bills to understand usage and set targets for the system size and payoff timeframe.
Start with an energy assessment and clear goals; gather bills to gauge usage and plan the system size.
How do I determine the right system size for my home?
Base sizing on your annual energy use and local sun exposure. Use an installer or an online calculator to translate kWh needs into kilowatts and panel counts.
Use your yearly energy use and sun hours to estimate the system size, with help from a pro if needed.
Do I need permits to install solar?
Yes. Most installs require building and electrical permits and an interconnection agreement with the utility. Your installer can often manage the paperwork.
Yes—permits and utility interconnection are typically required.
Is DIY solar installation safe or recommended?
Solar installations involve high-voltage electricity and roof work. In most cases, hiring a licensed professional improves safety, code compliance, and warranty coverage.
DIY can be risky; consider hiring a licensed professional for safety and warranty.
What maintenance does a solar system require?
Regular cleaning and inspections keep performance high. Monitor production data and address loose hardware or degraded seals promptly. Warranties cover major components for years.
Keep panels clean, monitor performance, and inspect for wear regularly.
How do incentives affect the economics of solar?
Federal, state, and local incentives lower upfront costs and improve ROI. Net metering credits and electricity rate plans also influence long-term savings.
Incentives cut upfront costs and boost long-term savings.
Watch Video
Top Takeaways
- Set clear solar goals and baseline consumption.
- Assess site conditions before sizing the system.
- Choose components that fit your budget and shading profile.
- Understand permits, incentives, and interconnection early.
- Plan for professional installation to protect warranties and safety.