Residential Solar Systems: A Practical Home Guide
Learn how residential solar systems work, how to size and compare options, and how to finance, install, and maintain solar panels for your home with clear, actionable steps.

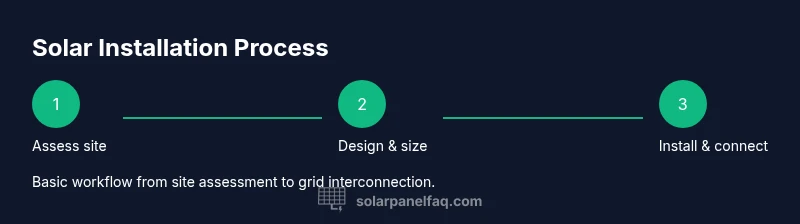
To go solar at home, you’ll assess your roof and shade, size the system for your typical electricity use, obtain quotes, and compare panels, inverters, and warranties. You’ll need permits, an installation window, and a monitoring plan to track production. Expect a multi-step process from site evaluation to commissioning. This quick plan helps you choose reliability and value.
Understanding Residential Solar Systems
Residential solar systems convert sunlight into electricity using PV modules, an inverter, and a mounting system. A typical home installation is grid-tied, meaning it feeds surplus power back to the utility and draws from the grid when needed. Key components include PV modules, an inverter (string or microinverters), a racking system, wiring, disconnects, and a monitoring setup. The Solar Panel FAQ team emphasizes that choosing reputable equipment and a skilled installer improves system longevity and performance. This section lays the foundation by describing how a residential solar system is designed to match a home’s energy profile and how different configurations affect reliability. You will also learn how warranties and service plans contribute to long-term value, helping homeowners feel confident in their investment. Throughout this guide, we reference common decision points like roof orientation, shading, system size, and expected maintenance so you can plan with clarity.
Site Assessment and Roof Suitability
Before you purchase, your roof must support the system both structurally and optically. Start with a shade audit to identify obstructions from nearby trees or structures that could reduce output. Roof direction matters; a southerly exposure in the northern hemisphere typically yields the highest production, while east or west exposures can still be effective with proper sizing. Roofing age and condition influence mounting choices and warranty eligibility, so check for necessary repairs before installation. A professional assessment should also inspect attic spaces, rafters, and seal integrity to prevent leaks. Document findings with clear notes and photographs so you can compare bids on an apples-to-apples basis. This groundwork sets realistic expectations for performance and return on investment.
Sizing Your System: How Much Do You Need?
Sizing a residential solar system starts with your electricity usage and the available roof area. Gather at least one full year of utility bills to understand seasonal variance. Use this data to estimate a system size that covers a substantial portion of daytime needs while accounting for future changes in consumption. Consider including a safety margin for shading, panel aging, and potential efficiency gains from newer modules. The choice between a grid-tied system with net metering and a system with energy storage depends on local policies and resilience goals. A properly sized system minimizes overproduction and underproduction, helping to maintain steady savings over time.
Choosing Panels and Inverters: Key Specifications
Panels come in several types, with monocrystalline typically offering the best efficiency and space utilization, while polycrystalline may be more price-competitive. Inverters convert DC from panels to AC for home use, and you can choose a string inverter, microinverters, or a hybrid option depending on shading and roof layout. Warranties vary by manufacturer and product type, with performance warranties guaranteeing a certain output level for 25 years or more. When evaluating bids, look for documented efficiency ratings, temperature coefficients, and the quality of the installation hardware. The right combination of panels and inverter will influence both output and long-term reliability, so align these choices with your climate, roof orientation, and budget.
Permitting, Interconnection, and Grid Policy
Permitting and interconnection are essential steps in the solar journey. Local building departments typically require structural permits, electrical permits, and a utility interconnection agreement. Net metering policies and program eligibility vary by region, affecting how credits are earned for excess production. Start the permitting process early, as approvals can take weeks. Your installer can help compile drawings and applications, but you should understand the terms of interconnection, meter installation, and any required inspections. Having a clear plan reduces delays and helps align expectations with your utility.
Installation Process: What to Expect
Installation often occurs in stages: mounting hardware is installed on the roof or ground rack, conductors are run to a combiner box and inverter location, panels are wired and mounted, and all connections are tested. A licensed electrical contractor should perform the final interconnection and utility test. The process typically includes a safety briefing, electrical isolation, roof access for installers, and a commissioning tour to confirm system performance. While installation can be completed in a few days, inspections and weather can extend the timeline. Plan for temporary impacts on access and noise, and confirm the expected commissioning date with your installer.
Financing, Incentives, and Contracts
Financing options include cash purchases, solar loans, leases, and power purchase agreements. In many regions, incentives or tax credits help reduce upfront costs and long-term expenses; however, availability varies by year and policy changes. Net metering credits can significantly influence payback by offsetting daytime generation against evening usage. When reviewing contracts, compare warranties, performance guarantees, and service terms. Ensure there is clarity on who is responsible for permits, grid interconnection, and post-install maintenance. A well-structured contract helps protect your investment while providing predictable savings.
Monitoring and Maintenance for Longevity
After installation, monitoring software or hardware helps you track energy production and usage in near real-time. Regular cleaning, especially in dusty or coastal environments, can maintain panel efficiency, while checking wiring and mounts for corrosion or loosening ensures ongoing safety. Inverters and optimizers require occasional checks, and system microinverters can simplify monitoring at the panel level. Schedule inspections and battery checks (if storage is installed) to extend lifespan. Proper maintenance reduces surprises and keeps performance near the expected levels, reinforcing the value of your solar investment.
Common Pitfalls and How to Avoid Them
Rushing bids without verifying contractor qualifications can lead to poor workmanship and unsafe installations. Under-sizing a system to save upfront costs may result in higher electric bills later. Failing to check warranties and service terms can leave you responsible for costly repairs. Shading from new trees or future renovations can reduce output, so plan for future growth and potential tree trimming. Finally, ignoring permitting steps or interconnection requirements can delay commissioning and create compliance issues. By performing due diligence and choosing experienced installers, you can minimize risk and maximize your solar system’s long-term value.
Tools & Materials
- Permits and approvals(Local building permits, electrical permits, and interconnection approvals)
- PV modules / solar panels(Certified panels with warranty and performance specs)
- Inverter(String or microinverter depending on design)
- Racking and mounting hardware(Roof-mounted or ground-mounted systems, with weatherproofing kit)
- DC disconnect switch(Mandatory disconnect for safety during maintenance)
- AC disconnect / service panel(Allows utility-side isolation during commissioning)
- Solar wiring, conduit, and junction boxes(UL-listed components sized for system current)
- Monitoring hardware(System for real-time production tracking)
- Safety gear and access equipment(Hard hats, gloves, non-slip footwear, roof anchors)
- Tools for installation(Torque wrench, multimeter, drill, conduit benders)
- Weatherproof sealant and flashings(Optional for additional roof protection)
Steps
Estimated time: 4-8 weeks
- 1
Perform site assessment
Evaluate roof condition, shading, and structural integrity. Take photos and measurements to guide design decisions and bids.
Tip: Document potential obstructions and roof age to avoid surprises. - 2
Size system and design
Analyze past electricity use and available roof area to determine system size and layout. Decide between roof and ground mounting strategies.
Tip: Use your last 12 months of utility bills for accuracy. - 3
Obtain quotes and compare equipment
Request bids from multiple installers and compare panels, inverters, warranties, and service terms. Verify certifications and past installations.
Tip: Prioritize performance warranties and installer reliability. - 4
Secure permits and interconnection
Submit permit applications and coordinate with the utility for interconnection and net metering. Track approval timelines.
Tip: Start early to minimize delays; ensure all drawings are compliant. - 5
Install mounting, wiring, and PV modules
Mount racks, run conduit, connect panels to inverter, and install safety measures. Ensure torque specs and weatherproof seals are correct.
Tip: Follow manufacturer torque specs and handling guidelines. - 6
Connect to grid and commission
Complete final interconnection, perform safety tests, and verify meter integration with the utility. Confirm monitoring is live.
Tip: Check for any error codes during commissioning and address promptly. - 7
Set up monitoring and maintenance plan
Configure monitoring, set alerts, and schedule periodic cleaning and inspections. Review warranties and save contact information for service.
Tip: Set calendar reminders for annual checks and inverter replacement windows.
Frequently Asked Questions
What is the typical payback period for residential solar systems?
Payback varies by location, usage, incentives, and electricity rates. A detailed analysis of your bills and local programs will give a clearer estimate. Compare upfront costs with anticipated savings over the system life.
Payback depends on where you live and how you use power; check local incentives and your bills for a better estimate.
Do I need a perfect roof to go solar?
Most roofs are eligible, but shading, orientation, and roof age matter. A professional assessment will confirm suitability and may suggest tweaks like mounting options to optimize output.
Most roofs can go solar, but shade and orientation affect output. A pro can confirm options.
Can I go solar if I rent my home?
Renters typically cannot install a system themselves. Look into community solar or ask the building owner about a solar lease or purchase option.
Renters usually can’t install panels; consider community solar or owner-installed options if available.
What maintenance is required for solar panels?
Panels require minimal maintenance but may need occasional cleaning and periodic checks of wiring and inverters. Monitoring helps detect issues early.
Very little maintenance is needed; keep monitoring active and clean panels when needed.
What is net metering and how does it affect my system?
Net metering provides credits for excess production against your usage. Availability and credit terms depend on local policies and utility rules.
Net metering credits extra production back to your bill, but terms vary by location.
Watch Video
Top Takeaways
- Assess roof and shade before sizing.
- Size based on energy use and future needs.
- Compare panels, inverters, and warranties carefully.
- Understand permits, interconnection, and incentives.
- Monitor performance and maintain proactively.