Solar Power Home Panels: A Step-by-Step Guide
A practical, step-by-step guide to planning, sizing, installing, and maintaining solar power home panels for homeowners and solar buyers.

By following this guide, you’ll plan, size, install, and maintain solar power home panels that fit your roof and energy needs. Key requirements include a clear energy goal, roof suitability, local incentives, and professional installation. This quick roadmap helps homeowners understand steps, costs, and expectations for a successful residential solar project.
Understanding Solar Power for Home Panels
For homeowners evaluating clean energy options, solar power for home panels represents a practical path to reducing utility bills and greenhouse gas emissions. According to Solar Panel FAQ, the core idea is to match energy production with consumption, accounting for roof orientation, shading, and local incentives. The Solar Panel FAQ team emphasizes that the best starting point is a clear energy goal—do you want to maximize savings, improve resilience, or both? Once you set that goal, you can begin collecting data about your roof, your current usage, and your budget. This section covers the building blocks of a residential solar system, including modules, inverters, racking, wiring, and monitoring components, and how they work together to convert sunlight into usable electricity. You’ll also learn common terms and what to expect in a typical installation timeline.
Key considerations when choosing solar panels
Choosing the right solar panels means weighing technology options, efficiency, and climate fit. Monocrystalline modules typically offer higher efficiency and better aesthetics, while polycrystalline modules are often more affordable. Consider the temperature coefficient, which describes how performance drops as temperatures rise, and look for warranties that cover power output and product integrity for 25 years or more. Inverters should be matched to your system type (string, microinverters, or optimizers) and installed with proper electrical protection. Roof mounting options depend on pitch, material, and potential shading; a professional assessment helps you select racking that minimizes weight, wind loads, and maintenance needs. Finally, review available warranties, certifications, and the installer’s track record to ensure long-term reliability.
Sizing and system design for your home
System sizing starts with your annual electricity usage and roof area. A properly designed system balances production with demand and accounts for future changes such as a growing household or appliance upgrades. Location matters for sun exposure and shading; choose panel types and configurations that maximize energy capture in your climate. Inverter capacity should align with your array size, and net metering arrangements with your utility influence how you recoup energy value. Remember to factor in maintenance access, wiring routes, and future expansion possibilities so the design remains flexible over time.
Installation lifecycle: permits, planning, and scheduling
A residential solar project involves several phases beyond equipment selection. Start by confirming local permits, utility interconnection requirements, and inspection schedules. Schedule a site visit with a reputable installer who can provide a detailed plan, including roof access, mounting locations, wiring routes, and safety measures. Preparation tasks include arranging temporary power shutoffs if needed, protecting landscaping, and coordinating with neighbors to minimize disruption. Clear documentation of the system design helps with permits and future maintenance. This phase lays the groundwork for a smooth installation and timely inspections.
Wiring, safety, and testing during installation
Electrical work must follow local codes and safety practices. The installer will route DC wiring from the panels to the inverter, connect the AC side to household circuits, and place a DC disconnect and an AC disconnect for safe operation. After wiring, the system undergoes commissioning tests to verify polarity, insulation, grounding, and safe isolation. The monitoring setup allows you to track production, performance, and any deviations from expected output. If you notice sudden drops or abnormal readings, address them promptly with your installer to prevent long-term inefficiency.
Maintenance, monitoring, and warranty considerations
Once active, monitor your system's performance with the inverter and module-level data where available. Routine maintenance includes periodic cleaning of dust, leaves, or snow that blocks sunlight, and inspections of mounting hardware for corrosion or loosening. Warranties typically cover power output degradation and hardware defects for decades, but coverage can vary by manufacturer and installer. Keep records of maintenance, inspection dates, and warranty documents. Regular monitoring helps detect performance issues early and sustain energy savings over the system’s lifespan.
Financial planning: costs, incentives, and payback
Cost considerations include equipment prices, labor, permitting, and potential grid upgrade requirements. Many regions offer incentives such as tax credits, rebates, or net metering programs that improve payback. The financial picture improves with smart design choices, like selecting higher-efficiency modules for limited roof space or bundling storage if you value resilience. Plan a budget that accounts for maintenance, inverter replacement, and potential service calls. With careful planning, a well-designed system can deliver meaningful long-term savings while reducing your carbon footprint.
Tools & Materials
- Solar panels (modules)(Quantity based on system size; choose panels with appropriate efficiency and warranty.)
- Inverter (string or microinverter)(Match inverter type to chosen panel configuration and site needs.)
- Racking/mounting hardware(Corrosion-resistant mounting suitable for roof type.)
- DC wiring and conduit(Weather-rated and sized for anticipated current.)
- AC disconnect switch(Allows safe shutoff of the system at the panel or meter.)
- Combiner boxes and fuses(Used in higher-count arrays to manage multiple strings.)
- Electrical meter kit or upgrade (if required)(Needed for net metering where applicable.)
- Junction boxes and connectors(Sealed and rated for outdoor use.)
- Safety equipment(Harness, hard hat, gloves, and fall protection as needed.)
- Permits and inspection documents(Local codes require approvals before starting.)
- Tools: drill, torque wrench, crimpers, multimeter(Essential for proper assembly and testing.)
- Monitoring equipment or app access(Helps track production and alerts.)
Steps
Estimated time: Estimated total time: 2-4 days
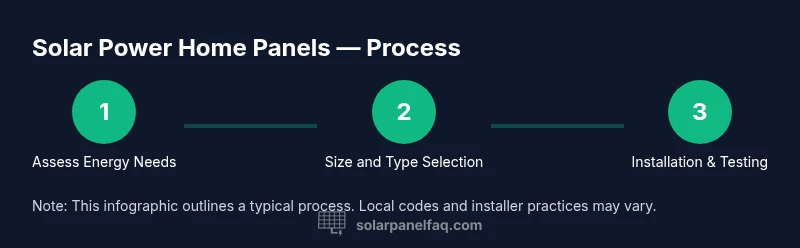
- 1
Assess energy needs and roof suitability
Gather past electricity bills and estimate future usage. Inspect roof orientation, shading, and structural integrity to determine if a solar array will perform well on the site.
Tip: Use a sun-path tool or mobile app to map shading across the day and seasons. - 2
Size system and choose panel type
Estimate system size based on energy goals and available roof area. Compare monocrystalline vs polycrystalline modules for efficiency, aesthetics, and cost in your climate.
Tip: Prioritize higher efficiency in limited spaces and consider temperature tolerance. - 3
Plan permits, contracts, and incentives
Check local permit requirements and interconnection rules. Gather quotes that include warranties, service plans, and any storage options.
Tip: Ask for a written contract detailing scope, timing, and responsibilities. - 4
Prepare site and install mounting hardware
Install roof mounts with correct pitch, mounting rails, and alignment. Ensure all fasteners are correctly torqued and that no potential leaks are introduced.
Tip: Double-check slope and spacing to optimize airflow and cleaning access. - 5
Wire, connect inverter, and finalize connections
Route DC wiring to the inverter, set up AC connections, and install safety disconnects. Verify grounding and polarity before energizing.
Tip: Have a qualified electrician review the wiring for safety. - 6
Test, monitor, and schedule maintenance
Perform commissioning tests and verify system output. Set up monitoring, schedule periodic cleaning, and check for any performance drifts over time.
Tip: Document readings and compare against expected production curves.
Frequently Asked Questions
What factors influence the overall cost of solar power home panels?
Costs depend on system size, equipment quality, permitting, and installation labor. Incentives and financing options can significantly alter the total outlay, and net metering arrangements affect long-term savings.
Costs vary with system size, equipment quality, and permits. Incentives and financing can change the total outlay, with net metering affecting long-term savings.
How long does installation typically take?
Installation duration depends on roof type, system size, and permit approvals. A typical residential project spans a few days from planning to commissioning.
Installation usually takes a few days, depending on roof type and permit timing.
What warranties should I expect for solar panels and hardware?
Expect a performance warranty on panels that covers output over 25 years and a product warranty for hardware. Inverters may have shorter warranties and may require replacement during the system life.
Most panels have 25-year performance warranties; inverters usually have shorter warranties and may need replacement later.
Do I need storage or a battery with residential solar?
Batteries are optional for grid-tied systems but can provide resilience and peak-shaving benefits. Evaluate your outages, energy goals, and budget before deciding.
Storage is optional and helpful for outages and peak use, depending on your goals and budget.
Is DIY installation safe or should I hire a professional?
Solar installations involve high electrical voltages and roof work; hiring a licensed professional is strongly recommended for safety and code compliance.
For safety and code compliance, hire a licensed professional instead of DIY.
Will solar panels increase my home value?
Solar power systems can increase property value and appeal to energy-conscious buyers, especially when paired with a solid warranty and performance data.
Solar panels can add value and appeal, particularly with strong warranties and good performance data.
Watch Video
Top Takeaways
- Define energy goals before selecting equipment.
- Choose panel type and inverter based on space and climate.
- Plan permits, incentives, and installer credentials early.
- Monitor performance to catch issues early.
- Consider storage options for future resilience.