Solar Panel and System: A Practical How-To Guide
A comprehensive, step-by-step guide to planning, sizing, installing, and maintaining a solar panel and system for homeowners. Learn site readiness, component choices, safety, permits, and optimization to maximize energy production.

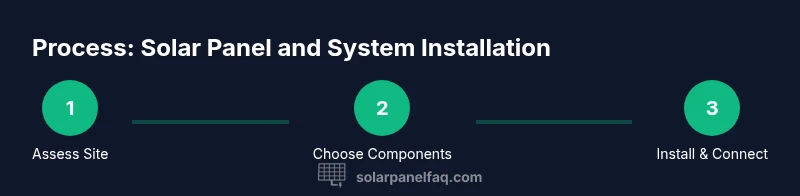
You will learn how to evaluate your solar panel and plan a safe, effective installation, including essential site readiness, selecting components, wiring basics, and maintenance steps. This guide walks you through a practical, step-by-step approach to maximizing energy production while protecting your home and investing wisely. Whether you're a homeowner or a curious buyer, this article helps you decide if solar is right for you and how to move forward confidently.
Define your goals and what 'solar panel and' implies for your home
Setting clear goals is the first step in any solar project. A thoughtful plan helps you choose between grid-tied, off-grid, or hybrid configurations and sets expectations for performance, cost, and maintenance. According to Solar Panel FAQ, most homeowners aim to reduce utility bills, increase energy independence, and protect against grid outages. When you think about a solar panel and system together, consider how you will use electricity, whether you want battery storage, and how your roof orientation affects sun exposure. This context informs system sizing, the type of inverter, and the mounting approach you’ll choose. By the end of this guide, you’ll have a practical path from concept to a functioning, safe installation that fits your home’s architecture and budget.
Site assessment: roof condition, sun exposure, and mounting area
A successful solar project starts with a candid assessment of your site. Inspect your roof for structural integrity, age, and roof material compatibility with mounting hardware. Shadow patterns from nearby trees or tall structures reduce production, so map sun exposure from dawn to late afternoon. If you’re considering a solar panel and battery storage, ensure the roof has the load-bearing capacity and that a secure, code-compliant ground or roof mount can be achieved. Plan for adequate space on the roof for airflow and cleaning access. If you detect rot, leaks, or excessive slope, address these issues before adding panels. A well-prepared site reduces risk, improves performance, and simplifies later maintenance.
Component choices: panels, inverter, and mounting hardware
When selecting a solar panel and system components, compare panel types (monocrystalline vs polycrystalline) for efficiency, temperature performance, and price. Inverters come in several forms: string, microinverters, or optimizers—each affecting how panels perform in shade and how easy maintenance is. Mounting hardware should be rated for your roof type and climate, with corrosion-resistant materials and proper sealing. Don’t overlook wiring methods, conduit routes, and enclosure protection. Choosing compatible components early saves time and reduces the risk of mismatched parts that complicate installation or future expansion.
System sizing and layout basics
Size matters for energy yield and ROI. Start with your annual energy consumption and local sun hours to estimate how many kilowatt-hours you’ll generate with a given panel count. Tilt angle and orientation affect production; in most locales, a design that matches the roof pitch or a fixed optimal tilt yields the best results. Plan spacing for airflow, heat dissipation, and easy access for cleaning and inspections. If you intend to add energy storage, account for inverter and battery capacity in your sizing calculations. A well-sized system maximizes production without oversizing and minimizes payback time.
Electrical basics and safety considerations
A solar panel and system involves both DC wiring from panels and AC wiring to your home’s electrical panel. Understand how current, voltage, and power interact and ensure proper over-current protection, fusing, and disconnects. Grounding is essential to safety and code compliance; use appropriately rated components and verify connections. If you’re unfamiliar with electrical work, hire a qualified electrician or solar installer to handle the high-voltage connections, compliance with electrical codes, and safe interconnection with the utility grid. Safety first protects people and property and ensures long-term performance.
Permits, interconnection, and inspections
Most solar projects require permits from local authorities and possibly a utility interconnection agreement. The process often includes plan review, system inspections, and a formal interconnection application to connect to the grid. Early, clear communication with your authority having jurisdiction helps avoid delays and rework. Keep copies of stamped drawings, equipment specifications, and inspection approvals handy during installation. Solar Panel FAQ notes that aligning permits with the installation timeline reduces stress and keeps the project on track.
Installation approach: DIY vs professional installation
A solar panel and system can be installed by a competent DIYer in some cases, but many homeowners choose professional installation for safety, warranty coverage, and code compliance. Evaluate your comfort level with roof work, electrical work, and set-up timing. Professionals can streamline permit handling, ensure optimal wiring layouts, and provide post-installation testing. If you opt for DIY, plan for weather windows, use proper fall protection, and have a licensed electrician review final connections. The key is to balance risk, cost, and long-term reliability.
Wiring and grounding essentials
Proper wiring routing reduces shading, heat buildup, and maintenance issues. Use weatherproof conduits, correctly sized conductors, and secure, code-compliant connections. Grounding ensures protection against lightning and electrical faults; follow local codes for grounding electrodes and bonding. Label all circuits, document the wiring diagram, and double-check polarity and continuity. If any step feels uncertain, pause and consult a professional—safety and reliability are worth the extra planning.
Commissioning, testing, and performance checks
After installation, commissioning confirms that the system operates as designed. Verify that all switches are set to safe positions, measure open-circuit voltages, and compare actual generation with expected output under typical conditions. Monitor inverters and the monitoring system for faults, and check for hot spots or unusual odors. Schedule a post-install inspection if required by local codes. A thorough test helps catch issues early and ensures you reap the full benefits of your solar panel and system.
Maintenance, monitoring, and cleaning
Routine maintenance keeps performance high and prolongs component life. Clean panels, check for fallen debris, and inspect seals around mounting hardware to prevent leaks. Use purpose-made solar cleaners or soft cloths to avoid scratching. Regular monitoring through a display or app helps identify drops in production, which could indicate shading changes, soiling, or aging hardware. Replace or service aging components promptly. A well-maintained system maintains efficiency and protects your investment.
Financing, incentives, and lifecycle costs (non-numeric)
Understand the financial picture by exploring available incentives, financing options, and lifecycle costs. Details vary by location, system size, and installer, so compare proposals carefully. Look beyond upfront costs to long-term savings, maintenance needs, and warranty coverage. A thoughtfully chosen solar panel and system can provide reliable energy, while incentives can shorten payback periods and improve overall value.
Common mistakes and troubleshooting tips
Avoid common pitfalls such as underestimating shading, skipping permits, or choosing incompatible components. Plan for expansion if you anticipate higher energy needs in the future. If performance appears off, check the inverter status, wiring connections, and panel cleanliness. Keep a maintenance log and schedule periodic professional audits to maintain safety and maximize efficiency.
Tools & Materials
- Safety gear (gloves, goggles, helmet)(Impact-resistant PPE rated for roof work)
- Ladder and fall protection equipment(Stable, level surface; consider harness when on pitched roofs)
- Drill with assorted bits(For mounting hardware and enclosure screws)
- Screwdrivers and wrenches set(Flathead and Phillips; torque appropriately)
- Voltage tester/multimeter(Check circuits and continuity)
- Conduit, connectors, and weatherproof sealant(Protective routing and weather sealing)
- Wire cutters/strippers(Size conductors correctly)
- Mounting rails/tracks and clamps(Compatible with roof type and panel size)
- PV modules (solar panels)(Ensure compatibility with mounting hardware)
- Inverter and/or microinverters(Match to system size and layout)
- Battery storage (optional)(Consider if desired for off-grid or storage goals)
- Grounding equipment and bonding(Properly rated grounding rods and clamps)
- Weatherproof sealants and electrical tape(Seal joints to prevent leaks)
- Documentation (plans, permits, warranties)(Keep for inspections and future maintenance)
Steps
Estimated time: Estimated total time: 6-10 hours
- 1
Assess site and safety prerequisites
Evaluate roof condition, sun exposure, and access routes. Confirm you have fall protection and a plan for weather windows. Document potential shading from nearby objects to inform layout decisions.
Tip: Always start with a risk assessment and a safety plan before touching the roof. - 2
Design layout and component selection
Choose panel type, inverter strategy, and mounting hardware based on roof type and shade analysis. Decide on cable routing paths to minimize exposure and maintenance needs.
Tip: Check compatibility between panels, inverter, and mounting hardware before purchasing. - 3
Obtain permits and schedule interconnection
Submit plans to the local authority and utility if required. Arrange for any required inspections and interconnection approvals.
Tip: Document approvals and keep a copy with installation records. - 4
Install mounting rails and hardware
Secure rails to the roof structure or ground mount with correct fasteners and sealing to prevent leaks.
Tip: Tighten all fasteners to manufacturer-specified torque. - 5
Mount panels and route wiring
Attach panels securely and connect wiring with proper strain relief. Keep DC wiring isolated from living spaces and route through weatherproof conduits.
Tip: Label polarity and keep panels free of debris during routing. - 6
Install inverter, disconnects, and combiner box
Mount the inverter in a safe, accessible location. Install disconnects and any necessary fusing, following electrical codes.
Tip: Have a licensed electrician verify critical connections. - 7
Grounding and safety checks
Bond system components and verify grounding integrity. Re-check for proper isolation during maintenance.
Tip: Test grounding with a multimeter and confirm continuity. - 8
Commissioning and performance testing
Power up the system, observe inverter status, and confirm output matches expectations under typical conditions. Document baseline performance for ongoing monitoring.
Tip: Record initial readings to compare against future data.
Frequently Asked Questions
What is the first step to start a solar panel and system project?
Begin with a site assessment and goal definition. Clarify whether you want grid-tied, off-grid, or a hybrid setup, then estimate energy needs.
Start with a site check and clear goals. Decide on grid-tied or storage options, then estimate your energy needs.
Do I need permits for solar panel installation?
Most installations require local permits and an interconnection agreement with the utility. Check your city or utility for requirements.
Permits and interconnection are usually required; contact your local authorities for specifics.
Can I do this myself or should I hire a professional?
DIY is possible for small systems if you have electrical and roofing experience. For larger systems or if in doubt, hire a licensed solar installer to ensure safety and code compliance.
You can DIY a small system if you’re skilled, but for larger setups, a licensed pro is safer and ensures compliance.
How long before I see energy savings?
Savings depend on system size, usage, and incentives. Expect a payback period that varies by location and energy habits rather than a fixed timeline.
Savings depend on size and usage; the payback time varies by location and energy habits.
What ongoing maintenance does a solar panel system require?
Regular cleaning, inspection of wiring and seals, and monitoring performance are the main tasks. Schedule professional checkups to verify safety and efficiency.
Keep panels clean, check wiring and seals, and monitor output. Have periodic professional checks.
What if I want to add battery storage later?
You can expand a solar panel and system with storage by selecting compatible inverter and battery options. Plan for future expansion during initial sizing.
You can add storage later by choosing compatible equipment and planning ahead.
Watch Video
Top Takeaways
- Plan your goals and budget before buying components.
- Assess roof and shading to optimize placement.
- Size the system to meet needs without oversizing.
- Prioritize permits, safety, and code compliance.
- Monitor performance and maintain cleanliness for longevity.