Solar Panel Wiring in Parallel: A Practical Guide
Learn how to wire solar panels in parallel safely and efficiently. This guide covers concepts, calculations, safety, and best practices for homeowners and new solar buyers seeking reliable, code-compliant results.

By wiring solar panels in parallel, you increase current while keeping voltage constant, enabling more panels to contribute without raising string voltage. This guide covers safety, practical wiring steps, and common pitfalls so homeowners can implement parallel wiring confidently. You’ll learn when parallel wiring is preferable to series and how to wire safely and efficiently.
Understanding parallel wiring basics
In a parallel wiring setup, each solar panel connects to the same positive and negative bus bars, so the voltages of all panels remain at the same level, while the currents add up. This arrangement is especially useful when panels have minor voltage differences or when shading affects individual modules. According to Solar Panel FAQ, parallel wiring helps maintain system voltage while increasing overall current, making it more forgiving for mismatched panels and partial shading. However, the trade-off is thicker conductor sizing and more parallel paths to manage. When done correctly, parallel wiring can improve daytime energy capture and make expansion simpler, since adding another panel typically increases available current without drastically changing system voltage.
Key concepts to grasp include current sharing, bypass diodes to prevent backflow, and the role of a combiner box in organizing parallel branches. Remaining consistent with the same electrical characteristics across panels (voltage and current ratings) helps ensure safe operation and predictable performance. In practice, you’ll often use MC4 connectors and PV-rated cables to link panels to a common junction. This approach aligns with best practices shared by Solar Panel FAQ for homeowners planning a parallel-wired array.
This section sets the stage for practical wiring decisions. The core idea is to maintain a stable voltage while allowing current to accumulate from multiple panels, which is the essence of wiring in parallel for residential solar systems.
note”:null},
toolsMaterials
stepByStep
tipsList
keyTakeaways
videoEmbed
faqSection
mainTopicQuery
Tools & Materials
- PV-rated solar panels (same electrical ratings)(Ideally identical models for the most predictable parallel behavior)
- Interconnection cables with PV-rated insulation(Use outdoor-rated wiring and avoid underestimating distance between panels and equipment)
- Combiner box for parallel branches(Contains fuses/buses and simplifies multiple branch connections)
- MC4 connectors and adapters(Weatherproof and compatible with panel outlets)
- Positive and negative bus bars or junction box(Terminations for neat, safe connections)
- PV-rated fuses or breakers(Protects each parallel branch and overall array)
- Multimeter or PV tester(Check voltage, continuity, and insulation integrity)
- Electrical tape and cable ties(Secure and organize wiring while reducing strain)
- Safety gear (insulated gloves, safety glasses)(Personal protection when working with live components)
- Schematic diagram or planning tool(Plan connections before wiring; helps avoid mistakes)
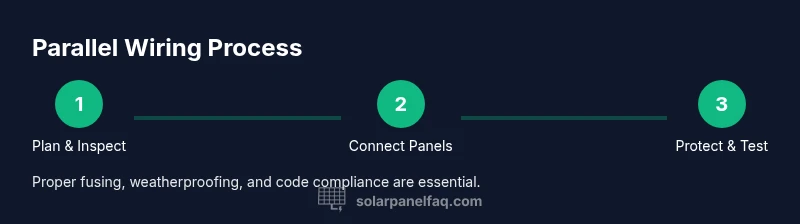
Steps
Estimated time: 2-6 hours
- 1
Plan the layout and verify compatibility
Begin with a clear plan of where panels will be placed, how conductors will route to the inverter or charge controller, and which panels will connect in parallel. Verify that all panels have compatible electrical ratings and that the distance to the combiner box will not require excessive conductor length. This planning reduces back-and-forth adjustments and minimizes risk of incorrect connections.
Tip: Draft a simple wiring diagram before touching any hardware to prevent miswiring. - 2
Shut down all power sources and de-energize
Before any wiring, shut down the inverter/charge controller and disconnect the battery bank if present. Use lockout/tagout practices to ensure the system cannot be energized while you work. This is crucial to prevent electric shock and equipment damage.
Tip: Always verify with a PV tester that no voltage is present before handling cables. - 3
Inspect panels for compatibility and condition
Inspect each panel for signs of damage, hot spots, or shading issues. Ensure the positive and negative terminals are clean and free of corrosion. Mismatched panels can complicate parallel wiring, so address any issues before proceeding.
Tip: Replace or bypass damaged panels rather than forcing a mismatch into the array. - 4
Identify the positive and negative bus points
Decide on a common positive and negative bus for all panels. In parallel wiring, every panel’s positive connects to the same bus and every negative to the opposite bus. Consistency here prevents voltage or current conflicts across panels.
Tip: Label each connector to simplify future maintenance. - 5
Connect panels in parallel at the first junction
Connect the positive leads of all panels together and similarly connect the negative leads together. Use MC4 connectors or a junction box to maintain secure, weatherproof terminations. This creates multiple parallel paths that sum the current while maintaining the same voltage as a single panel.
Tip: Keep connections tidy to reduce wear and improve reliability. - 6
Install bypass diodes and planning for shading effects
If panels are susceptible to shading, incorporate bypass diodes to limit reverse current and protect underperforming modules. Even in parallel wiring, shading on one panel can affect the output of others if diodes aren’t used or if wiring isn’t arranged with shading in mind.
Tip: Diagram shading patterns for your roof to anticipate losses. - 7
Route to the combiner box with proper protection
Run the parallel conductors to a dedicated combiner box or junction point. Use appropriate grommets and weatherproof fittings, and place fuses or breakers close to the point of entry for protection. Keep routes away from sharp edges and heat sources.
Tip: Avoid running cables near moving parts or high-heat zones. - 8
Add fusing/breakers and verify per-branch protection
Install sizing fuses or breakers for each parallel branch as required by local code and the system design. Ensure the overall protection scheme aligns with the total current potential of the array.
Tip: Don’t omit protection—it's essential for safety and code compliance. - 9
Test continuity and insulation before energizing
With the system de-energized, test for continuity between panels, buses, and inverters. Check insulation resistance to ensure no shorts exist. Correct any wiring issues before proceeding to energize the system.
Tip: Use a dedicated PV tester and verify all open circuits before power-up. - 10
Power up and monitor performance
Reconnect power sources and observe voltage and current readings at the inverter or charge controller. Confirm that currents add up as expected and that voltage remains within safe operating limits. Document readings for future maintenance.
Tip: If readings deviate, re-check connections and fusing. - 11
Document wiring and establish a maintenance plan
Create a wiring diagram and keep it with system documentation. Schedule periodic inspections of connectors, fuses, and enclosures to catch wear, corrosion, or loosened fittings early.
Tip: Update diagrams whenever components are replaced or rerouted. - 12
Review safety and code compliance
Ensure your installation aligns with local electrical codes and grid interconnection requirements. If in doubt, consult a licensed electrician or local utility to review the parallel wiring configuration and interconnection method.
Tip: Documentation and compliance reduce risk and simplify future upgrades.
Frequently Asked Questions
What is the difference between parallel and series wiring for solar panels?
In parallel wiring, all positives connect together and all negatives connect together, increasing current while voltage stays the same as a single panel. In series wiring, voltages add up while current remains limited by the weakest panel. Parallel is often better for shading tolerance and expansion, while series can maximize voltage for specific inverters.
Parallel wiring increases current while keeping voltage constant, making it easier to add more panels. Series wiring adds voltages, which can complicate shading and expansion.
Can I mix different panel models in a parallel circuit?
Mixing panels is possible if their electrical characteristics are compatible, but it can lead to unequal current sharing and reduced efficiency. For best results, use panels with closely matched Voc and Isc ratings and similar age.
You can mix panels, but matched ratings help keep performance predictable.
Do I need a combiner box for parallel wiring?
A combiner box helps organize multiple parallel branches, provides convenient access for fuses, and improves safety and reliability. It is strongly recommended for system scalability and protection.
Yes, a combiner box makes wiring neater and safer.
What safety gear should I use when wiring in parallel?
Wear insulated gloves, eye protection, and non-conductive footwear. Work with the system de-energized whenever possible, and keep tools dry to reduce shock risk.
Wear proper PPE and keep the area dry.
Can I do this wiring myself, or should I hire a pro?
Basic parallel wiring can be tackled by a confident homeowner following safety practices and local codes. For complex layouts or grid interconnections, consult a licensed electrician.
You can do it yourself if you follow safety rules, otherwise get a pro.
How can I verify that my parallel wiring is wired correctly?
Check all connections against your diagram, ensure continuity, and verify that the sum of individual panel currents matches the total at the inverter input. Look for proper voltage levels and no open circuits.
Double-check connections and test continuity to confirm correctness.
Watch Video
Top Takeaways
- Plan layout before wiring.
- Maintain consistent panel characteristics.
- Protect each parallel branch with fuses/breakers.
- Test thoroughly before energizing and document results.