Solar Panel to Power Your Home: A Practical Essential Guide
Discover how a solar panel to power your home works, how to size a system, incentives, and a clear step-by-step plan to install safely. Solar Panel FAQ guides homeowners toward confident, sustainable solar choices.

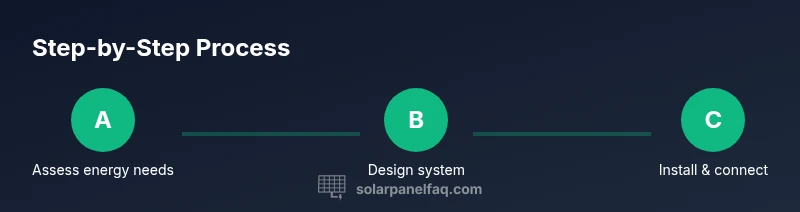
To power your home with solar, size a grid-tied system, secure permits, install rooftop or ground-mounted panels, connect an inverter, and wire into your main panel. You’ll need adequate sun exposure, space for the array, and a plan for interconnection with your utility. Expect a staged process from assessment to permit, installation, and commissioning.
What it means to power your home with solar panels
According to Solar Panel FAQ, powering a home with solar panels means converting sunlight into electricity via photovoltaic modules, then feeding that electricity through an inverter to supply your home's circuits. In a grid-tied system, any excess energy can be sent back to the utility via net metering, while during cloudy days you draw from the grid. The concept of a solar panel to power home embodies a practical shift from fossil fuels to renewable energy, offering daytime power and the potential for reduced bills when paired with proper orientation, shading analysis, and system sizing. This approach empowers homeowners to light, heat, and run appliances using clean energy, while maintaining reliability through utility interconnection and intelligent load management.
How solar panels convert sunlight into usable electricity
Solar photovoltaic cells release electrons when exposed to sunlight. These cells are wired into modules, which form an array mounted on a roof or a ground frame. Sunlight creates a direct current (DC) flow, which an inverter converts to alternating current (AC) for home use. A correctly sized system ties into the electrical panel, allowing loads to draw power and often enabling excess generation to feed back to the grid via net metering. In practice, you’ll experience consistent daytime power and the option to store or trade surplus energy depending on your chosen configuration.
Sizing a solar installation for your home
Sizing starts with your energy needs. Review utility bills to determine daily and seasonal usage, then consider available sun exposure and roof or ground space. A well-sized system accounts for typical daylight hours, seasonal weather, and electrical load diversity (appliances that share cycles). Use a sizing method that translates your load into a system capacity, then adjust for shading, orientation, and local incentives. A properly sized system aims to meet a high share of daytime demand while preserving flexibility for future expansion or battery storage.
Grid-tied vs off-grid: which fits your home
Grid-tied solar connects to the utility, often enabling net metering and reduced energy costs without costly battery storage. Off-grid setups require energy storage and usually backup generators, making them more complex and expensive. For most homeowners, grid-tied with optional battery backup provides a practical balance of reliability and cost. The choice hinges on your location’s reliability, energy usage patterns, and your tolerance for storage equipment, maintenance, and potential downtime during outages.
Site and mounting considerations: roof vs ground mounts
Roof-mounted systems utilize existing structure, saving space and often reducing costs, but require a solid roof with adequate orientation and minimal shading. Ground-mounted arrays offer flexible siting, easier maintenance, and better shading control, but involve more land use and higher mounting costs. Evaluate roof material, age, structural integrity, and angle; for ground mounts, consider soil stability, access, and local permits. Proper placement maximizes sun exposure and minimizes shading from trees or nearby structures.
Costs, incentives, and ROI
Costs for solar projects vary by region, system size, and component quality, with incentives and tax credits influencing overall economics. Solar Panel FAQ analysis shows that available incentives can significantly reduce upfront costs and shorten payback periods, though details depend on local programs and utility policies. When planning, compare quotes that include panels, inverters, racking, permitting, and interconnection, and model financials against projected energy savings and potential increases in home value.
Permitting, interconnection, and timelines
Most installations require rooftop or ground-mount permits, electrical inspections, and utility interconnection agreements. Start the process early by gathering load data, site measurements, and any required documentation. Timelines vary by locality and utility, but a typical project progresses from design to permitting, then installation and commissioning. Working with an experienced installer helps navigate these steps and ensures code compliance, safety, and reliable interconnection.
Installation steps overview
While the step-by-step guide provides actionable actions, this section offers a high-level understanding. The installation begins with design and permitting, followed by mounting hardware placement, module installation, wiring runs, inverter placement, and final interconnection testing. Each phase emphasizes safety and adherence to local electrical codes, with inspections scheduled to validate workmanship and performance. Expect straightforward tasks alongside the need for precise alignment, solid mounting, and careful cable management to minimize shade and maximize efficiency.
Maintenance, monitoring, and warranties
A solar system requires periodic inspection and cleaning to prevent energy loss from dust, debris, or shading. Monitoring platforms track production, performance anomalies, and system health, helping preempt issues. Warranties typically cover modules for twenty to twenty-five years and inverters for around ten to fifteen years, with performance guarantees tied to degradation rates. Regular check-ins with your installer or monitoring service help sustain system output and protect your investment.
Environmental impact and long-term benefits
Solar panels reduce dependence on fossil fuels, lower greenhouse gas emissions, and contribute to local energy resilience. While manufacturing and transport have upfront environmental costs, the long lifespan of solar equipment and the potential for local energy generation helps offset these impacts over time. homeowners who shift toward solar often report a sense of energy independence and a positive contribution to climate goals, reinforced by ongoing improvements in efficiency and durability.
Tools & Materials
- Safety gear (hard hat, gloves, safety glasses)(Essential for every edge work and roof maintenance; ensure proper fall protection)
- Measuring tape and framing square(For precise layout and mounting alignment)
- Solar PV modules(Select appropriate wattage and warranty; ensure compatibility with racking)
- Racking and mounting hardware(Roof or ground mount; corrosion-resistant materials recommended)
- DC to AC inverter(Match inverter type to module voltage and system size)
- Conduit, cabling, and junction boxes(Use appropriate gauge and weatherproof fittings)
- Electrical permit and interconnection paperwork(Maintain copies for inspections and utility review)
- Multimeter and voltage/current testers(Critical for safe commissioning and troubleshooting)
Steps
Estimated time: 2-4 days for planning and permitting; installation duration varies by size and site conditions, typically 1-3 days on-site
- 1
Assess energy needs
Review last twelve months of utility bills to understand your daily and seasonal energy usage. Identify high-load appliances and typical daily patterns to estimate how much solar generation you’ll need to offset. Create a simple load profile to guide system sizing and battery considerations if desired.
Tip: Use a year-long data set to account for seasonal swings in usage and solar production. - 2
Evaluate site and space
Inspect roof orientation and shading from trees or nearby structures. Measure available roof sections or allocate ground space for mounting. Consider accessibility for maintenance and future expansions.
Tip: Take sun-path measurements at different times of day and seasons to minimize shading. - 3
Obtain permits and interconnection
Contact local permitting authorities and your utility early to understand requirements. Prepare electrical diagrams, equipment lists, and any inspections that will be scheduled. Obtain all approvals before ordering equipment.
Tip: Starting early with permits can prevent project delays and ensure code compliance. - 4
Design system and select components
Choose modules with suitable wattage and efficiency, pick an inverter compatible with your array, and plan wiring and racking. Decide whether to include battery storage for backup and calculate a realistic performance expectation.
Tip: Prioritize quality components and documented warranties over lowest upfront cost. - 5
Install mounting and wiring
Secure mounting hardware to roof or ground structure, attach modules in a tight, level arrangement, route cables in conduit, and connect to the inverter. Ensure all connections are weatherproof and labeled for safety.
Tip: Turn off main service before beginning wiring; verify continuity with a multimeter. - 6
Connect to the main panel and test
Terminate system output at the electrical panel and perform a commissioning test. Verify safety switches, grounding, and metering with the utility. Review performance readings and adjust if needed.
Tip: Schedule a final inspection with the utility and an authorized electrician to confirm compliance.
Frequently Asked Questions
Is it possible to power my entire home with solar panels?
For many homes, a grid-tied solar system can cover a large portion of daytime energy use. Battery storage or hybrid setups can extend coverage during evenings and outages, but total independence requires careful design and backup planning.
Yes, many homes can cover a substantial portion of daytime energy needs with solar, and batteries can extend availability into the evening.
What size system do I need for my home?
System size depends on your daily energy use, available sun exposure, and roof or ground space. A professional assessment translates your load into the recommended number of panels, inverters, and possible battery storage.
System size is based on your daily energy use and available space; a professional assessment helps determine the exact setup.
How long does installation take typically?
Process length varies with permits and site readiness. Planning, approvals, and installation can span a few days to a couple of weeks, depending on local timelines and system complexity.
Installation can take a few days to a couple of weeks depending on permits and site readiness.
Do I need battery storage with solar panels?
Battery storage is optional but beneficial for outages and higher self-consumption. Grid-tied systems without batteries rely on the grid for evening power, while hybrids provide stored energy for critical loads.
Battery storage is optional but helpful for outages and more self-sufficiency.
What maintenance do solar panels require?
Solar panels require minimal maintenance: keep surfaces clean, check wiring connections periodically, and monitor performance data. Most issues are preventable with routine inspections and professional service when needed.
They’re fairly low maintenance; just clean panels occasionally and monitor performance.
Watch Video
Top Takeaways
- Assess energy needs before design decisions
- Choose a grid-tied system to leverage net metering
- Plan maintenance and monitoring from day one
- The Solar Panel FAQ team's verdict: solar power for home is attainable with careful planning and professional guidance