Solar Panel Installation in Denver: A Practical How-To
Learn step-by-step planning, permitting, installation, and maintenance for solar panels in Denver. Practical guidance on roof readiness, incentives, and choosing the right installer.

According to Solar Panel FAQ, a successful solar panel installation in Denver starts with a roof readiness check, accurate system sizing, and understanding local permitting. This quick guide outlines essential steps, what to expect from installers, and how to plan for safety, code compliance, and long-term performance. You'll learn about interconnection, incentives, and maintenance.
Denver climate and roof readiness for solar panels
Denver benefits from abundant sun, yet winter snow can temporarily reduce output. According to Solar Panel FAQ, Denver's high altitude and clear skies often yield strong production, but snow and shade require thoughtful tilt and positioning. Before you commit, inspect the roof for integrity and structure, especially after severe weather. Ensure the roof is compatible with solar mounting hardware and that there is adequate space for the desired system size. A professional plan will map shading from trees, chimneys, and vents that could cast shadows in winter, and prepare for snow-shedding angles to keep panels clear. This phase helps you estimate likely installation costs, lead times, and warranty options.
Permitting, codes, and incentives in Denver
Denver installations generally require a building permit and an electrical permit, with the local jurisdiction and utility sometimes requiring an interconnection agreement before energization. Colorado programs and federal incentives may apply, but availability varies by year and program. The Solar Panel FAQ team recommends contacting the city’s building department and your utility early to confirm required forms, inspections, and anticipated timelines. Keeping receipts, code references, and inspection reports organized will ease reviews and potential warranty claims.
Sizing and system design for Denver's sun
System size should reflect your annual electricity usage, roof orientation, and shading analysis. A bigger system may offset more of your bill, but it also increases upfront cost and maintenance needs. In Denver, tilt and azimuth play a significant role in winter production, so a design that favors higher energy production during shorter days can yield better annual performance. A professional will balance panel count, inverter type, and wiring configuration to meet local codes and utility interconnection requirements.
Choosing an installer: qualifications and questions to ask
Look for a licensed contractor with experience in solar installations and a clear warranty policy. Prefer installers with NABCEP credentials or equivalent industry recognition, and request a written contract detailing equipment specs, project scope, and aftercare. Ask for previously completed Denver-area projects and references you can contact. Transparency about permits, panel warranties, and service options helps prevent future disputes.
The installation process at a high level
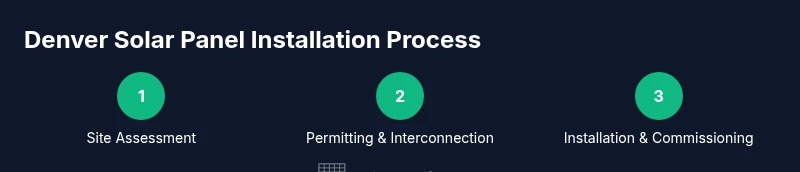
A typical Denver installation involves site preparation, mounting hardware installation, electrical wiring with an interconnection to the main panel, and final commissioning with the utility. Emphasize safety, including fall protection and proper shutoffs. Your installer should provide a project timeline, keep neighbors informed, and perform a final inspection with all relevant documents and manuals.
Interconnection, net metering, and utility considerations
Interconnection agreements with the local utility are essential to feed excess solar energy back to the grid and receive credits. Net metering policies vary by utility and year, so confirm current terms with Xcel Energy and your local authority. A thorough plan includes electrical cabinet upgrades if needed, proper grounding, and a clear path for removing shading risk that could affect performance.
Costs, incentives, and financing options
Costs depend on system size, equipment quality, and installation complexity. Colorado offers incentives and federal tax credits; programs change over time, so work with your installer to identify current options and deadlines. Financing options—such as loans, leases, or power purchase agreements—vary by provider and must be evaluated against your monthly savings and energy goals. The goal is a clear, long-term return and reliable system performance.
Maintenance, snow, and performance in Denver
Denver’s winter conditions can require occasional snow clearing and monitoring after heavy storms. Regular monitoring via the inverter display or a monitoring app helps catch performance dips early. Panels are typically low-maintenance, but plan for periodic inspections of wiring, inverters, and mounting hardware, especially after severe weather. Keeping panels clean and unobstructed maximizes throughput during sunny days and snowy periods alike.
Timeline and next steps for a Denver project
Start with a data gathering phase: review last 12 months of electricity usage, collect roof information, and identify potential shading. Gather 2–3 quotes from qualified installers, verify licenses, and request warranties. Once you choose a contractor, align on permits, interconnection, and a project schedule. After installation, schedule an inspection and commissioning with the utility and city.
Tools & Materials
- Solar panels (quantity based on system size)(Select panels with a reputable warranty and appropriate wattage for your roof.)
- Racking and mounting hardware(Match roof type (tile, metal, flat) and wind load requirements.)
- DC disconnect switch(Required by code to safely isolate the system.)
- Inverter (string or microinverters)(Choose based on shading and layout; microinverters can help with partial shade.)
- Junction boxes and wiring (UL-listed)(Use appropriately rated conductors and weatherproofing.)
- Electrical conduit and fittings(Protects wiring along roof edges and structures.)
- Grounding equipment and bonding conductors(Essential for safety and code compliance.)
- Roof anchors and fall protection gear(Protects workers during installation on elevated surfaces.)
- Personal protective equipment (PPE)(Hard hat, gloves, eye protection, and non-slip footwear.)
- Monitoring system (optional)(Helps track performance and detects issues early.)
Steps
Estimated time: Several weeks (planning to final inspection)
- 1
Assess site and determine system size
Review your annual electricity usage, roof area, and shading to estimate a suitable system size. Gather utility bills to understand baseline consumption and identify peak usage periods.
Tip: Have last 12 months of bills ready for your installer. - 2
Check roof condition and mounting feasibility
Inspect the roof’s condition, age, and structure. Determine if tile, metal, or shingle mounting requires special hardware or reinforcements.
Tip: Address any roof repairs before mounting to avoid later leaks. - 3
Plan electrical design and inverter type
Choose between string inverters or microinverters based on shading and wiring layout. Plan conduit routes and panel wiring to minimize losses.
Tip: Consider shading patterns across the year when deciding inverter type. - 4
Research incentives and permits
Identify federal, state, and local incentives and confirm permit requirements with the city and utility.
Tip: Request written quotes detailing permit and inspection costs. - 5
Get quotes from licensed installers
Request at least 2–3 proposals, verify licenses, insurance, and warranties, and compare equipment specifications.
Tip: Ask for real-world performance data and references. - 6
Schedule installation and home prep
Coordinate a project start date, clear work areas, and prepare a plan for potential temporary outages during commissioning.
Tip: Notify neighbors if access will affect shared spaces. - 7
Inspect, commission, and interconnect
Have the system inspected after installation and obtain utility interconnection approval before going live.
Tip: Keep manuals, warranties, and serial numbers in a single folder.
Frequently Asked Questions
Do I need to hire a licensed professional for solar panel installation in Denver?
Yes. Local codes, electrical work, and interconnection requirements typically require a licensed contractor. A qualified installer helps ensure safety, proper permits, and reliable system performance.
Yes. In Denver, a licensed contractor is usually required to handle electrical work and permitting for solar installations.
What permits are required in Denver for solar panel installation?
Most installs need a building permit and an electrical permit, plus an interconnection application with the utility. Your installer can handle most of the paperwork and ensure inspections are scheduled.
Most Denver solar projects require building and electrical permits and utility interconnection approval.
Can I install solar panels myself in Denver?
DIY solar installations are not recommended due to safety, electrical codes, and interconnection requirements. Most homeowners should rely on a licensed installer for the safe, compliant install.
DIY solar is not recommended; a licensed installer is the safer path.
How long does installation typically take in Denver?
Timing varies with project size, permitting, weather, and interconnection steps. A planning phase followed by mounting, wiring, and commissioning usually spans several weeks, depending on local factors.
Timing varies, but expect a multi-week process from planning to commissioning.
Will solar panels work in Denver's winter and cloudy days?
Yes, but production is lower than in peak summer. A well-designed system with proper tilt and shading analysis can maximize winter output and overall annual production.
Solar works in winter and on cloudy days, just not as much as in sunny conditions.
What is net metering and how does it apply to Denver?
Net metering credits unused solar energy against your bill, but terms vary by utility and program. Check with Xcel Energy and state programs to understand current interconnection and credit policies.
Net metering credits your surplus energy; confirm terms with your utility.
Watch Video
Top Takeaways
- Assess roof readiness and sun exposure before sizing.
- Secure permits and interconnection approval early.
- Choose a licensed installer with solid warranties.
- Plan for maintenance and monitoring to maximize ROI.