Solar Panel Installation Brisbane: A Practical How-To Guide
Learn how to plan, size, permit, and install solar panels in Brisbane with safety, code compliance, and local incentives. This practical guide covers site assessment, installer selection, costs, and maintenance for long-term energy savings.

By the end of this guide, you will understand how to plan, evaluate, and complete a compliant solar panel installation in Brisbane. You'll learn permitting requirements, roof suitability, system sizing, and contractor selection. This step-by-step approach covers safety, electrical work, and local incentives, ensuring a reliable, code-compliant install for homes across Brisbane.
Brisbane Context: Why a Thoughtful Solar Installation Matters
According to Solar Panel FAQ, Brisbane homeowners face unique considerations when adding solar panels: intense sun exposure, seasonal shading from trees, and the need to align with Queensland electrical rules. Your goal is a system that reliably generates power while staying compliant with local codes and rebates. This means planning for roof angle, panel orientation, and future grid requirements before you purchase equipment. The Solar Panel FAQ team emphasizes that upfront planning reduces risk and maximizes long-term savings, especially in a city known for sunny days and varying weather patterns. When you start with a clear assessment of site conditions and goals, you set a solid foundation for a successful installation in Brisbane.
A well-executed Brisbane install also considers aesthetics and property value, because many homeowners want a system that blends with their home and remains maintenance-light. Solar panels now come in a range of sizes and finishes, and modern inverters offer smarter monitoring. The key takeaway is to define your energy targets (how much you want to offset from daytime usage, and whether you plan to export surplus to the grid) and then design a system that fits your roof, budget, and lifestyle.
This article uses practical steps, real-world examples, and local guidance to help you achieve a safe, reliable, and financially sensible solar installation in Brisbane.
Tools & Materials
- Safety gear (helmet, gloves, non-slip shoes)(Essential for any roof work; ensure harness and fall protection when working at height.)
- Ladder and roof-safe anchoring(Stable access to the roof with secure footing and fall protection.)
- Drill, screwdriver set, and torque wrench(For mounting rails and securing modules.)
- Voltage tester and multimeter(Used to verify circuits and ensure de-energized work areas.)
- Measuring tape and compass/app for solar orientation(Accurate sizing and orientation maximize sun capture.)
- Racking kit and solar modules (panels)(Choose UL/CE-rated mounting system and panels matching design.)
- DC isolation switch and conduit pieces(Protects wiring runs and simplifies maintenance.)
- Inverter (string or microinverters) and mounting hardware(Choose based on system design and shading considerations.)
- Junction boxes, fuses, and connectors(Ensure weatherproof components and proper sealing.)
- Permits and documentation folder(Keep plans, warranties, and code compliance records organized.)
Steps
Estimated time: 2-5 days
- 1
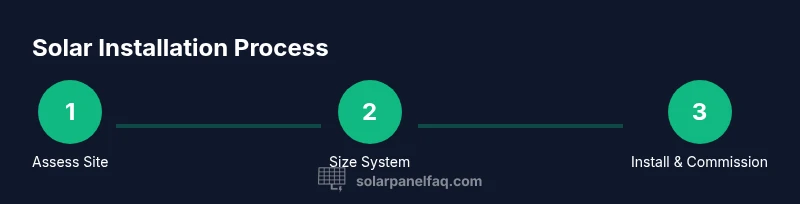
Assess site
Evaluate roof orientation, shading, and structural integrity. Document daylight hours and typical usage patterns. This helps determine the optimal system size and panel layout.
Tip: Take photos from multiple angles and note any trees or obstructions that shade the roof. - 2
Size the system
Estimate daily electricity use, then translate that into panel count and inverter capacity. Consider future needs and potential growth in household load.
Tip: In Brisbane, aiming for 70-90% daytime offset is common, but your target should reflect actual consumption. - 3
Obtain permits
Check with your local council and electrical regulator about required permits and approvals. Electrical work typically requires a licensed installer.
Tip: Verify what documentation is needed before scheduling work to avoid delays. - 4
Select equipment
Choose panels, inverters, and mounting hardware that suit your roof type, climate, and budget. Decide between string vs microinverters based on shading and ease of expansion.
Tip: Prioritize warranties and certification marks (e.g., UL/CE) for long-term reliability. - 5
Prepare roof and safety
Set up ladders, anchor points, and fall protection. Ensure the roof is clean and free of debris before mounting rails.
Tip: Coordinate with all workers so everyone knows the fall-protection plan. - 6
Mount rails and modules
Install mounting rails, attach rails securely, and mount solar modules in the intended configuration. Ensure proper torque on all fasteners.
Tip: Double-check alignment and seal any penetrations to prevent leaks. - 7
Connect wiring and inverter
Run DC wiring to the combiner box, install the DC isolation switch, and connect to the inverter according to the design.
Tip: Keep all conductors organized and properly labeled for future maintenance. - 8
Commission and inspect
Have the system inspected by a licensed electrician or local authority. Commission the system and test generation, safety switches, and monitoring.
Tip: Record compliance documentation and ensure the monitoring app is activated. - 9
Monitor and maintain
Set up monitoring, review performance data, and schedule periodic cleaning and inspections to maintain efficiency.
Tip: Clean panels gently with soft brushes and water to avoid micro-scratches.
Frequently Asked Questions
Do I need planning approval to install solar panels in Brisbane?
Most residential solar installations do not require council planning approval, but electrical work must comply with Queensland regulations. It’s important to verify with the local council and engage a licensed installer to ensure permit requirements are met.
In Brisbane, most home solar installs don’t need planning approval, but electrical work must follow local rules; check with your council and hire a licensed installer.
What permits are required for solar panel installation in Queensland?
You’ll typically need electrical permits and a valid electrical license for the installer. Your installer should handle permitting; keep copies of warranties and inspection reports.
Electrical permits are usually required; your installer can handle them, and you should keep all related documents.
Can I install solar panels myself in Brisbane?
For safety and code compliance, solar installations should be performed by a licensed professional. DIY work can void warranties and create hazards, especially when dealing with mains voltage.
We don’t recommend DIY solar installation; consult a licensed professional to keep you safe and compliant.
How long does installation typically take in Brisbane?
Most residential installs take a few days from assessment to commissioning, depending on roof access, permit timing, and contractor availability.
Expect a few days for a typical home install, depending on planning and inspections.
Will solar save money in Brisbane, and how soon?
Savings depend on system size, usage, and incentives. A properly designed system can offset a significant portion of daytime electricity use over its lifetime.
With a well-sized system and good sun, you’ll likely see meaningful savings over time.
What warranty coverage should I look for?
Look for a product warranty on panels and inverters, plus a workmanship warranty from the installer. Clarify coverage for labor, installation, and potential roof damage.
Ensure both product and workmanship warranties are clearly documented.
Watch Video
Top Takeaways
- Plan early for permits and roof readiness
- Size the system to real usage and climate realities
- Choose reliable equipment with solid warranties
- Hire licensed professionals to ensure safety and compliance
- Set up monitoring to track performance and savings