Building with Solar Panel: A Practical Homeowner's Guide
Comprehensive step-by-step guide for homeowners on building with solar panel—from planning and equipment to permits, installation, and upkeep for safe, efficient home solar power.

By the end of this guide you will know how to plan, select components, and safely install a residential solar panel system tailored to your home. You'll move from site assessment to permit readiness and system commissioning. The key requirements are clear energy goals, roof compatibility, proper mounting and wiring, and strict adherence to local electrical codes. This is a practical, code-conscious approach for homeowners considering building with solar panel.
Building with Solar Panel: A Practical Overview
According to Solar Panel FAQ, building with solar panel is a practical, long-term home improvement that blends energy generation with everyday living. This overview explains what homeowners should plan before anchoring panels, how to choose equipment, and how to navigate local rules. You’ll consider energy goals, roof space, shading, and future expansion while balancing upfront costs with long-term savings. The goal is a safe, code-compliant installation that fits your home’s design and climate. This approach treats solar as a system, not a single gadget, integrating panels with your electrical service, roof structure, and data monitoring.
A successful build starts with a clear vision: how much electricity you want to offset, whether you want a grid-tied system with net metering, or a standalone setup for backup power. You’ll also decide whether to pursue a DIY-friendly route or hire licensed professionals for critical steps such as electrical connections and permit inspections. The remainder of this guide lays out a practical path from site evaluation to commissioning, with concrete guidance intended for homeowners and prospective buyers who want reliable, safe solar performance. In this block, we cover the core concepts: system sizing, mounting options, safety, and service access. We’ll also discuss common pitfalls and how to avoid them.
Key considerations before starting
Before you purchase equipment or file permits, map your goals and constraints. Start with a home energy audit to estimate your current usage and determine how much of your load you want to offset. Consider roof orientation, shading from trees or chimneys, and the direction your roof faces; south-facing exposure in the northern hemisphere generally yields the best results, though real-world shading can still complicate performance. Local climate affects panel efficiency and inverter choice, so you may want to plan for a system that performs well under heat and cloud cover. Net metering policies and utility interconnection rules will shape how you size and time your production. Also, think about future needs: a battery backup, electric vehicle charging, or potential roof replacement. Setting realistic expectations around payback, warranty coverage, and maintenance helps you avoid over-promising results to family and buyers. Finally, build a decision tree that includes budget constraints, permitting timelines, and your preferred balance between DIY efforts and professional installation. This mindset makes the project more predictable and reduces the risk of costly changes later on.
Choosing panels, inverters, and mounting hardware
The core of any solar build is selecting the right hardware. Panels come in several archetypes, with monocrystalline offering high efficiency at a higher cost, polycrystalline providing good performance for lower budgets, and thin-film serving niche applications. Inverters convert DC from panels to usable AC power; options include string inverters, microinverters, and power optimizers—each with trade-offs in efficiency, shading tolerance, and maintenance. Mounting hardware varies by roof type and climate: roof-mounted systems save space, while ground-mounted setups maximize accessibility and flexibility for future expansion. Wiring and safety components—DC disconnects, conduit, and grounding—must meet current electrical codes. Finally, plan for monitoring and data visibility so you can track production and quickly spot performance issues. A well-chosen combination of panels, inverters, and mounting ensures long-term reliability and easier maintenance.
Roof assessment and structural considerations
Your roof is the stage for the entire system, so a careful assessment is essential. Evaluate roof age and condition to avoid premature replacements after installation. Check for roof material compatibility (asphalt shingles, metal, or tiles), flashing details, and the feasibility of mounting rails without compromising waterproofing. Shading from nearby trees, chimneys, or vents can severely impact performance, so conduct a shading analysis at different times of day and seasons. Structural loads must be within the rafters’ capacity, and in cases of older homes, you may want a professional assessment to confirm wind uplift resistance and load distribution. Access for future inspections and panel cleaning should also be considered when planning layout and orientation. The goal is a durable mounting solution that won’t stress roofing materials or void warranties.
Permits, codes, and safety practices
Most residential solar projects require permits and inspections from local authorities. Building permits ensure structural integrity and roof work follows code, while electrical permits cover wiring and inverter installation. Interconnection agreements with the utility company determine how your system will feed power back to the grid. Codes evolve, so verify you’re operating under the latest edition of the National Electrical Code (NEC) and any local amendments—these affect conductor sizing, grounding, and overcurrent protection. Safety is non-negotiable: plan for fall protection, lockout-tagout procedures when servicing, and proper Personal Protective Equipment (PPE). If you’re unsure about electrical work, hire a licensed electrician to handle critical tasks. Document every stage for inspections and future service.
Planning, budgeting, and long-term savings
Cost is a major driver, but it’s just one piece of the picture. System size, panel efficiency, mounting type, inverters, and warranties shape overall value. Local incentives, rebates, and tax credits can reduce upfront costs, while net metering rules influence payback timelines. Consider financing options such as loans or leases and compare total cost of ownership over the system’s lifetime. Include maintenance, inverter replacement, and potential battery storage in your financial plan. While exact prices vary by region and equipment choice, a well-designed system should align with your energy goals and offer predictable long-term savings. Think about future needs, like adding a battery or expanding capacity as electricity use grows. A thoughtful budget helps you set realistic expectations and avoid delays.
Maintenance, monitoring, and future upgrades
Maintenance keeps performance stable. Periodic cleaning to remove dust and debris, especially in dry climates, helps maintain efficiency. Monitoring dashboards let you spot performance dips and detect shading changes from growing trees. Inverters and transformers may require occasional service or replacement, typically after a decade or more, so plan for possible component refreshes. If you anticipate upgrades—such as larger capacity, storage, or vehicle charging—design the system layout to accommodate future expansion. Stay informed about warranty terms and service agreements to maximize protection for your investment.
Real-world case studies and pitfalls
Real-world installations reveal the practical realities behind the theory. For example, systems that were undersized for the actual energy load fail to offset bills, while poorly shaded roofs yield underperforming panels regardless of quality. Pitfalls often include delayed permits, underestimating roof age, and neglecting monitoring, which can hide performance issues. By examining a few representative cases, homeowners learn to prioritize accurate energy audits, include contingency budgets for roof work, and insist on thorough commissioning. This section helps translate design decisions into durable, efficient, and cost-effective solar builds.
Tools & Materials
- Solar panels (monocrystalline or polycrystalline)(Choose based on efficiency goals and budget; consider suppliers with solid warranties)
- Racking/mounting system(Roof-mounted or ground-mounted; ensure compatibility with roof type)
- Inverter (string, micro, or hybrid)(Match to system size and shading; microinverters offer shading resilience)
- DC disconnect switch(Required by code for safe service shutdown)
- DC/AC wiring and conduit(Appropriate gauge and protection; plan routing to main service panel)
- Electrical panel upgrade (if needed)(May be necessary for large systems or limited service capacity)
- Monitoring system(Optional, for real-time performance data and fault detection)
- Safety gear(Gloves, safety glasses, fall protection, and ladders)
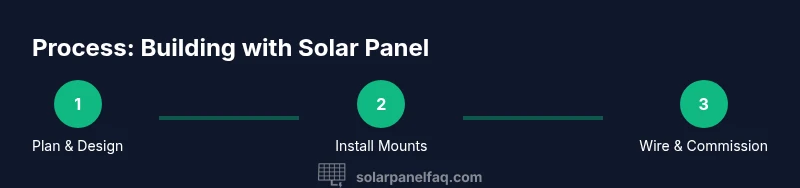
Steps
Estimated time: 1-3 days for a typical residential install, plus permit processing time
- 1
Define goals and perform site assessment
Clarify how much of your load you want to offset and assess roof space, orientation, and shading. This step anchors system sizing and layout decisions.
Tip: Document your energy use for a typical day—include HVAC peaks and kitchen loads. - 2
Select components based on goals
Choose panels, inverters, and mounting hardware that balance cost, space, and performance. Consider future upgrades like storage or EV charging.
Tip: Ask suppliers about warranties and real-world performance under your climate. - 3
Obtain permits and plan the interconnection
Submit building and electrical permits and plan for utility interconnection. This step ensures compliance and streamlines inspections.
Tip: Contact your utility early to understand net metering requirements. - 4
Prepare mounting and routes
Install mounting rails or ground mounts, verify roof integrity, and plan cable routing to the main panel.
Tip: Include access for future maintenance and panel cleaning in the layout. - 5
Install panels and electrical connections
Attach panels, connect wiring to the inverter, and install the DC disconnect; ensure all connections are secure and compliant.
Tip: If in doubt, hire a licensed electrician for the electrical connections. - 6
Commission, test, and document
Test system performance, verify safety clearances, and document all components and inspections for warranty and future service.
Tip: Record serials, warranty terms, and site conditions for future maintenance.
Frequently Asked Questions
Do I need professional installation or can I do it myself?
While some basic tasks can be handled by a handy homeowner, most residential solar installs require licensed electricians for electrical work and code compliance. Improper wiring or mounting can create safety hazards and void warranties.
Most residential solar installs should be done by a licensed electrician for safety and code compliance.
What permits are typically required for a residential solar installation?
Electrical and building permits are commonly required, along with an interconnection application with your utility. Inspections verify that the system is safe and compliant with local codes.
You'll likely need electrical and building permits and an interconnection with your utility.
How long does installation take?
Time varies with system size and site conditions, but most residential projects span several days, including inspection and commissioning.
Most installations take a few days, plus any required inspections.
What maintenance is required after installation?
Periodic cleaning and system monitoring are typical. Inverters may require servicing after many years, and monitoring helps catch performance issues early.
Keep panels clean and monitor performance; plan for occasional inverter checks.
Are there incentives or tax credits available?
Incentives vary by location and change over time. Check federal, state, and local programs and your utility’s schemes for potential rebates or credits.
Look up current local incentives and federal programs for solar.
Watch Video
Top Takeaways
- Define clear energy goals before component selection
- Assess roof and shading to optimize placement
- Secure permits early to avoid delays
- Budget for equipment, installation, and monitoring
- Plan for future upgrades and maintenance