How to Remove Ring Solar Panel from Mount
A comprehensive, safety-first guide to removing the mounting ring from your solar panel mount. Includes step-by-step instructions, tools, safety tips, and post-removal checks to ensure your system remains reliable and ready for reinstallation.

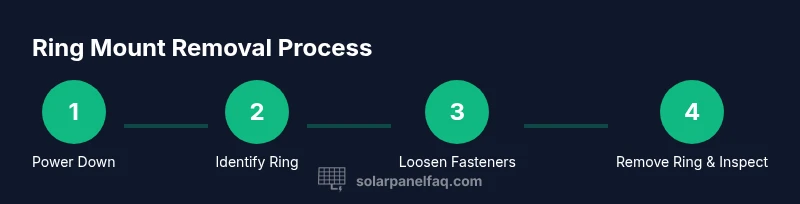
To remove the ring from a solar panel mount, first power down the system and lock out energy sources. Identify the ring type and mounting hardware, then carefully loosen fasteners in the recommended sequence. Remove the ring, inspect the mounting surface for damage, and set aside all fasteners for reinstallation. Finally, apply appropriate sealant or torque settings during reassembly and test the system after completion.
Safety and Preparation
Before touching any mounting hardware, power down the solar array and lock out energy sources. This reduces the risk of electrical shock, arc flash, or unexpected panel movement. Wear safety glasses and gloves, and if you are working on a roof, set up a fall-arrest system and a stable ladder. Check the weather and ensure your workspace is dry and clean. Have a plan for where to place screws, washers, and small parts so nothing rolls away or falls. This preparation sets the foundation for a safe, damage-free removal and minimizes the chance of rework.
Identify the Ring Type and Mount Connection
Rings and mounting connections vary widely. Some rings are decorative or cosmetic, while others form a critical link between the panel frame and the mounting rails or clamps. Inspect the ring profile, set screws, and any integrated seal or flashing. Note if the ring is threaded into rails, clamped around a post, or secured with a single large bolt. If the ring is part of a waterproof seal, removal may require resealing after the job. When in doubt, consult the manufacturer’s manual or take clear photos from multiple angles before touching fasteners.
Workspace Setup and Access
Layout your tools within arm’s reach and use a magnetic tray or labeled containers to keep screws and washers organized by size. If the panel is elevated, ensure you have a stable platform and fall protection. For wiring related concerns, isolate nearby connectors per your manual, but you typically don’t need to disconnect PV wiring to remove the ring itself. Maintain a tidy, dry workspace and avoid stepping on soft surfaces that could shift the panel or shed. A clean workspace reduces the risk of dropping components and losing hardware.
Removal Scenarios and Considerations
When loosening fasteners, work gradually and in a balanced sequence to reduce stress on the frame. Avoid prying directly on glass or the panel frame. If fasteners are corroded, apply penetrating oil and let it sit for several minutes before retrying. If a sealant has hardened around the ring, apply gentle heat (not enough to damage glass) to soften it, then loosen. Document the process with photos for reference during reinstallation. After the ring is loose, lift it slowly to avoid pinching cables or misaligning connections.
Aftercare and Reinstallation Readiness
With the ring removed, inspect the mounting surface for corrosion, cracks, or damaged flashing. Replace any worn hardware and clean threads before reassembly. When reinstalling, reseal or reapply flashing according to manufacturer guidelines and torque fasteners to the specified values. Restore power only after reassembly is complete and the ring is securely fastened. Verify the mechanical fit by gently testing movement and rechecking all connections. Keeping a maintenance log with torque values and hardware replacements helps long-term reliability.
Tools & Materials
- Safety gear (gloves, safety glasses)(Cut-resistant gloves recommended; eye protection required)
- Fall protection (if on roof)(Harness/ladder safety as needed)
- Torque wrench(Use to re-torque fasteners to manufacturer specs)
- Screwdriver set (Torx/hex as needed)(Match fastener type on ring hardware)
- Socket/wrench set(Common sizes depend on hardware)
- Penetrating oil (if seized)(Apply and wait 5–10 minutes)
- Sealant/flash sealant (if needed)(Only if re-sealing is required by mounting method)
- Magnetic tray or labeled containers(Keeps small parts organized)
- Rag or solvent wipe(Clean threads before reassembly)
Steps
Estimated time: 30-45 minutes
- 1
Power down and lock out
Switch off the solar array at the main disconnect and at the inverter/combiner box. Apply a lockout tag per your local safety standards and verify there is no voltage at accessible points with a non-contact tester. This step protects you from shock or accidental re-energizing during removal.
Tip: Always tag the lockout device and inform others to avoid re-energizing the system. - 2
Identify ring type and mounting connection
Carefully examine the ring and its mounting points. Look for screws, bolts, or clamps and compare to the manufacturer’s manual or photos you took earlier. Confirm whether the ring is part of a waterproof seal or flashing that will require resealing after removal.
Tip: Take multiple photos from different angles before touching hardware. - 3
Gather and organize tools
Arrange the torque wrench, appropriate screwdriver bits, and socket set. Prepare sealant or flashing materials if resealing is anticipated. Group fasteners by size and type into labeled containers to prevent mix-ups during reassembly.
Tip: Label containers so you can find the right fasteners quickly if needed later. - 4
Loosen fasteners in sequence
Begin at a corner or opposite pair and loosen gradually in a crisscross pattern to avoid uneven stress on the frame. If a fastener resists, apply penetrating oil and wait the recommended time before retrying. Do not fully remove a fastener until all others are loose to prevent ring distortion.
Tip: Use a helper to hold the ring steady as you loosen the final fasteners. - 5
Remove ring and secure hardware
Lift the ring away slowly, watching for cables or flashing that could snag. Place washers, nuts, and bolts in labeled bags or containers. Inspect threads and the mounting surface for any damage that needs repair before replacement.
Tip: Keep a clear space beneath the ring to avoid dropping parts. - 6
Inspect, store, and prepare for reinstallation
Clean threads, check for corrosion, and replace any worn hardware. If resealing is required, apply fresh sealant and inspect flashing for integrity. When ready to reinstall, confirm torque values and perform a final functional check after re-energizing the system.
Tip: Document torque specs and hardware changes for future maintenance.
Frequently Asked Questions
Is it safe to remove the ring while the system is energized?
No. Always power down and lock out energy sources before removing any mounting ring. Electrical shock or arc flash can occur even if the system seems quiet. Follow manufacturer safety guidelines.
No. Power down and lock out before removing the ring to prevent shocks or arc flashes.
What tools do I need for ring removal?
You’ll typically need a torque wrench, appropriate screwdrivers or sockets, and wrenches that match the ring hardware. Have penetrating oil and sealant on hand if fasteners are corroded or resealing is required.
A torque wrench and the right screwdriver or socket set, plus penetrating oil if parts are stuck.
What if fasteners are stuck due to rust?
Apply penetrating oil, wait several minutes, and retry gently. If still stuck, avoid forcing the fastener and consult a professional to prevent frame damage.
Try penetrating oil and a careful retry, but don’t force stuck bolts. Get help if needed.
Do I need to disconnect wiring to remove the ring?
Typically you do not need to disconnect PV wiring to remove the ring. Always follow the manufacturer’s instructions and ensure conductors remain isolated from accidental contact.
Usually not, but check your manual and keep wiring safe and isolated.
How can I verify safety after removal?
Inspect the mounting surface for damage, re-torque fasteners to spec, reseal if required, and re-energize only after confirming all connections are secure and the ring is properly installed.
Check torque, reseal if needed, and test the system only after everything is secure.
Watch Video
Top Takeaways
- Power down before any removal.
- Identify the ring type to avoid damage.
- Loosen fasteners in the correct sequence and stay organized.
- Inspect surfaces and reseal as needed after reinstallation.