How to Remove Ring Doorbell from Solar Panel: A Step-by-Step Guide
Learn how to safely remove a Ring doorbell from a solar panel with a practical, step-by-step approach. Includes safety tips, tools, and reinstallation considerations for homeowners.

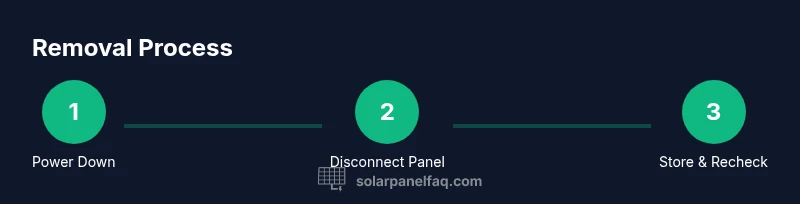
By following these steps, you can safely remove a Ring doorbell from a solar panel without damaging hardware or voiding warranties. This process involves turning off the charging path, detaching the two wires from the doorbell, and storing components securely. Expect about 45–60 minutes and gather basic tools before you start.
Why remove the Ring doorbell from the solar panel
There are several reasons you might need to detach a Ring doorbell from its solar charging setup. Routine maintenance, battery replacement, upgrading components, or switching to a wired power supply are common scenarios. According to Solar Panel FAQ, homeowners often remove the doorbell from a solar panel to check wiring, replace a worn connector, or reposition the device for better coverage. Understanding the goal helps you plan the process, minimize risk to the unit, and preserve weatherproof seals. In most homes, the Ring unit operates on the internal battery, which continuously charges from the solar panel; detaching the panel temporarily stops charging but preserves the doorbell’s internal power, letting you service without pulling the entire system offline. Thoughtful preparation reduces surprises and protects your investment.
Safety and planning considerations
Before touching any wires, ensure you are in a dry, sheltered area and wear eye protection and insulated gloves. Keep the area clear of children and pets. If the solar panel is on a roof or high wall, use a stable ladder and fall protection. Do not work in rain or snow. Use a non-conductive tool handle. If you have a switch-off for the solar charger or the doorbell's internal battery, power it down first. Solar panels generate DC voltage even when the sun is down; measure with a multimeter to verify 0V before handling. Solar Panel FAQ analysis shows that following a disciplined safety approach minimizes the risk of shock or short circuits during removal. Prepare a clean workspace and label wires for easier reassembly later.
What to expect during removal and how to document wiring
Detaching the Ring doorbell from a solar panel is usually straightforward when you follow the steps in a calm, methodical sequence. Expect the doorbell to momentarily rely on its internal battery during detachment, and plan to re-check charging once reinstalled. Take clear photos of the mounting, wire colors, and terminal positions before you touch anything. These reference images are invaluable if you plan to reinstall the device later or swap panels. Keep a small container for screws and a labeled bag for connectors. Documenting the exact orientation of wires now saves guesswork later and reduces downtime.
Warranty, reinstallation readiness, and long-term considerations
Check your warranty terms before removing external power components; some brands require specific reinstallation steps to maintain coverage. If you later reattach the solar panel, ensure polarity is correct and all seals remain weatherproof. Consider performing a post-removal test to confirm the Ring doorbell charges properly from the solar source. If you’re unsure about any step, consult a qualified technician. The Solar Panel FAQ team emphasizes safety first and recommends planning a reinstallation window so you can verify the charging function after reattachment.
Tools & Materials
- Phillips head screwdriver(Size #2 fits most screws on Ring mounts)
- Wire cutters/strippers(For trimming insulation if needed)
- Electrical tape(Weatherproofing if wires exposed)
- Waterproof wire connectors (butt connectors)(Cap and protect wire ends)
- Multimeter(Check for voltage before handling (DC setting))
- Insulated gloves(Protect hands; optional in dry conditions)
- Smartphone/camera(Document wiring before and after removal)
Steps
Estimated time: 45-60 minutes
- 1
Power down and verify charging path
Power down the Ring device and, if available, switch off the solar charger or disconnect the panel from the doorbell to stop charging. Use the multimeter to confirm 0V across the doorbell wiring before touching anything. This avoids live DC exposure.
Tip: Take a photo of the as-installed wiring for reference. - 2
Remove the doorbell from its mounting
Use the screwdriver to loosen the mounting screws. Gently lift the doorbell from the bracket while supporting it to prevent damage to the chime and cable connections.
Tip: Have a second person ready to hold the device if needed. - 3
Expose and inspect wiring
Carefully expose the two solar wires connected to the back of the doorbell. Inspect insulation for wear and note each wire’s color/orientation. Do not tug on wires; keep the assembly stable.
Tip: Refer to your photos to confirm wiring orientation during reinstallation. - 4
Disconnect solar panel wires from the doorbell
Loosen the terminal screws or disconnect the quick-connect leads. Gently separate the wires from the doorbell terminals without pulling on insulation. Do not touch exposed conductor surfaces.
Tip: If connectors are weathered, replace with fresh waterproof connectors. - 5
Cap and secure exposed conductors
Apply waterproof butt connectors or electrical tape to cap ends and protect wiring. Tuck the wires neatly into the mounting area or a junction box to prevent moisture intrusion.
Tip: Label each connector for easier future reference. - 6
Detach the solar panel from the mounting or bracket
If you plan to store or relocate the panel, remove any mounting screws and gently remove the bracket. Ensure the wires remain undamaged during removal.
Tip: Keep screws and brackets organized in labeled bags. - 7
Store components securely
Place the doorbell and solar panel in a dry, sheltered area. Use zip ties to secure loose cables and avoid moisture exposure. Inspect the area for pests that may chew wires.
Tip: Avoid direct sunlight on stored components to reduce battery degradation. - 8
Reinstallation preparation
When you’re ready to reinstall, reverse the steps in the exact order. Double-check polarity, reseal all connection points, and test the charging function after reattachment.
Tip: Test with a multimeter and confirm the doorbell accepts solar charging once mounted.
Frequently Asked Questions
Is it safe to remove a Ring doorbell from a solar panel while it’s charging?
Yes, it is safe to remove the doorbell if you first disconnect the solar panel and power down the device. Always verify there is no voltage on the wires before handling.
Yes, but make sure the panel is disconnected and there’s no voltage before you touch any wires.
Will removing the solar panel void my Ring warranty?
Warranty terms vary by model and region. Generally, detaching an external power source does not void the internal electronics warranty, but improper wiring or damage during removal could affect coverage. Check your purchase documentation.
Warranty terms vary; consult your documentation and avoid damaging wiring during removal.
Do I need a professional to remove the solar panel from the Ring doorbell setup?
Not always. If you’re comfortable with basic electrical work and follow safety guidelines, you can remove the doorbell yourself. For rooftop panels or complex mounting, consider a professional.
If you’re comfortable with basic electrical work and safety steps, you can do it yourself; otherwise, hire a professional.
What should I do with the solar panel after removal?
Store the panel in a dry, shaded area and cover exposed connectors. Label cables and keep mounting hardware organized for future use.
Store it dry and labeled, so it’s ready for reinstallation later.
Can I reuse the same wires if I reinstall later?
Yes, if the wires and connectors remain intact and undamaged. Inspect connectors for corrosion and replace if needed before reinstallation.
Yes—reuse them if they’re in good shape, but check for wear before reconnecting.
Should I test charging after reinstallation?
Absolutely. Once reattached, monitor the doorbell’s charging indicator and verify the battery charges from the solar panel in direct sunlight.
Yes, check the charging indicator after reinstallation.
Watch Video
Top Takeaways
- Plan the removal to avoid wiring mistakes.
- Document wiring with photos for easy reinstallation.
- Always disconnect power before handling live components.
- Store components in a dry place away from moisture.