How to Remove Battery from a Solar Panel
A practical, safety-focused guide for homeowners on removing a battery from a solar panel storage system, including gear, tools, step-by-step actions, and post-removal care. Learn to disconnect, isolate, and store batteries properly with confidence.

This guide shows you how to safely remove a battery from a solar panel storage system. You’ll learn essential safety steps, required tools, and a clear sequence to minimize risk to people and equipment. Proper shutdown, isolation, and careful handling protect battery health and solar components.
Why removing a battery from a solar panel system might be necessary
Batteries in solar storage support power when sunlight isn’t available. There are times you’ll need to remove a battery—for maintenance, replacement, or relocation. Removing a battery correctly reduces the risk of electrical shock, chemical exposure, or shorts. According to Solar Panel FAQ, understanding the system layout helps you plan safe removal, minimize downtime, and prevent accidental re-energization during the process. By preparing properly, homeowners can avoid costly mistakes and extend the life of their storage components.
Safety considerations and gear you’ll need
Safety should never be an afterthought when handling batteries. Wear insulated gloves and impact-resistant safety goggles, and keep a fire extinguisher rated for electrical fires nearby. Use non-conductive tools and avoid metal jewelry that could bridge terminals. Ensure you have a partner to assist if a lift is required. Good ventilation helps when removing large lead-acid or Lithium-based batteries, reducing the risk of hazardous fumes. A quick risk assessment before starting will guide your choices about PPE and workspace layout.
Understanding the components involved in a solar battery system
A solar battery sits within a bank connected to a charge controller, inverter, and sometimes a DC disconnect. The charge controller regulates charging from the solar panels, while the inverter converts stored energy for household use. Knowing where each component sits and how they interact helps you plan safe disconnection and reassembly. Labels on terminals and wires simplify reassembly and reduce the chance of reversing connections.
Preparing the workspace and environment for safe removal
Choose a dry, well-ventilated area with plenty of light. Clear the space of flammable materials and secure the battery to prevent tipping. Have labeling materials ready so you can document terminal orientation and cable routes. Ensure the system is de-energized according to your equipment manual before you touch any cables. A clean, organized workspace reduces errors and speeds up the removal process.
Practical considerations for post-removal care
After removal, store the battery upright in a ventilated, climate-controlled area, away from living spaces and heat sources. Check the battery for signs of damage, leakage, or swelling before handling. Document the date of removal, the battery type, and its condition for future maintenance records. If you’re unsure about storage options, consult local guidelines or a certified electrician. Proper disposal or recycling is essential for end-of-life batteries.
Tools & Materials
- Insulated gloves(Choose gloves rated for electrical work, and ensure a comfortable fit.)
- Safety goggles(Eye protection against splashes, sparks, or debris.)
- Non-conductive tools(Plastic or fiberglass handles to avoid shorts.)
- Battery terminal wrench or insulated screwdriver(Only use insulated hand tools on live terminals.)
- Digital multimeter(For verifying voltage and confirming isolation.)
- Cable labels and marker(Label connections before disconnecting to ease reassembly.)
- Fire extinguisher (Class C/electrical)(Keep within easy reach in case of emergencies.)
- Battery cradle or stand(Optional for stabilizing heavy batteries during removal.)
- Storage container or vented case(Store upright and in a cool, dry place after removal.)
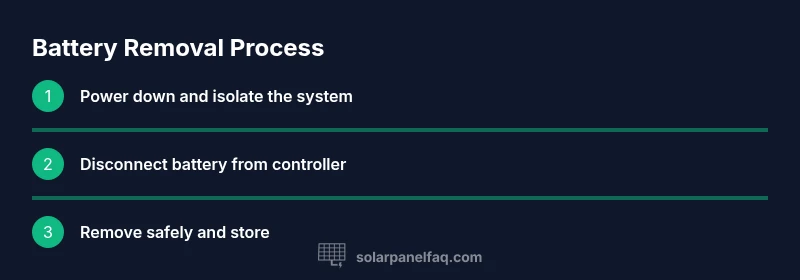
Steps
Estimated time: 45-60 minutes
- 1
Power down the system and isolate panels
Turn off the charge controller and inverter. If there is a dedicated DC disconnect, switch it off as well. Isolating the solar array prevents it from generating voltage during removal, reducing shock risk and accidental arcing.
Tip: Comment: Always verify that the solar array is not producing power before touching any cables. - 2
Put on PPE and secure the workspace
Don gloves and goggles before handling any battery components. Clear the area of trip hazards and ensure a helper is available to assist with lifting or maneuvering the battery.
Tip: Pro tip: Keep a belt or harness nearby for heavy batteries to prevent dropping them. - 3
Identify and label battery connections
Inspect the battery bank and identify negative and positive terminals. Label each cable with its destination to simplify reassembly and reduce the chance of cross-connection.
Tip: Label both ends of each cable so you can trace routes during reinstallation. - 4
Disconnect the battery from the controller (negative first)
Using an insulated tool, loosen the negative terminal first, then the positive. This sequence minimizes sparks and reduces the risk of shorting the system.
Tip: Always keep tools away from the metal case during removal. - 5
Verify isolation with a multimeter
Check that the battery terminals show no voltage relative to the system ground. If voltage is detected, re-check connections and isolation before proceeding.
Tip: If you’re unsure about readings, pause and consult a licensed technician. - 6
Remove the battery from the enclosure
With a helper if needed, lift the battery carefully using proper body mechanics. Place it on the cradle or onto a storage tray, ensuring it remains upright and stable.
Tip: Keep the battery away from metal benches to avoid accidental contact with tools. - 7
Inspect, label, and store
Check terminals for corrosion, cap any openings if required, and place the battery in a vented container for storage. Document the removal date and any observed issues for future maintenance.
Tip: Record storage location and conditions to support safe long-term storage.
Frequently Asked Questions
Do I need to disconnect all solar panels before removing the battery?
Ideally, isolate the entire system by turning off the charge controller and any DC disconnects, then verify there is no voltage present. This minimizes risk of shocks or arcing during removal.
Turn off the controller and disconnects, then verify no voltage before touching any cables.
Is it safe to remove a battery if the sun is shining?
Sunlight should not be a barrier to safety when removing a battery. Take precautions to avoid shocks, and ensure systems are de-energized according to manuals and safety guidelines.
Shining sun isn't a reason to skip safety—de-energize first and proceed carefully.
What tools are essential for battery removal?
Essential tools include insulated gloves, safety goggles, non-conductive tools, a multimeter, and labeling materials. Have a helper if the battery is large or heavy.
Use insulated gloves, goggles, non-conductive tools, and a multimeter. Have someone assist if needed.
How can I tell if the battery is damaged after removal?
Inspect for swelling, cracks, leaks, or unusual odors. If damage is detected, handle with care and consult a professional for disposal or replacement.
Look for swelling or leaks and contact a pro if you find damage.
Where should I store the removed battery?
Store upright in a ventilated, climate-controlled area away from flammable materials. Follow local regulations for disposal or recycling.
Keep it upright in a ventilated space and follow local disposal rules.
Can I remove batteries from off-grid solar setups?
The general safety steps apply, but always refer to the system’s manual and follow manufacturer guidance for off-grid configurations.
Yes, but follow the system manual and safety rules specific to your setup.
Watch Video
Top Takeaways
- Power down and isolate to prevent energy flow
- Use proper PPE and careful lifting for safety
- Label cables to simplify reinstallation
- Store battery upright in a ventilated space