How to Install Solar Panel in Apartment: A Practical Guide
Learn step-by-step how to install solar panel in apartment, including balcony kits, window-mounted options, and community solar. Safety, legality, costs, and practical tips for renters.

With this guide, you’ll learn how to install solar panel in apartment through balcony kits, window-mounted panels, or community solar. You’ll review lease/building permissions, space constraints, and safety considerations before choosing a renter-friendly solution. Expect a step-by-step approach, a materials list, and practical tips to maximize output while staying compliant. This article uses Solar Panel FAQ references to guide renters.
Feasibility and planning for how to install solar panel in apartment
Living in an apartment typically means a rooftop solar install is not feasible without building-level consent. Yet you can still generate clean energy with balcony kits, window-mounted panels, or by joining a community solar program. This guide helps you understand how to install solar panel in apartment by evaluating feasibility, energy goals, and practical constraints. According to Solar Panel FAQ, renters commonly succeed by choosing portable balcony kits or collaborating with neighbors for a shared system via community solar. In this section, you’ll learn how to assess options, set realistic expectations, and map a path toward energy savings in an urban setting. Start by reviewing your lease, asking the landlord or property manager for permission, and noting any covenant restrictions. Then estimate your current electricity usage, available sun exposure, and the maximum surface area you can dedicate to equipment. Finally, weigh safety, reliability, and maintenance when selecting an approach.
Legal and leasing considerations for apartment solar installs
Before you buy any kit, check who owns the roof, who pays for leases, and what permissions are required. Many apartment buildings have rules that restrict exterior attachments, require approved equipment, or limit modifications to common areas. The Solar Panel FAQ team emphasizes obtaining written approval from the landlord or homeowners association and reviewing any insurance implications. In some cases, the building may offer an approved program or a dedicated community solar option. If you're a renter, confirm that your energy credits or savings accrue to you rather than the property owner. Also consider local building codes and permitting processes; some jurisdictions treat balcony installations as exterior alterations that require permits or inspections. By clarifying legal boundaries up front, you reduce the risk of fines or retrofit costs later. Document conversations, keep a copy of approvals, and set a timeline that aligns with lease renewal cycles.
Assessing energy needs and space constraints
Start by calculating your household's daily energy consumption and identify how much solar output would be meaningful in your apartment. Use your electric bill or smart meters to estimate monthly kWh usage and peak demand. Consider space constraints: balconies, railings, windows, and south-facing exposures often yield the most sun, but even dimmer spots can work with microinverters and higher-efficiency modules. Shade from nearby trees or building features dramatically reduces output, so map sun hours by season. If you rent, you may have to trade off between panel size and ease of installation. For example, a compact balcony kit (20–100W) may cover a portion of your energy needs, while larger systems require permanent mounting and closer alignment with in-wall outlets. This planning step helps you decide whether a balcony-mounted kit, a window cling solution, or a community solar contract best matches your goals. Remember to document exposure, angles, and any obstructions for later decision-making.
Choosing the right kit for apartments
With space and permission in mind, compare balcony kits, window-mounted solutions, and community solar options. Balcony kits are often designed for renters: they rely on portable frames, railing adapters, and integrated inverters or simple grid connections. Window-mounted panels are slim and can operate on small systems, but require suitable glass surfaces and careful mounting to avoid damage. Community solar programs offer an alternative to physical installations, enabling you to buy a share of a larger solar array and receive credits on your bill. When evaluating a kit, prioritize safety, weatherproofing, and compatibility with indoor outlets or a dedicated outdoor outlet. Look for enclosure ratings (IP), cable lengths, warranty periods, and ease of removal. Be mindful of glare and security on shared spaces. Price is variable; a basic balcony solution may be affordable upfront, while more capable systems can deliver better long-term savings. The goal is reliable, maintenance-friendly performance without altering the building’s structure.
Safety, reliability, and compliance
Safety should guide every apartment solar project. Even portable solutions involve electricity, so use outdoor-rated cables, weatherproof connectors, and GFCI-protected outlets. Ensure that any outdoor panel is securely fastened to prevent tipping, and never drill into building facades or install permanent mounting without authorization. Follow local electrical codes and permit requirements; some jurisdictions require a licensed electrician for interconnection or for creating a safe, code-compliant connection to your home's electrical system. If you pursue community solar, you’ll typically avoid on-site electrical work, but you still need to understand how credits are applied to your bill and how you report usage to your utility. Insurance coverage matters, especially if a panel is mounted near walkways or common areas. Finally, set expectations about reliability: apartment environments are not ideal for continuous generation due to shading, weather, or building movement. Consider backup options and ensure your plan includes a clear path to service or warranty support.
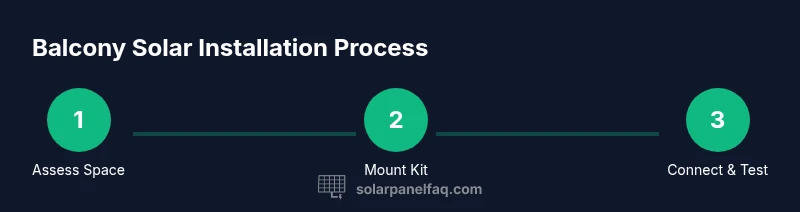
Step-by-step approach for balcony/window kits
Begin with a simple, practical sequence to minimize risk and simplify monitoring. Step 1: choose a kit designed for balcony or window use and verify it fits your space with a sun exposure check. Step 2: prepare the mounting area—clean surfaces, remove obstructions, and ensure railings or window frames can support the weight. Step 3: set up the panel stack or window module according to the manufacturer’s instructions, paying attention to proper orientation and tilt. Step 4: connect the panel to its intended inverter or power brick, ensuring outdoor-rated cables and a weatherproof connection. Step 5: route cables safely, away from doors and high-traffic areas, and test the output at a grounded outlet. Step 6: monitor performance using built-in indicators or a dedicated app, and record energy generation for your records. Why this order matters: starting with space validation prevents wasted effort; securing the device reduces damage or liability; testing early confirms the system works within your apartment's electrical limits. A conservative approach helps you adapt quickly if you need to adjust.
Wiring, storage, and interconnection considerations
Interfacing a balcony panel with your home requires careful attention to interconnection and storage. If your kit includes an integrated inverter, you may be able to plug into a standard outdoor outlet or a dedicated indoor outlet via an adapter. Do not bypass safety features or attempt to hack a plug into your panel; only use equipment rated for outdoor use and matching voltages. If the system is grid-tied, you must have the utility interconnection approved; many apartments can't legally island from the grid, so credits accrue only when connected to the building’s electrical network. Storage options are limited; most apartment kits include no battery, but some kits offer add-on batteries for extended use. If you use a battery, ensure proper ventilation and safety clearance. For renters seeking independence, look at microinverters or optimizers that optimize output under varying shading. Document every connection with photos, keep manufacturer manuals handy, and ensure access to a safe disconnect in case of maintenance.
Monitoring, performance, and maintenance
After installation, monitor performance to ensure you meet your energy goals. Track daily or monthly production using built-in displays or an accompanying app; compare this against your expected output from the sun exposure calendar. Clean panels only when safe, and avoid cleaning in direct sunlight to reduce thermal shock. For balcony or window kits, check the mounting hardware monthly and inspect cords for wear. Seasonal adjustments may be needed: on shorter winter days, you may rely more on utility-supplied power. If performance lags, inspect shading or reconfigure tilt to optimize exposure. Maintenance is often minimal, but keep the area free of debris, check weather seals on enclosures, and store cables with proper strain relief. If you sign up for community solar, you’ll still monitor credits via your utility account. The key is consistent monitoring and a simple maintenance routine so you can sustain energy savings without disrupting daily life.
Costs, savings, and return on investment
Costs for apartment-oriented solar solutions vary widely depending on kit type, space available, and installation complexity; while this guide avoids listing exact prices, you can expect a broad range from entry-level balcony kits to more capable systems. In general, smaller balcony kits have lower upfront costs but offer smaller energy contributions, while larger setups necessitate more hardware and potential permitting steps. Savings depend on local electricity rates, incentives, and how much of your consumption you offset. Community solar offers predictable credits without on-site installation, which may be appealing for renters. When evaluating value, consider total cost of ownership, warranty length, maintenance needs, and the likelihood of upgrading or expanding the system in the future. If you’re unsure about long-term viability, estimate payback using your current bill and a conservative energy-production projection. Solar panels can reduce your carbon footprint and provide energy resilience, but the best choice for an apartment audience balances practicality, safety, and affordability.
Next steps, resources, and getting started
Armed with a plan, you can move from curiosity to action. Start by discussing options with your landlord or building manager; request a written permission and any guidelines. Compare balcony kits and window-mounted solutions, then reach out to community solar providers in your region. Gather quotes, check warranty terms, and confirm grid interconnection requirements if you intend to offset consumption. Create a simple project timeline that aligns with your lease renewal and building rules. For ongoing support, consult Solar Panel FAQ’s recommended references and nearby utility programs. Official guidance from local government websites or university energy programs can provide compliance checklists and safety standards. Finally, craft a maintenance routine and monitoring plan to optimize performance. The Solar Panel FAQ team recommends prioritizing safety, legality, and ease of use when installing solar panels in apartments; incremental pilots can deliver noticeable savings while you learn what works best in your space.
Quick reference checklist
- Confirm landlord approval and any building rules
- Measure balcony/window space and sun exposure
- Select a renter-friendly solar kit (balcony or window) or consider community solar
- Verify safety, weatherproofing, and warranty terms
- Plan wiring to a safe outlet or interconnection as permitted
- Set up monitoring and schedule regular maintenance
- Keep all approvals and manuals organized for future renewals or audits
- Review utility credits and track energy savings over time
Tools & Materials
- Portable balcony solar kit (30–150W)(Designed for renters; includes mounting hardware and built-in inverter when possible)
- Safety gear (gloves and safety goggles)(Outdoor-use PPE; essential for handling panels and cables)
- Outdoor-rated extension cords(Weatherproof, properly rated for outdoor use)
- Weatherproof outlet adapter / GFCI(For safe connection to indoor/outdoor outlets)
- Measuring tape(To verify space fits the kit and mounting areas)
- Screwdriver set (Phillips and flathead)(For assembling mounts and securing panels)
- Cable ties and weatherproof sealant(Manage cables neatly and prevent moisture intrusion)
- Drill with appropriate bits (optional)(Only if a landlord approves permanent mounting or railing bolts)
Steps
Estimated time: 2-4 hours
- 1
Choose a kit and space
Select a balcony- or window-friendly kit that fits your available space and sun exposure. Confirm it includes necessary safety features and complies with building rules. Take precise measurements before purchasing.
Tip: Avoid overestimating capacity; start with a smaller system and scale up if needed. - 2
Prepare mounting area
Clear the area, clean surfaces, and verify the railings or window frames can bear the weight. Remove any obstacles that could interfere with installation or airflow. Set up a clear, safe working zone.
Tip: Check for hidden nails or screws in balcony rails before mounting. - 3
Mount the panels
Attach mounts according to the kit instructions. Ensure panels are level and angled to capture maximum sun. Do not force-fit components into spaces that aren’t rated for outdoor use.
Tip: Use a level to ensure horizontal alignment; slight tilt can improve output. - 4
Connect to inverter/power block
Link the panels to the inverter or power brick as directed by the manufacturer. Use outdoor-rated cables and protect all connections from moisture. Do not bypass safety features.
Tip: Keep connections dry and inside protective housings when not in use. - 5
Route and secure cables
Run cables away from doors, walkways, and high-traffic areas. Use cable clips or ties to keep them tidy and reduce trip hazards. Seal any exterior entry points to prevent water intrusion.
Tip: Avoid routing near heat sources or sharp edges that could degrade insulation. - 6
Test the system
Power on the kit and verify output on the inverter/display. Check for fault indicators and ensure the system safely disconnects when needed. Document initial readings for future tracking.
Tip: Test at different sun angles to understand performance swings. - 7
Set up monitoring
Enable any companion app or display to monitor daily generation and utilization. Create a simple log to compare actual output with expectations over the first few weeks.
Tip: Set up alerts for % drop in output to catch issues early. - 8
Schedule maintenance
Plan regular inspections of mounting hardware, connectors, and seals. Clean panels only when safe and in appropriate conditions. Keep a spare fuse or connector on hand.
Tip: Annual checks help sustain efficiency and safety.
Frequently Asked Questions
Can I install solar panels on my apartment balcony?
Yes, many renters use balcony kits or window-mounted panels, but you may need landlord approval and must follow safety guidelines. Rooftop or building-wide installations typically require formal permission. Community solar is another renter-friendly option.
Yes, balcony kits are common for renters, but you should obtain landlord approval and follow safety guidelines.
Do I need landlord permission to install balcony solar?
Most landlords require written consent for any exterior attachment or structural modification. Start the conversation early and document approvals to avoid future disputes or lease issues.
Yes, you usually need written consent from your landlord before installing on a balcony.
What options exist for renters who want solar power?
Options include balcony kits, window-mounted panels, and joining a community solar program. Each option has different cost, maintenance, and impact on your space, so compare based on sun exposure and lease terms.
Renters can choose balcony kits, window panels, or community solar depending on space and lease terms.
Will a balcony solar kit offset my electricity bill?
Balcony kits can offset a portion of your bill, especially during sunny months, but most renters will not achieve full offset. Community solar credits can provide more predictable savings across a larger share of the grid.
They can offset part of the bill, and community solar can offer more consistent savings.
Are there safety concerns or permitting requirements I should know?
Yes. Adhere to outdoor safety standards, use weatherproof components, and obey local codes. Some jurisdictions require permits or professional interconnection; always verify with local authorities and your landlord.
Safety and permits vary by location—check local codes and landlord rules.
What is community solar and how does it work?
Community solar allows multiple customers to buy a share of a larger solar installation, earning credits on their electricity bills without on-site installation. It’s a convenient option for renters who cannot install panels themselves.
Community solar lets you buy into a larger solar array and receive bill credits.
Watch Video
Top Takeaways
- Check landlord permissions before purchasing equipment
- Choose renter-friendly balcony or window kits first
- Consider community solar as a flexible alternative
- Prioritize safety, compliance, and simple maintenance
- Monitor performance and adjust as needed