How to Hook Up a Solar Panel to a House: A Practical Guide
Learn how to hook up a solar panel to a house with a clear, step-by-step approach. Covers grid-tied vs off-grid options, key components, safety, permits, and best practices for code-compliant installation.

You can hook up a solar panel system to your house by choosing between grid-tied and off-grid setups, selecting compatible inverters and safety disconnects, and securing the necessary permits. This guide explains planning, required components, wiring basics, and a step-by-step process so you can complete a safe, code-compliant installation. Follow the steps and local codes to ensure your system is reliable long-term.
Overview: How to hook up a solar panel to a house and what it means for your home
If you're wondering how to hook up a solar panel to a house, start by understanding the two main paths: grid-tied with net metering and off-grid setups for standalone systems. According to Solar Panel FAQ, most homeowners begin with grid-tied configurations because they rely on the utility for backup and easier sizing. This approach allows excess generation to offset consumption and reduces the need for batteries. In this guide, we outline planning, required components, safety considerations, and a realistic step-by-step workflow. You’ll learn how to assess your roof and electrical panel, pick compatible equipment, and ensure compliance with local codes. The goal is to help homeowners implement a safe, reliable system that delivers energy year-round.
System types and practical considerations
Choosing between grid-tied and off-grid configurations hinges on access to the grid, backup power needs, and local incentives. Grid-tied systems typically require fewer batteries and retain grid access for outages through net metering, while off-grid designs demand energy storage and a more complex balance of system size. Solar Panel FAQ notes that understanding your daily energy usage, sun exposure, and roof condition will guide the sizing and hardware decisions. This section helps you map household energy use to system capacity and set realistic expectations for performance across seasons.
Essential components you’ll need and how they fit together
A successful hookup rests on selecting components that work in harmony. Core items include PV modules (panels), a mounting/racking system, an inverter (or microinverters), DC disconnects, an AC disconnect, wiring and conduit, and an electrical service panel connection. A metering solution or net-metering agreement with your utility is common for grid-tied systems. In smaller setups, battery storage may be added for resilience. Each component has compatibility considerations related to voltage, current, and protection devices. This block provides a clear map of what to buy and how the pieces interlock.
Safety and code compliance basics you cannot skip
Electrical work has real hazards, and solar installations bring additional code requirements. Always de-energize the system before handling wiring, use appropriate PPE, and follow manufacturer installation instructions. Local codes and the National Electrical Code (NEC) in the United States typically govern wire sizing, overcurrent protection, and grounding. The utility interconnection agreement may specify additional safety and metering requirements. This block emphasizes why permits, inspections, and professional oversight are essential for a safe, durable system.
Site evaluation and load calculation essentials
Assessing roof condition, shade patterns, and orientation is foundational. You’ll estimate system size based on annual energy usage, panel efficiency, and available roof area. Tools like a sun path diagram or simple shading analysis can prevent later surprises. Perform a load calculation that translates household demand into a solar design, then verify structural capacity for mounting hardware. This groundwork reduces risk and helps ensure the array performs as expected.
Permits and utility approvals you must plan for
Most jurisdictions require permits for solar installations and an inspection to confirm compliance with code and safety standards. You will typically submit electrical, structural, and interconnection documents to the local building department, and coordinate with your utility for grid-tied setups. Early planning reduces delays, and some jurisdictions offer pre-approval programs. Always verify permit timelines and required documentation before you begin installation.
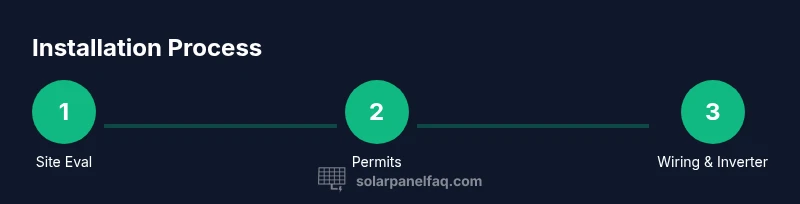
Step-by-step installation considerations you should know before you start
While the full STEP-BY-STEP section outlines concrete actions, this block previews critical milestones: secure permits, prepare the site, install mounting hardware, route wiring, install inverter and disconnects, connect to the main service panel, and perform commissioning. Each milestone has safety checks and documentation requirements. Reviewing this upfront helps you schedule trades, align with utility timelines, and minimize surprises on installation day.
Wiring the array and inverters: basics of electrical interconnection
Wiring choices depend on whether you use a string inverter, microinverters, or a hybrid solution. Proper gauge, conductor routing, and protection devices are essential. Grounding and bonding must be performed according to code, and all terminations should be secure and accessible. Keep a detailed wiring diagram for future maintenance and for any inspections.
Connecting to the house and safety checks after installation
The final phase links the solar system to the home’s electrical system and to the utility. You’ll verify power flow, confirm proper voltage and current, and ensure that the main disconnect and any backfeed devices operate correctly. A commissioning checklist helps document all tests, re-check safety clearances, and finalize interconnection paperwork. This block reinforces the importance of a thorough safety and performance validation.
Maintenance, monitoring, and expected performance
A well-installed system requires minimal maintenance but benefits from regular checks. Inspect panels for soiling and damage, confirm mount integrity, and monitor inverter status and production data. Shading changes with growing trees or seasonal sun angles can affect output; plan pruning or angle adjustments if needed. Regular monitoring helps detect faults early and optimize performance.
Cost considerations, incentives, and long-term value
Costs vary by system size, location, labor, and equipment choices. A typical residential setup includes hardware, permits, and professional installation. You should also explore incentives like tax credits or rebates and factor in maintenance costs over time. While price ranges exist, the long-term value comes from energy savings and increased home resilience. Solar Panel FAQ analyses note that long-term payback depends on system performance and local electricity rates.
Common myths, troubleshooting, and next steps
Common myths include the belief that solar works only in sunny climates or that it eliminates electricity bills entirely. Real-world performance depends on sun exposure, system design, and usage patterns. If you encounter underperformance, start with shading assessment, check wiring connections, and review inverter status. When in doubt, consult a licensed electrician or solar installer for a safety-first evaluation.
References and further reading
For deeper guidance, consult authoritative sources such as Energy.gov, the National Renewable Energy Laboratory (NREL), and OSHA guidelines. These sources provide official safety recommendations, interconnection standards, and best practices for residential solar installations. - https://www.energy.gov/eere/solar - https://www.nrel.gov - https://www.osha.gov
Tools & Materials
- Solar panels (PV modules)(Select compatible wattage and warranty terms for your design)
- Mounting/racking system(Roof- or ground-mounted with proper roof attachment method)
- Inverter (string or microinverters)(Ensure compatibility with panel voltage and system size)
- DC disconnect switch(Required by many codes for de-energizing the array)
- AC disconnect switch(Allows safe isolation from the home grid)
- Conduit and wiring (appropriate gauge)(Route wiring safely and meet code requirements)
- MC4 connectors and cables(Weather-rated connectors for PV wiring)
- Electrical panel interconnection equipment(Backfeed breakers, bus bars as required)
- Grounding equipment and bonding conductors(Critical for safety and code compliance)
- Non-contact voltage tester and PPE(Safety gear and testing tools)
- Permitting documents and interconnection agreement(Submit to local authority and utility)
- Electrical labels and diagrams(Clear labeling aids future maintenance)
Steps
Estimated time: 8-12 hours (plus permit processing time)
- 1
Assess site and design system
Evaluate roof orientation, shading, and structural capacity. Determine system size based on energy usage and available roof area. Create a design diagram showing module layout and wire paths.
Tip: Document shading at different times of day to optimize angle. - 2
Obtain permits and coordinate with utility
Check local permit requirements and schedule inspections. Initiate interconnection with the utility for grid-tied systems, and gather all required forms.
Tip: Submit a preliminary design with accurate electrical diagrams to reduce review time. - 3
Mount racking and prepare wiring routes
Install the mounting hardware per manufacturer instructions and route conduit paths to the electrical panel. Ensure all hardware is secure and watertight.
Tip: Avoid routing wires across areas that may be damaged by maintenance work. - 4
Install panels on mounting hardware
Place modules in the planned arrangement, fasten securely, and maintain proper spacing for cooling. Verify alignment and tilt angle according to design.
Tip: Use a helper or pulley system to lift panels safely. - 5
Install inverter and connect to electrical system
Mount the inverter in a dry, cool location. Connect PV DC wiring to the inverter and route DC conductors to the disconnects. Install a suitable backfeed breaker if required.
Tip: Keep DC wiring separate from AC to reduce interference. - 6
Install disconnects and metering interfaces
Mount the DC and AC disconnects where accessible, label them clearly, and connect to the home service panel as required by code. Prepare interconnection with the utility meter.
Tip: Verify that all disconnects are clearly marked and easily reachable. - 7
Perform safety checks and commissioning
Verify grounding, wiring polarity, and proper torque on all connections. Power up the system and test voltage, current, and production readings against design targets.
Tip: Have a qualified electrician review the final wiring diagram. - 8
Document installation and monitor performance
Create as-built diagrams, record serial numbers, and set up monitoring software. Schedule periodic inspections and performance reviews to ensure long-term reliability.
Tip: Keep copies of permits, warranties, and interconnection agreements handy.
Frequently Asked Questions
Do I need a permit to install solar panels at home?
Yes, most jurisdictions require a permit and an inspection to ensure code and safety compliance. You should contact your local building department and coordinate with your utility for interconnection.
Yes, permits are usually required and inspections ensure the installation is safe and up to code.
Can a homeowner install solar panels without professional help?
DIY installation is possible in some jurisdictions for small, simple systems, but electrical work carries safety and code risks. If you lack proper training, hire a licensed electrician or solar installer to avoid hazards.
It’s possible in limited cases, but for safety and code compliance, consider hiring a professional.
Grid-tied vs off-grid: what's best for a typical home?
For most homes, grid-tied systems with net metering offer lower upfront costs and easier maintenance. Off-grid requires batteries and more complex management, best for remote locations without grid access.
Grid-tied is usually best for most homes; off-grid is for remote sites.
How long does installation typically take?
Most residential installs take 1–3 days, depending on roof complexity, system size, and permitting timelines.
Usually a few days, with additional time for permits.
Will solar panels affect homeowner's insurance?
Solar installations are typically covered under homeowners insurance, but you should notify your insurer and adjust coverage if needed.
Check with your insurer to confirm coverage details.
What maintenance is required after installation?
Solar panels require minimal cleaning and inspection. Check for loose hardware and monitor inverter status at least annually.
Keep panels clean and check wiring and inverters yearly.
Watch Video
Top Takeaways
- Define system type early (grid-tied vs off-grid).
- Choose compatible components (panels, inverter, disconnects).
- Secure permits and utility interconnection before work starts.
- Test, document, and monitor for reliable performance.