Best Way to Get Solar Panels: A Practical Guide
Learn the best way to get solar panels—from site assessment and financing to installation. This comprehensive guide helps homeowners compare options, maximize incentives, and choose reliable installers for long-term value.

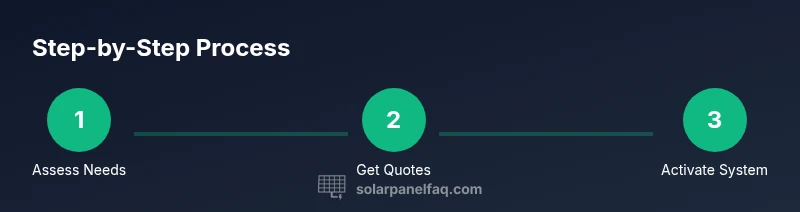
To secure solar panels, begin with a professional site assessment, then compare financing options (out-right purchase, loans, leases, or PPAs). Gather multiple, licensed installer bids, check warranties and panel efficiency, and confirm incentives like tax credits and net metering. Verify roof suitability, shading, and permit requirements, and run a clear ROI estimate before signing.
Why the Path Matters: Buy vs Lease vs PPA
According to Solar Panel FAQ, the first question homeowners should answer is not just what panels cost, but what path fits their goals and finances. The best way to get solar panels begins with clarity: what you want to achieve (lower bills, energy independence, home value), how much you’re willing to invest upfront, and how you’ll manage risk over time. This foundation influences every subsequent decision—from choosing a purchase option to selecting a responsible installer. In practice, most homeowners optimize value by balancing upfront cost, long-term savings, and system reliability. A thoughtful plan reduces sticker shock and speeds up realization of benefits, especially when combined with a clear understanding of incentives and local rules.
The decision you make here will cascade into quotes, contracts, and timelines. A well-defined goal helps you compare apples to apples when installers present bids, and it sets expectations for monitoring, maintenance, and potential upgrades in the future. Remember, the goal isn’t merely to add panels—it’s to secure dependable, affordable solar energy for years to come.
Financing Pathways: Purchase, Loan, Lease, or PPA
Choosing how to pay for solar panels is as important as choosing the panels themselves. A straight purchase or loan typically offers the highest long-term value because you own the system and collect all energy savings. Leases and PPAs lower or remove upfront costs but transfer some ownership and savings to the provider, potentially reducing your net benefit over time. When assessing options, compare total cost of ownership, expected production, and any maintenance obligations. Consider how incentives (tax credits, rebates, net metering) apply to each option, and ensure you understand who is responsible for upgrades if technology improves during your ownership period. Solar Panel FAQ notes that the right financing choice depends on your tax situation, cash flow, and appetite for risk, not just the sticker price of the system.
Site Readiness: Roof, Shading, and Electrical Capacity
A successful solar installation hinges on accurate site data. A professional site assessment should verify roof condition, orientation, and shading from trees or neighboring structures. The installer's team will also review your electrical panel capacity and whether any upgrades are needed to accommodate the new system safely. If the roof is old or in poor condition, it may be prudent to replace it before installation to avoid additional work later. By prioritizing roof health and electrical readiness, you’ll reduce the likelihood of delays or costly modifications after installation begins.
Document findings with photos and notes so you have a clear record for comparison when you receive bids. This due diligence will help you understand whether a larger system is feasible and how roof orientation and shading affect expected energy production.
Sizing and Energy Needs: How Much Capacity Do You Need?
System size should align with your energy usage and goals. Review your last 12 months of utility bills to determine a typical daily energy requirement and how many kilowatt-hours you want to offset. Use this data to estimate the appropriate system size and examine production forecasts from different panel types and inverters. Don’t assume bigger is always better—oversizing can increase upfront costs without proportional savings if you’re constrained by roof space or budget. A precise estimate helps you negotiate fair bids and reduces post-install surprises.
Finding and Evaluating Installers: Credentials, Warranties, and Service
With bids in hand, evaluate installers on more than price. Check licensing, insurance, and local references. Review equipment warranties (panels and inverters) and the monitoring options that let you track production. A reputable installer should provide a transparent contract that explains interconnection with the grid, permit fees, inspection steps, and what happens if production underperforms. Ask about their project timeline and after-sales support. The goal is a reliable system with solid warranties and responsive service if issues arise.
Document each bid with a simple rubric (price, equipment, warranties, timeline, and maintenance terms) to compare apples to apples. A structured comparison makes the final decision easier and minimizes regrets later.
Incentives, Net Metering, and Interconnection: What to Expect
Incentives can substantially affect the economics of solar. Federal tax credits, state rebates, and local programs can reduce net cost, while net metering policies determine how much you’re credited for excess energy you export to the grid. Each utility has its own interconnection process and billing rules, so verify the steps, required documentation, and any fees before committing. Keep a running checklist of eligibility criteria and deadlines for incentives to avoid missing opportunities as programs change.
Understanding these programs up front helps you forecast savings and tailor your system size to maximize value over its lifetime.
The End-to-End Path: From First Contact to System Activation
Following a structured path—from goals and site assessment to financing, bids, and final activation—reduces the risk of surprises. After you select an installer, expect a permitting phase, an installation window, and a final inspection by the utility. Ensure you receive documentation for warranties, a system schematic, and an operating manual. Activation typically includes setting up online monitoring so you can verify production and performance in real time. Being proactive here improves your long-term experience and helps you catch issues early.
Common Pitfalls and How to Avoid Them
Rushed decisions, unclear bids, or ignoring roof condition can derail a solar project. Avoid vague language in contracts, and insist on clear, written pricing that includes all fees. Don’t sign until you understand the interconnection terms and who is responsible for future maintenance. Failing to analyze shading correctly or mis-sizing the system can lead to underproduction and unsatisfactory ROI. Set aside time for due diligence, ask for references, and verify the installer’s track record before committing.
The Value Proposition: ROI, Peace of Mind, and Long-Term Benefits
A well-planned solar installation offers more than reduced electricity bills; it provides long-term energy resilience and increased home value. By selecting the right financing path, accurate sizing, and reliable equipment with solid warranties, you ensure a positive return over the system’s life. The process can seem complex, but a methodical approach—centered on site readiness, credible bids, and informed decisions—delivers predictable results and lasting satisfaction.
Tools & Materials
- Measuring tape(to verify roof dimensions and mounting space)
- Safety gear(hard hat, gloves, non-slip shoes; fall protection as needed)
- Digital camera or smartphone(document roof condition, shading, and electrical panel)
- Notebook or digital notes(record measurements, shading notes, and contractor details)
- Utility bill and energy usage data(to size the system and estimate offsets)
- Access to installer quotes and manufacturer specs(ensure apples-to-apples comparisons and up-to-date specs)
Steps
Estimated time: 4-8 weeks from initial inquiry to system activation
- 1
Define goals and budget
Clarify what you want to achieve with solar (cost savings, energy independence, or home value) and set a realistic budget. Document your expected payback period and any constraints, such as roof space or HOA rules. This foundation guides every subsequent decision.
Tip: Write down your top 3 goals and a target price range to compare later. - 2
Get a professional site assessment
Have a licensed installer assess roof condition, orientation, shading, and electrical panel capacity. A thorough assessment prevents surprises and helps you size the system accurately.
Tip: Ask for a shading analysis and a roof health report your records. - 3
Size your system accurately
Use your last 12 months of energy data to determine daily needs and desired offset. Size the system to meet goals without overspending on unused capacity.
Tip: Bring the most recent utility bill to the assessment for precision. - 4
Compare financing options
Evaluate upfront purchase, loans, leases, and PPAs. Compare total ownership costs, monthly payments, and potential tax credits or rebates.
Tip: Request an apples-to-apples quote with the same system size from each option. - 5
Request multiple bids
Ask 3-5 installers to bid, and require detailed breakdowns of equipment, warranties, and timelines. A structured comparison makes decisions easier.
Tip: Create a side-by-side rubric to score each bid fairly. - 6
Check warranties and equipment
Review panel efficiency, inverter warranties, monitoring options, and service commitments. Strong coverage reduces future risk.
Tip: Prioritize at least 25-year panel warranties and 10- to 12-year inverters. - 7
Understand incentives and interconnection
Identify federal/state incentives and net metering terms. Confirm interconnection steps with your utility to avoid delays.
Tip: Document all incentive eligibility and deadline details. - 8
Review contract and permits
Read the contract for scope, pricing, timelines, and permit responsibilities. Have a trusted advisor review if needed.
Tip: Don’t sign until all costs and responsibilities are explicit. - 9
Prepare for installation and activation
Coordinate with the installer for a schedule, inspect the system post-install, and ensure online monitoring is active.
Tip: Confirm who will monitor performance and how to contact support.
Frequently Asked Questions
What is the best way to get solar panels?
Start with a site assessment, then compare financing options and bids from licensed installers. Review warranties, incentives, and interconnection terms before signing.
Begin with a site assessment, compare financing options, and review bids from licensed installers along with warranties and incentives.
Should I buy or lease solar panels?
Buying generally provides the strongest long-term value, while leases and PPAs can lower upfront costs but reduce long-term ownership benefits.
Buying usually offers the best long-term value; leases and PPAs may reduce upfront costs but limit ownership benefits.
How many quotes should I collect?
Aim for 3-5 quotes from licensed installers to compare prices, equipment, and terms.
Collect three to five quotes to fairly compare equipment, pricing, and terms.
What incentives should I expect?
Look for federal tax credits, state rebates, and net metering policies; eligibility varies by location and program.
Check federal and state incentives and net metering rules, since eligibility varies by location.
Do I need a new roof before installation?
Not always, but if the roof is aging or damaged, replacement before install can prevent future work and leaks.
A new or healthy roof is recommended if the current one is aging or damaged.
How long does installation take?
Most residential installs take from a few hours to a couple of days, depending on system size and roof complexity.
Installation usually takes hours to a couple of days based on roof complexity.
What maintenance is required?
Solar panels require minimal maintenance, with occasional cleaning and inverter monitoring; warranties cover major components.
Low maintenance overall, with occasional cleaning and monitoring.
Watch Video
Top Takeaways
- Define goals and budget up front
- Conduct a professional site assessment
- Size the system based on actual energy use
- Compare financing options carefully
- Investigate incentives and interconnection early
- Choose installers with solid warranties and references