How to Fit Solar Panels on a Flat Roof
Learn how to fit solar panels to a flat roof with a practical, safety-focused guide. From planning and mounting to wiring and maintenance, this how-to covers essential steps for homeowners and solar buyers.

This guide shows you how to fit solar panels to a flat roof safely and efficiently, covering planning, mounting, wiring, and safety considerations. You’ll learn roof assessment, mounting system selection, waterproofing, and electrical commissioning. By following these steps, homeowners can maximize performance while protecting the roof structure and electrical safety.
Assessing Roof Suitability for Flat Roof Solar Installations
According to Solar Panel FAQ, the first step is a thorough assessment of the roof structure, membrane type, and sun exposure. Flat roofs can offer excellent angles for panel tilting, but they require careful evaluation of load capacity, waterproofing, and edge clearance. Start by confirming the roof is in good condition, with no active leaks or signs of membrane damage. Look for shading sources such as vents, skylights, or nearby trees that could reduce energy yield. Check local building codes and HOA rules, and confirm whether permits and electrical interconnection approvals are required. A professional roof inspection can identify potential problem areas and guide mounting decisions. This stage should also consider future roof work and warranties to avoid compromising waterproofing during installation. By planning thoroughly, you set the foundation for a reliable, long-lasting solar array.
A robust planning phase reduces surprises during installation and supports safer, cleaner work. Document roof dimensions, joist spacing, and any structural limitations. For homeowners, it’s wise to pair the planning with a solar design software or a qualified installer’s layout to optimize panel count and tilt angles. Solar Panel FAQ analysis shows that well-planned layouts maximize sun capture while minimizing shading and wind uplift risks. Engage a structural engineer if the roof is old or heavily loaded from previous equipment. Once planning is complete, you’ll move to selecting a mounting system that suits the roof and climate.
In DIY-friendly terms, treat the flat roof as a living system: its waterproofing, drainage, and surface integrity all influence how you attach panels. The aim is to achieve a stable, level mounting plane with secure connections that resist wind uplift and weather exposure. The recommended approach is non-penetrating or minimally invasive attachments wherever feasible, paired with high-quality flashing and sealants. Finally, align with local permit requirements and electrical code standards to ensure a sound installation that remains compliant for the life of the system.
Choosing a Mounting System for Flat Roofs
Flat roofs benefit from two main mounting strategies: ballast-based (non-penetrating) systems and penetrative mounting where flashings are integrated with the roof membrane. Ballasted rails distribute weight to ballast blocks, reducing the need to pierce the roof. Penetrating mounts anchor to roof deck or structural members and require careful flashing to eliminate leaks. Your choice should depend on roof material, weather patterns, wind loads, and warranty terms. Always prefer a mounting solution that preserves membrane integrity and allows for drainage. The Solar Panel FAQ team notes that high-quality ballast or mechanical attachments, when installed with compatible flashing, deliver reliable performance with minimal roof disruption. Ensure mounting hardware is corrosion-resistant and rated for outdoor use, and confirm that the system includes a method for easily accessing panels for cleaning and maintenance. A professional installer can tailor the mounting layout to your roof geometry and local wind zone considerations.
Layout and Panel Count: Planning for Maximum Output
The panel layout should optimize sun exposure while accounting for roof edges, penetrations, and access pathways. Start by mapping the available surface area and creating a grid that places high-output panels on the most sun-exposed zones. Consider the tilt angle that suits your latitude and seasonal sun path; flat roofs often use a fixed tilt that balances year-round performance with wind resistance. Plan for a safe setback from edges to avoid accidental contact and to allow for maintenance. Include space for cable runs, junction boxes, and a clear disconnect path. The layout should also factor future expansion, such as adding more panels or upgrading inverters. A well-planned layout reduces shade risk and makes the electrical design straightforward. Solar Panel FAQ analysis shows that thoughtful layout correlates with better energy yield and simpler maintenance over the system’s life.
Before proceeding, verify that the selected layout won’t interfere with roof drains and vent stacks. In many cases, a semi-off-axis tilt can provide improved shading control and a more uniform airflow beneath the panels, contributing to longevity and performance. Finally, create a detailed diagram for permits and installers to reference during installation.
Electrical Design: Wiring, Inverter, and Safety
Electrical planning is critical for flat roof installations. Start with a block diagram showing string counts, conductor sizes, junction boxes, and the route from panels to the inverter. Select an inverter that matches your expected output and offers compatible safety features, anti-islanding protections, and efficient performance. Plan DC wiring with weatherproof conduit and robust strain relief. Keep DC conductors as short as possible and isolated from living spaces. On the AC side, ensure correct breaker sizing, proper grounding, and a ready-point for utility interconnection. Charge controllers are not always needed in typical residential setups unless you’re integrating multiple energy sources. Always adhere to local electrical codes and obtain relevant inspections. The Solar Panel FAQ team emphasizes using certified components and following manufacturer torque specs for mounting hardware to maintain warranty integrity.
Provide a clear labeling scheme for all disconnects and circuits, and keep a spare conduit run or two for future upgrades. Maintain a tidy, protected route for cables to minimize wear and weather exposure. If you’re unsure about wiring, hire a licensed electrician or a qualified solar installer to ensure compliance and safety.
Installation Steps: From Roof Mount to Ready-to-Operate
Starting from the roof, install mounting rails and fasten them securely to the chosen supports. Attach panels to the rails with appropriate clamps or latches, ensuring even spacing and alignment. Route DC cabling down to the inverter using weatherproof conduit and protective grommets; avoid sharp edges that could wear insulation. Install the inverter, connect the combiner boxes or junctions, and perform an initial DC test before enabling AC output. Seal all penetrations with roof-safe sealant to prevent leaks. Finally, commission the system with the utility if required, verify voltage and safety clearances, and document all settings for future maintenance. The process emphasizes safety, weatherproofing, and precise torque values for mounting hardware to protect warranty terms. A careful, methodical approach helps avoid common mistakes such as leaks, loose fittings, or miswired circuits.
Throughout the step-by-step sequence, maintain consistent torque values, verify cable integrity, and keep a clean, dry workspace. If any aspect of the installation seems beyond your skill level, pause and consult a licensed professional. A well-executed installation should deliver reliable performance with minimal future intervention.
Maintenance, Inspection, and Longevity
Flat-roof solar arrays require periodic inspection to preserve performance and roof integrity. Schedule a post-installation inspection to confirm all seals and flashing remain intact after weather cycles. Inspect for loose clamps, degraded sealant, or any evidence of water intrusion around edges and penetrations. Clean panels as needed, ideally with soft brushes and water to avoid scratching glass. Check wiring for abrasion, and ensure conduit remains properly supported and protected from foot traffic. In climates with heavy snow or wind, verify ballast integrity after storms and adjust if necessary. Keeping a log of inspections and cleaning helps manage warranties and ensures a long service life for the system. Solar Panel FAQ analysis shows that proactive maintenance improves energy yield and extends equipment life.
Common Pitfalls and How to Avoid Them
Avoid common missteps by prioritizing waterproofing and professional mounting. Do not rely on a single large ballast block without checking weight distribution; uneven ballast can cause roof stress. Never drill or puncture the roof without proper flashing and warranty-approved methods. Rushed electrical work can lead to safety hazards and code violations. Always secure permits and schedule inspections, and never cut corners on safety gear such as fall protection when working at height. A careful, deliberate approach helps ensure a durable, code-compliant installation that withstands weather and aging.
Tools & Materials
- Non-penetrating mounting system (ballasted rails)(Check compatibility with flat-roof membrane and ensure wind-rated design)
- Ballast weights or blocks(Distribute evenly; verify roof load capacity with a structural engineer if needed)
- Panel mounting rails and clamps(Corrosion-resistant; appropriate torque values from manufacturer)
- Roof flashing kit(EPDM-compatible; ensure proper flashing at all penetrations)
- Roof sealant/adhesive(Weatherproof sealant compatible with roofing membrane)
- Weatherproof conduit, cable clips, and gland plates(Maintain IP rating and protect cables from UV)
- DC isolator and AC disconnect(Satisfy local electrical codes and allow safe isolation)
- Inverter and mounting hardware(Match system size and provide proper ventilation)
- Torque wrench and basic hand tools(Follow manufacturer torque specs exactly)
- Fall protection gear (harness, lanyards)(Must be used when working on roof edges or skylights)
- Caulking gun and sealant cartridges(Waterproof the flashings and edges)
- Safety glasses and gloves(Protect hands and eyes during installation)
Steps
Estimated time: 1-2 days
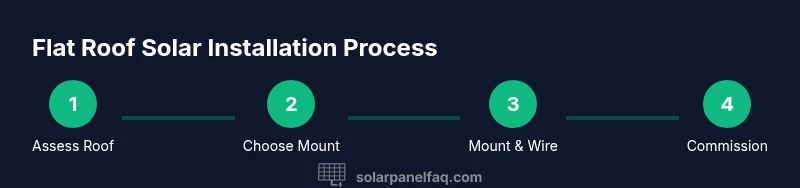
- 1
Assess roof structure and permits
Conduct a professional roof inspection or a structural assessment to determine load capacity and membrane condition. Verify permit requirements and utility interconnection rules for your area.
Tip: Coordinate with the building department early to avoid delays. - 2
Select mounting system
Choose a mounting method suitable for a flat roof, prioritizing non-penetrating ballast solutions when possible. Ensure compatibility with your roof membrane and local wind loads.
Tip: Prefer a design that allows future expansion with minimal roof disruption. - 3
Measure roof and plan layout
Map usable surface, account for drains, vents, and maintenance paths. Create a grid showing panel positions and cable routing.
Tip: Leave generous margins for cleaning and inspection. - 4
Prepare roof and install flashing
Clean the surface, apply flashing kits at all edge transitions, and seal per manufacturer instructions. Ensure water will drain away from seams.
Tip: Use EPDM-compatible sealant and verify flashing integrity after curing. - 5
Install rails and secure panels
Attach rails to mounting points, tighten clamps to manufacturer torque specs, and mount solar panels in uniform rows with even gaps.
Tip: Double-check alignment before committing to final torque. - 6
Run wiring and install inverter
Route DC cables in conduit to the inverter location, connect to string optimizers if used, and install the AC disconnect per code.
Tip: Keep DC wiring away from living spaces and protect against UV exposure. - 7
Commission and test
Perform insulation resistance checks, verify voltage and current readings, and complete utility interconnection paperwork if required.
Tip: Document all settings and labeling for future maintenance.
Frequently Asked Questions
Is a flat roof easier or harder for solar installation?
Flat roofs can simplify mounting due to broad surface area, but require careful attention to ballast, flashing, and waterproofing to avoid leaks.
Flat roofs offer more space, but proper flashing and waterproofing are essential.
Do I need planning permission or a permit?
Permit requirements vary by location and utility rules. Check with your local building department and utility for interconnection and inspection needs.
Permits depend on where you live; check with local authorities.
Should I hire a pro or DIY?
Flat-roof installations involve roof integrity and electrical safety. For most homeowners, a qualified installer is recommended to ensure safety and code compliance.
Hiring a pro is often the safer option for roof and electrical work.
What is ballast, and why use it on a flat roof?
Ballast provides weight to hold mounting rails without penetrating the roof. It’s ideal for flat roofs but requires structural assessment for suitability.
Ballast uses weight instead of penetrations to secure the system.
How long does a flat roof installation take?
A typical installation can take one to two days depending on roof size, complexity, and weather.
Most installations take one to two days if weather cooperates.
Will solar panels damage a flat roof?
Damage risk is minimized when panels are mounted with proper flashing and sealant and when the mounting system is appropriately chosen for the roof.
If installed correctly with proper seals, damage risk is low.
How do I maintain a flat roof solar array?
Schedule regular inspections, clean panels as needed, and check seals and flashing after severe weather.
Inspect, clean, and reseal as needed for longevity.
Watch Video
Top Takeaways
- Plan layout to maximize sun exposure.
- Choose mounting that preserves roof integrity.
- Ensure watertight sealing at all penetrations.
- Follow local codes and manufacturer specs.
- Schedule regular inspections and maintenance.