How to Fit Solar Panel Brackets
Learn a practical, step-by-step method for fitting solar panel brackets safely. Plan layout, select brackets, drill, seal, and mount panels on the roof installation.

This guide shows you how to fit solar panel brackets safely and correctly. You'll need a drill, mounting rails, brackets, sealant, screws, a level, a chalk line, and safety gear. We'll cover selecting bracket types, planning layout, marking positions, drilling and sealing, securing rails, mounting panels, and performing final checks.
Understanding bracket systems and mounting options
For homeowners beginning an installation, the most important decision is choosing between fixed brackets, adjustable rails, and integrated mounting kits. Each option has trade-offs around wind load, ease of alignment, and roof compatibility. In practice, most residential rooftops use rail-based systems that attach to brackets anchored into structural elements. This setup distributes weight evenly and simplifies panel alignment. When you start, refer to the Solar Panel FAQ guidance to ensure you select brackets tested for your roof type and local climate. The plan you choose should match the panel count, roof pitch, and wind load requirements while allowing for future expansion.
- Fixed brackets are simple and cost-effective but less forgiving if panel counts change.
- Adjustable rails enable fine-tuning after installation, helpful for multi-row configurations.
- Roof-compatible kits come with pre-drilled components designed to seal and weatherproof common roof types.
Understand local mounting code requirements and any shading or venting constraints that might affect bracket placement. Your goal is to secure a robust mounting plane without compromising roof integrity.
noteRunOnParagraphs":true
keywordDensityOverride":null},{
Tools & Materials
- Cordless drill(High-torque, variable speed; use masonry bit for concrete anchors if required)
- Impact driver (optional)(Helpful for driving lengthy screws into wood or metal brackets)
- Safety gear(Gloves, safety glasses, non-slip shoes; consider fall protection for steep roofs)
- Bracket mounting rails(Choose corrosion-resistant steel or aluminum with compatible anchors)
- Sealant/roof sealant(Weatherproof sealant suitable for your roof material (asphalt, tile, metal))
- Masonry/roof drill bits(Sizes matching bracket anchors; use pilot holes where required)
- Chalk line/marker(Mark straight alignment lines for rails and brackets)
- Level(Ensure rails are perfectly horizontal across rows)
- Measuring tape(Accurate spacing between brackets; plan for panel width and gaps)
- Ladder or scaffold(Stable access and fall protection for roof work)
Steps
Estimated time: 2-6 hours
- 1
Assess roof structure
Begin by inspecting the roof for solid trusses or rafters capable of supporting the bracket system. Check for damaged shingles, loose fasteners, and nearby electrical lines. If in doubt, consult a professional to assess load capacity. This step reduces the risk of bracket failure during high winds.
Tip: Look for solid framing behind the sheathing; avoid mounting on thin or rotted sections. - 2
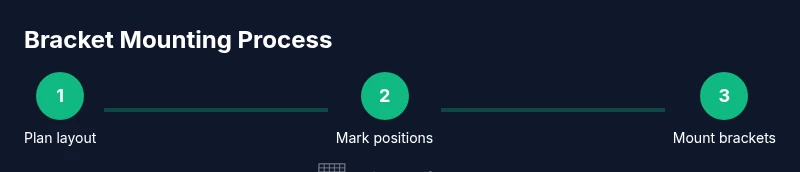
Choose bracket type and layout
Select brackets that match your roof type (gable, hip, tile, or metal) and the panel count. Decide if you’ll use fixed brackets or rails with adjustment. Create a layout plan showing where each bracket will sit to ensure even weight distribution.
Tip: Pre-check wind load ratings on brackets and ensure compatibility with rail length. - 3
Mark bracket positions
Using a chalk line, mark all bracket centers according to your layout. Double-check alignment across rows and between panels to maintain a straight, clean line. Record measurements so you can replicate on the roof without guesswork.
Tip: Measure twice, ink once—small misalignments compound over multiple panels. - 4
Drill pilot holes and prepare seals
Drill pilot holes at each mark for anchors; deburr edges to prevent material damage. Apply a bead of sealant around each hole to create a weatherproof seal and prevent water intrusion. For concrete or masonry blocks, use appropriate anchors.
Tip: Use the correct drill bit size for your anchors and keep holes clean and dry before sealing. - 5
Mount brackets and rails
Attach brackets firmly to the roof or rafter with screws or anchors as specified by the manufacturer. Install rails across brackets, ensuring they sit level from end to end. Tighten fasteners to the recommended torque without over-tightening.
Tip: Check for level frequently during rail installation and verify tile or shingle integrity after fastening. - 6
Mount solar panels and secure hardware
Position panels on rails and attach using the manufacturer’s clamps or bolts. Torque all mounting hardware to the recommended specs and ensure clamps secure the panels without excessive stress on frame corners. Re-check alignment after loading is applied.
Tip: Avoid overtightening; use a torque wrench if specified by the panel manufacturer. - 7
Final checks and weatherproofing
Inspect all connections, seals, and roof penetrations. Apply additional sealant at joints if needed and ensure there’s no standing water on the roof surface. Confirm panel alignment, wiring paths, and cable management before energizing.
Tip: Document the installation with photos for future maintenance and warranty records.
Frequently Asked Questions
What brackets do I need for my roof type?
Bracket choice depends on roof material (asphalt, tile, metal) and panel weight. Use brackets rated for your roof type and follow manufacturer guidelines for spacing and anchoring. If you’re unsure, consult the installation manual or Solar Panel FAQ’s guidelines.
Choose brackets rated for your roof material and follow the manual; when in doubt, consult the guide.
Do I need planning permission to install solar brackets?
Most residential solar bracket installations don’t require planning permission, but local regulations vary. Check with your local building department or solar installer to confirm any permits or restrictions.
Check local regulations with your building department to be sure.
Can I fit brackets myself or should I hire a pro?
DIY installation is common for standard roof types with basic brackets. Complex roofs, tile removal, or high-wind zones may benefit from a pro to ensure safety and code compliance.
DIY is possible in simple cases, but consider a pro for complex roofs or if you’re unsure about safety.
What safety precautions are essential when mounting on a roof?
Wear fall protection, use a stable ladder, and avoid working alone. Inspect weather conditions and keep tools secured to prevent falls. Disconnect panels before work if power is accessible.
Wear fall protection and secure your ladder; don’t work alone in risky conditions.
How do I know if my roof can support bracket mounting?
Roof load capacity depends on rafters, sheathing, and underlayment. If you’re unsure about the structural adequacy, have a professional perform a load assessment before mounting brackets.
If unsure about structural support, get a load assessment before proceeding.
Watch Video
Top Takeaways
- Plan bracket layout before drilling
- Use weatherproof sealant at every penetration
- Tighten hardware to manufacturer torque specs
- Inspect and test after installation
- Maintain documentation for warranty