How to Control Solar Panels: A Practical Guide for Homeowners
A practical, safety-focused guide on controlling solar panels—from tilt/orientation to MPPT settings and monitoring—for homeowners seeking better energy efficiency and system longevity.

Goal: learn safe, practical ways to control solar panels to optimize output. This guide covers monitoring, tilt/orientation adjustments, MPPT/inverter settings, shading management, and routine maintenance. You’ll gain actionable steps, safety cautions, and a framework to tune your system while protecting warranties and equipment.
Understanding what control means for solar panels
Control in solar panel systems means actively managing how and when energy is generated and delivered through a mix of physical adjustments, electrical settings, and ongoing monitoring. It includes adjusting tilt and azimuth to optimize sun exposure, configuring MPPT (maximum power point tracking) and inverters for efficient operation, and using software dashboards to respond to performance data. According to Solar Panel FAQ, controlling solar panels combines hardware adjustments with continuous monitoring to optimize output and longevity. The goal is to align your array’s behavior with your household energy needs, seasonal sun patterns, and roof constraints while staying within warranty and safety guidelines. By understanding these components, homeowners can make informed decisions about when and how to intervene for better performance.
Key ideas:
- Physical orientation (tilt and azimuth) affects sun capture.
- Electrical controls (MPPT, inverter settings) influence power conversion.
- Monitoring data guides when and how to intervene.
- Safety and warranty considerations shape which changes you can perform yourself.
Tools & Materials
- Safety gear (gloves, non-slip shoes, helmet if working on a roof)(Keep three points of contact; use fall protection when on a roof.)
- Ladder or stable platform(Secure footing; use non-conductive ladder if near wiring.)
- Inclinometer or angle gauge(Baseline tilt measurement and seasonal adjustments.)
- Torque wrench set(Tighten mounting hardware to manufacturer specs.)
- Multimeter or clamp meter(Check voltage/current and verify electrical connections.)
- Inverter/optimizer manual or web interface access(Needed to adjust MPPT or settings where allowed.)
- Smartphone with monitoring app(For live data, thresholds, and alerts.)
- Documentation and camera(Record prior settings and after-change results.)
Steps
Estimated time: 2-4 hours
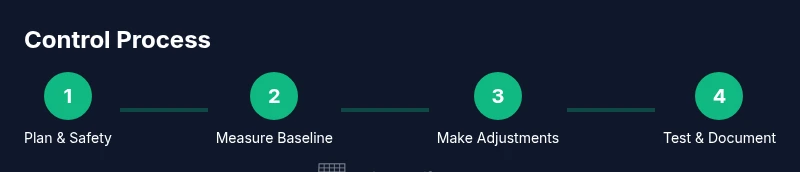
- 1
Plan and assess safety
Before touching any equipment, review the task plan with everyone involved. Check the weather for wind, rain, and lightning risk. Turn off or isolate the system per the manufacturer’s safety protocol and ensure fall protection if working on a roof. This prevents electrical hazards and falls while you prepare your plan.
Tip: Verify weather and wear proper PPE; never rush this step. - 2
Locate system specs and access controls
Find the system’s tilt limits, orientation options, and whether the inverter or tracker supports manual adjustments. Have the installation manual handy or access the online portal. Understanding limits helps prevent accidental damage and ensures changes stay within warranty guidelines.
Tip: Keep the manual open and note the manufacturer’s recommended maximum tilt and azimuth ranges. - 3
Measure current tilt and orientation
Record the current tilt angle and azimuth direction to establish a baseline. Take photos from multiple angles and note any shading patterns during peak sun. Baseline data makes it easier to evaluate the impact of future changes.
Tip: Baseline data enables meaningful comparison after adjustments. - 4
Adjust tilt and azimuth according to plan
Make incremental tilt changes in small steps, reassessing sun exposure and shading impact. If you have a motorized tracker, use the control interface to apply the planned angle. After each adjustment, re-check structural attachment and ensure no wiring is stressed.
Tip: Avoid large jumps—small, tested changes reduce risk. - 5
Connect to MPPT and inverter interfaces
Access the inverter or optimizer interface only if the manufacturer allows manual changes. Verify that target voltage/current aligns with the new tilt/azimuth. If you’re unsure, consult the manual or a qualified technician. Incorrect settings can reduce output or cause equipment stress.
Tip: Change only one parameter at a time to isolate effects. - 6
Run a short production test
With changes complete, monitor the system for a full sun period to compare production against the baseline. Look for consistent voltage, no unexpected drop-offs, and stable currents. Use monitoring software or the inverter dashboard to confirm performance improvements.
Tip: Document the test window and results for future reference. - 7
Update monitoring thresholds and alerts
Adjust alert thresholds to reflect the new baseline. Enable notifications for unusual drops, temperature spikes, or shade changes, so you can respond quickly. Automation can shorten response time and preserve gains in performance.
Tip: Set sensible alert thresholds to avoid notification fatigue. - 8
Document results and schedule follow-up
Record the final tilt/azimuth, MPPT settings, and performance data. Schedule periodic reviews (seasonally or after major shading changes) to maintain optimum control. Keep a brief log for maintenance history and warranty records.
Tip: A maintenance log simplifies future troubleshooting.
Frequently Asked Questions
Is it safe to adjust solar panel tilt by myself?
Yes, you can adjust tilt if you follow safety guidelines: wear PPE, use a stable ladder, avoid wet surfaces, and don’t touch wiring. Consult the installation manual for limits and timing. If unsure, hire a qualified technician.
Yes, with proper safety precautions and by following the manual.
Can I change MPPT settings without a professional?
You can review MPPT behavior and diagnostics, but major changes should follow the inverter manual. Improper adjustments can reduce output or damage components. When in doubt, consult the installer.
Only adjust MPPT settings if the manual permits it, otherwise seek professional help.
What signs indicate I should adjust controls?
Signs include a drop in daily production, unusual voltage fluctuations, or new shading patterns from growth or nearby structures. Temperature changes can also affect efficiency, prompting a re-evaluation of tilt and settings.
Watch for drops in production or new shading that impacts performance.
How often should I monitor system performance?
Check performance after any change, then monitor weekly for the first month. After stabilization, monthly or seasonally is usually sufficient, with alerts for major deviations.
Monitor regularly—start with a close look after changes, then on a predictable schedule.
Will adjusting tilt on a roof-mounted system affect warranty?
Changing tilt or angle may affect warranty if it involves structural changes or system reconfiguration. Check with the installer or manufacturer before proceeding.
Check with your installer since some changes can affect warranty.
What is the best starting tilt angle?
A common starting point is aligning tilt with your latitude or seasonally adjusting up or down in small increments. Always follow manufacturer recommendations and safety guidelines.
Start with a latitude-based tilt and adjust gradually.
Watch Video
Top Takeaways
- Identify safe controls you can adjust
- Prioritize safety and consult manuals
- Monitor performance data before changing
- Make small adjustments and test results
- Document changes for future maintenance