How to Calculate Solar Panel Needs: A Homeowner's Guide
Learn how to calculate solar panel needs with an easy, practical sizing framework. This guide covers daily energy use, sun exposure, system efficiency, and a simple calculator to estimate panel counts for your home.

How to calculate solar panel needs: A practical framework
According to Solar Panel FAQ, calculating solar panel needs starts with a clear picture of how much energy your home uses and how much sun your site gets. This framework helps homeowners avoid undersizing, which can lead to outages, or oversizing, which wastes money. The process combines three core inputs: daily energy consumption, sun exposure, and system efficiency. It also considers practical constraints like roof space and local incentives, though these vary by region. By laying out a repeatable method, you can compare different panel types, orientations, and inverter configurations with confidence. In this section, we’ll outline a step-by-step approach that you can apply before talking to installers or shopping for panels. The goal is to arrive at a panel count that meets your needs without overengineering the system. Throughout, keep in mind that real-world performance depends on weather patterns, maintenance, and the quality of components. Solar Panel FAQ’s team emphasizes testing assumptions with simple calculations early in the planning process.
This overview also highlights the importance of documenting assumptions and using a consistent method so you can revisit sizing later if your energy habits or roof conditions change. The more transparent you are about inputs, the easier it is to compare offers from different installers and ensure you’re not paying for more capacity than you truly need. Remember: the objective is a balanced, cost-effective system that reliably meets your daily energy goals.
Step 1: Determine your daily energy use
To size solar panels accurately, start with your daily energy footprint. Gather your last 12 months of electric bills and compute an average daily kWh usage. Include weekends and seasonal shifts to avoid surprises. If you have a family member with high energy needs (electric vehicle charging, hot tubs, or heat pumps), incorporate those daily averages as separate line items. An even more practical approach is to track your daily usage for a full billing cycle using your utility’s online portal. This gives you a realistic baseline, which you can adjust for planned changes in your household (new appliances, renovations, or lifestyle shifts). After you determine daily energy use, write it down as dailyUsageKWh and keep this figure as the anchor for the rest of your sizing.
Step 2: Estimate sun hours per day and site factors
Sun hours per day represent how much productive sun your location delivers to your panels. This varies by latitude, season, shading, roof angle, and orientation. A good starting point is to use the solar irradiance or sun-hours data for your region, then adjust for shading and climate. If your roof faces east or west, you’ll typically get fewer peak sun hours than a south-facing roof in the northern hemisphere. Consider seasonal variation: winter daylight is shorter, so annualized calculations help avoid over-optimistic estimates. Don’t overlook temporary shading from trees, nearby structures, or chimneys. A simple on-site shading analysis—often performed by an installer—can identify optimum panel placement or the need for microinverters.
Step 3: Choose panel wattage and system efficiency
Panel wattage determines how much energy a single panel can produce under standard test conditions. Common residential panels range in the 300–400 W class, with higher-wattage panels offering more production per panel but potentially higher cost. System efficiency accounts for losses from inverters, wiring, and temperature. A typical residential system efficiency might fall in the 0.75–0.90 range, depending on equipment quality and installation. When you combine sun hours, panel wattage, and efficiency, you get the effective daily production per panel. This step helps you translate a daily kWh target into a concrete panel count, enabling apples-to-apples comparisons between different panel types and configurations.
Step 4: Size the system and calculate panel count (with a formula)
The core sizing question is: how many panels are needed? A straightforward formula you can apply is:
( panels = round( dailyUsageKWh / ( sunHoursPerDay * ( panelWattage/1000 ) * systemEfficiency ) ) )
This yields an integer panel count by dividing your daily energy target by the daily energy per panel. For example, if you need 30 kWh per day, have 5 sun hours per day, use 320 W panels, and operate at 0.80 efficiency, the calculation is 30 / (5 * 0.32 * 0.80) ≈ 23.4, which rounds to 23 panels. While this example is illustrative, the same approach scales to your real inputs. Remember to consider roof space and budget constraints when finalizing the count, and verify that your roof can physically accommodate the proposed array.
Real-world example: sizing a common home scenario
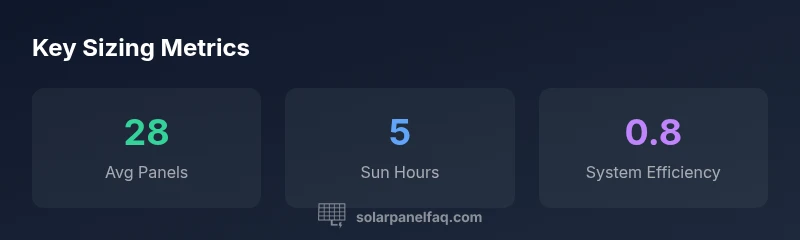
Let’s walk through a concrete example to crystalize the concept. Suppose your daily energy use is 28 kWh, your site provides about 5 sun hours per day, you’re evaluating 320 W panels, and you expect system efficiency around 0.8. The per-panel daily production is 5 × (320/1000) × 0.8 = 1.28 kWh. The required panel count is round(28 / 1.28) = round(21.875) = 22 panels. With these inputs, you can start pricing and confirming roof area requirements, warranty terms, and installation logistics. Adjust inputs to reflect your actual conditions, and use the same calculation to compare different panel sizes or lower-cost options. A small change in sun hours or efficiency can meaningfully affect the final panel tally, so re-run the calculation after any significant assumptions change.
Practical steps to finalize and verify your sizing
After you have a panel count, validate it with a professional: a site assessment will verify roof space, shading, mounting options, and wiring constraints. Use a shade analysis tool or on-site measurements to confirm the expected output, then compare multiple quotes that reflect the same assumptions. Finally, plan for future needs (like adding a battery or EV charging) that may require expanding the system. By following these steps, you’ll have a defensible, transparent sizing process that aligns with your goals and budget.