How to determine solar panel size
Learn how to determine solar panel size for your home with a clear, step-by-step method, tools, and typical range guidance to fit your energy needs.

By the end of this guide you will know how to determine the right solar panel size for your home. Start with your average daily energy use, available roof space, and system efficiency. We’ll walk through practical steps, common methods, and real-world ranges so you can design a reliable solar setup that fits your needs today and into the coming years.
Understanding your energy needs
Understanding energy needs is the foundation of any sizing calculation. Start by pulling your most recent 12 months of utility bills or energy-monitoring data to compute daily and monthly averages. According to Solar Panel FAQ, the most reliable starting point is your true energy footprint rather than a rough guess. This baseline guides how large a system you need to supply daytime usage and helps you set realistic goals for panel count and inverter capacity. The Solar Panel FAQ team found that many homeowners underestimate seasonal swings—winter heating and summer cooling can shift daily kWh demands noticeably. By analyzing annualized usage and recognizing peak demand periods, you establish a solid framework for choosing panel counts, estimating inverter size, and evaluating the potential role of battery storage. Translate kWh per day into a preliminary system size, then verify with sun hours and shading patterns for accuracy.
This section anchors your sizing approach in actual consumption, not assumptions, and sets you up to balance space, budget, and performance. Minted with practical checks, it also helps you communicate needs clearly to installers and utilities.
Assessing roof space and orientation
Roof space and orientation determine how many panels fit and how efficiently they operate. Begin with a roof plan to measure usable area, accounting for vents, chimneys, and structural limitations. In the northern hemisphere, true south orientation yields the strongest annual production, while tilt angle and azimuth influence both energy capture and shading exposure. Use a rough rule of thumb: a typical residential panel occupies roughly 1.6 square meters of usable space after spacing. Align the array to minimize shading from nearby trees or structures, and verify seasonal sun paths to maximize year-round output. The way you position panels can meaningfully change system size needs, so document constraints before finalizing counts and layout.
A careful assessment of layout now saves time later and prevents costly redesigns if space is tighter than imagined.
Considering shading and climate effects
Shading dramatically reduces output, even with high-efficiency panels. Map shading across times of day and seasons using sun-path visualization tools or simple photo annotations on your roof. Climate matters: high temperatures can reduce panel efficiency, while cooler, sunnier days often boost performance. Plan for these effects by choosing panels with favorable temperature coefficients and by leaving room for potential future expansion. Local patterns of sun hours per day influence expected daily production and should be included in your sizing calculations. By integrating shading data, climate considerations, and panel specs, you’ll derive a more robust system size rather than relying on idealized test conditions.
This step helps you avoid surprises on sunny days and under varying weather, ensuring your design remains resilient across the year.
Panel technology and efficiency basics
Panel efficiency indicates how effectively a module converts sunlight into electricity. Higher efficiency panels deliver more watts per square meter, which can reduce roof space needs but may come at a higher cost per watt. When sizing, compare nominal wattage per panel, efficiency, and temperature coefficients to estimate real-world performance. A mixed approach—selecting the right wattage per panel while balancing the number of panels and available area—often yields better outcomes than chasing the highest efficiency alone. Remember that efficiency interacts with mounting density: two high-efficiency panels in a tight space can outperform several lower-efficiency units in a cramped footprint. For most homes, 60- to 72-cell modules across a plausible efficiency range provide practical options.
Selecting technology thoughtfully helps ensure long-term performance and easier maintenance.
Sizing methods: load-based vs generation-based
Two common sizing philosophies shape your design. Load-based sizing starts from your energy consumption and aims to meet a target portion of daytime usage, incorporating shading, growth, and storage plans. Generation-based sizing targets a fixed system size tied to roof area and budget, then estimates what share of demand it covers. A hybrid approach often works best: size near your annual energy goal while leaving headroom for future expansion and possible battery storage. The choice depends on whether your priority is maximizing self-consumption, resilience, or overall cost-effectiveness. By documenting goals at the outset, you’ll pick a method that aligns with both practical constraints and financial expectations.
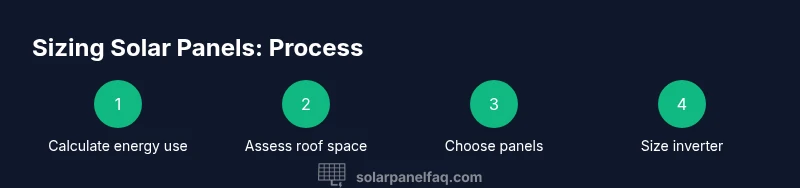
Step-by-step sizing workflow
- Collect energy data from bills and monitoring to establish a reliable daily kWh baseline. 2) Inventory roof space and identify shading across typical sun hours. 3) Choose panel type and a rough wattage target based on space and budget. 4) Compute the required system size by dividing daily kWh by expected sun-hours and applying a design margin. 5) Select an inverter with appropriate headroom for peak production and future expansion. 6) Check local interconnection rules and incentive programs. 7) Draft a preliminary layout and cost estimate for review. 8) Obtain final validation from a licensed installer for permits and code compliance.
Tip: Use a simple spreadsheet to record inputs, assumptions, and margins so you can easily adjust as conditions change.
Inverter sizing and electrical considerations
Inverter capacity limits how much DC power your panels can feed into your home. Size the inverter to accommodate total DC wattage with a small derating margin (often 10–20%) to account for real-world losses. Oversizing the inverter relative to the panel string can reduce clipping on bright days, but it adds upfront cost. Also plan for wiring, conduit, and disconnects that meet local electrical codes. If you’re considering battery storage, coordinate inverter and battery charger ratings to avoid bottlenecks during peak generation, and ensure compatibility with the service panel and meter. A well-sized inverter supports efficient energy transfer and system longevity.
Example calculations: small, medium, and large homes
Small home systems typically fit a compact footprint and yield more modest daily output, often around a few kilowatts. Medium homes commonly use a 5–6 kW array, a balance between roof space, cost, and energy needs. Large homes may require a 9–12 kW system or larger to meet high daytime consumption and storage goals. These examples illustrate how roof space, sun hours, and energy targets drive system size rather than a single rule. Always validate with local conditions and installer recommendations to avoid common sizing errors.
Permits, utilities, and installation planning
Before installation, confirm permit requirements, interconnection procedures, and any available incentives with local authorities and your utility. Some jurisdictions require stamped designs or professional installation documentation, particularly for larger systems. Utilities may have preferred inverter sizes, metering configurations, or net-metering rules that influence final sizing. Request multiple installer quotes that include design, permitting, monitoring, and warranty terms. Finally, plan for ongoing maintenance and cleaning to preserve performance over the system’s lifetime.
Common mistakes and how to avoid them
Avoid over-optimistic sun-hour assumptions and rely on conservative projections verified with a professional. Do not size panels without considering wiring, conduit, and inverter limits, which can constrain performance. Underestimating roof space or overestimating future energy growth leads to underperforming systems or expensive retrofits. Don’t overlook safety margins, local codes, or warranty requirements, which can delay or invalidate installations. A disciplined, data-driven sizing process reduces risk and improves long-term outcomes.
Quick-start checklist before you buy
- Gather 12 months of energy usage data and a list of appliances with runtimes.
- Measure roof space and identify shaded areas across the day.
- Choose panel type and rough wattage targets; draft a layout estimate.
- Run calculations in a spreadsheet and align with an installer for validation.
- Check local incentives, interconnection rules, and warranty terms.
- Plan for future changes such as panel upgrades or storage options.
Data sources and next steps
For further validation, consult reliable sources and consider a quick design review with a licensed installer. The process outlined here helps homeowners determine solar panel size with practical, real-world inputs rather than theoretical values. As you move forward, revisit the energy budget annually and adjust your system size if your needs or roof space changes. This proactive approach leads to better performance and long-term savings.
Tools & Materials
- Recent energy bills (12 months) or energy monitor data(Use to calculate daily kWh usage.)
- Roof measurements or satellite plan(Estimate usable panel area; include orientation.)
- Measuring tool (tape measure or laser distance tool)(For area estimation and mounting layout.)
- Compass or smartphone app for orientation(Determine true south/north alignment.)
- Calculator or spreadsheet (or solar sizing tool)(Run quick calculations and margins.)
- Camera or drawing tools for shading map(Document shading at different times.)
Steps
Estimated time: 2-3 hours
- 1
Gather energy data
Collect your 12 months of energy usage from bills or a monitoring app. Calculate daily and monthly averages to establish a reliable baseline for sizing.
Tip: Be sure to include seasonal spikes (e.g., summer cooling, winter heating). - 2
Measure roof space and shading
Measure usable roof area and map shading across different times of day and seasons. Note obstructions that will affect panel placement.
Tip: Use a sun-path diagram or photo plan to document shading clearly. - 3
Choose panel type and initial wattage
Select panel wattage per unit and a rough layout. Higher wattage per panel can reduce the number of units if space is tight.
Tip: Balance panel wattage with available space to avoid oversizing. - 4
Compute required system size
Calculate system size by dividing daily kWh by expected sun-hours and applying a design margin.
Tip: Include a conservative safety factor to account for real-world losses. - 5
Select inverter size
Choose an inverter with headroom for peak production and possible future additions (storage).
Tip: Ensure inverter and panel strings are matched to avoid clipping. - 6
Check permits and interconnection
Review local permit requirements and utility interconnection rules. Confirm documentation needs.
Tip: Early coordination saves delays and retrofit costs. - 7
Draft layout and budget
Create a preliminary panel layout and a rough cost estimate. Include mounting, wiring, and monitoring costs.
Tip: Document assumptions to justify budget and design choices. - 8
Finalize with a licensed installer
Have a licensed professional validate the design, perform final calculations, and handle permitting.
Tip: Get a written quote with scope, timeline, and warranties.
Frequently Asked Questions
What factors determine solar panel size?
The main factors are energy usage, roof space, shading, panel efficiency, and inverter capacity. Also consider future changes and storage plans. These determine how many panels you need and their total wattage.
Key factors are energy use, roof space, shading, and inverter size. Plan for future storage.
How do I account for shading when sizing panels?
Shade reduces output; map shading across seasons and use a conservative estimate. Choose higher-efficiency panels or add margin to system size to compensate.
Shading lowers output; map shade and add margin.
Can I size panels to cover 100% of my usage?
Yes, but it may be costly and space-limited. Many homes size for a practical portion of annual consumption and use storage to fill gaps.
You can size to cover a big share, but plan for space and storage.
What is the difference between panel wattage and system size?
Panel wattage is the rating per panel; system size is the sum of all installed panels. The latter determines potential daily output and should align with energy goals.
Wattage is per panel; system size is total watts.
Do I need a professional to size my solar system?
While you can estimate size, a licensed installer validates measurements, codes, and interconnection rules, ensuring safety and optimal performance.
It’s wise to have a professional validate the sizing.
What is a practical starting point for system size?
A practical starting point is the energy footprint expressed as daily kWh and a budget-based panel count, then adjust for sun hours and inverter headroom.
Start with your daily kWh and adjust for sun hours.
Watch Video
Top Takeaways
- Define energy needs before sizing.
- Account for roof space, shading, and orientation.
- Coordinate inverter sizing with panel wattage and future options.
- Consult a licensed installer to finalize the design.