Best Way to Install Solar Panels: A Practical Guide for 2026
A practical, safety-first guide outlining the best way to install solar panels, covering planning, permits, mounting, wiring, and maintenance for homeowners seeking reliable solar power.

The best way to install solar panels is to plan thoroughly, secure all permits, choose proper mounting and inverter options, and hire licensed professionals when needed. This guide outlines a safe, compliant approach, from site assessment to final commissioning. Start by evaluating roof orientation and shading, confirm structural integrity, select a system size that meets energy goals, and budget for inspection and permitting.
Why Getting the Installation Right Matters
If you’re exploring the best way to install solar panels, the installation decisions you make will directly affect energy production, safety, and long-term reliability. A rushed or sloppy job can lead to leaks, electrical faults, and reduced efficiency. According to Solar Panel FAQ, thorough planning, roof condition checks, and strict adherence to local codes are non negotiable. This section explains why thoughtful installation matters for decades of clean energy and how the right approach supports your home’s energy goals. The best way to install solar panels starts with clarity on goals, roof suitability, and responsible contractor selection.
Site Assessment and Permits
Before any hardware is installed, perform a rigorous site assessment and obtain the required permits. Evaluate roof orientation, tilt, shading, and structural capacity to bear the additional load. Solar Panel FAQ analysis shows that addressing shading and orientation early reduces performance gaps and prevents costly changes later. Use a practical, step-by-step checklist for roof condition, electrical service capacity, interconnection requirements, and timelines for permits and inspections. This phase sets the foundation for the best way to install solar panels by aligning design with site realities and local rules.
System Design and Component Selection
Choosing modules, inverters, mounting rails, and wiring requires understanding how they work together to deliver reliable power. The best way to install solar panels starts with selecting high-quality modules with suitable wattage and efficiency, a mounting system compatible with your roof type, and an inverter that matches system size. In this section we cover module types (mono- vs polycrystalline), inverter options (string vs microinverters), and essential safety features such as rapid shutdown, grounding, and weatherproofing. You’ll also learn how to plan wiring routes, conduit protection, and how to choose components that scale with future energy goals.
Safety, Codes, and Best Practices
Safety is non-negotiable in any solar installation. This section covers fall protection, ladder safety, and safe handling of energized components. It explains key codes and standards and provides a practical checklist to minimize risk and ensure components are rated for outdoor exposure, wind loads, and temperature. Avoid common mistakes like undersized conductors, improper bonding, or inadequate weatherproofing that can compromise performance and safety. The best way to install solar panels is to prioritize comprehensive training, proper PPE, and step-by-step adherence to code requirements.
Installation Steps Overview and Commissioning
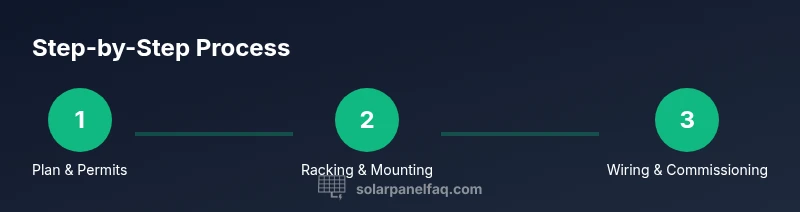
With planning, permits, and design complete, you’ll move to execution and verification. This overview provides a high-level workflow: mount rails, attach panels, string electrical wiring, connect to the inverter, and complete a commissioning test. The emphasis is on organized steps, proper labeling, and safety discipline. It also covers interconnection steps with the utility and how to document the system for ongoing monitoring. This section complements the quickAnswer by offering a clear roadmap for the best way to install solar panels in a real home.
Maintenance After Installation
Long-term performance depends on regular maintenance and timely inspections. Establish a routine for cleaning, inspecting connections, checking seals around roof penetrations, and monitoring production. Keep a maintenance log to identify trends and schedule service windows. The best way to install solar panels starts at commissioning and continues with proactive care to maximize life, warranty coverage, and energy savings.
Tools & Materials
- PV modules(Choose a wattage range that fits energy goals and roof space)
- Racking/mounting system(Roof-compatible rails and hardware; consider ballast for flat roofs)
- Inverter (string or microinverters)(Base on system size and shading; microinverters add shade tolerance)
- DC disconnect switch(Weatherproof and accessible location near the main service panel)
- AC disconnect and meter interconnection equipment(Ensure compatibility with local interconnection rules)
- Conduit, wiring, and fittings(Use weatherproof, UV-rated components and proper gauge)
- Roof penetrations and flashing(High-quality flashing to prevent leaks)
- Safety gear(Fall protection, harness, hard hat, insulated gloves)
- Tools(Drill, torque wrench, screwdriver bits, wire stripper, multimeter, conduit bender)
- Sealants and weatherproofing material(Silicone/urethane sealant suitable for outdoor use)
- Documentation(System design, permits, warranties, and maintenance logs)
Steps
Estimated time: 1-3 days (excluding permit processing)
- 1
Plan and assess site
Define energy goals, inspect roof conditions, and identify shading issues. Confirm local permit requirements and interconnection rules before any work begins. This step sets the foundation for a safe, compliant installation.
Tip: Document your energy goals and any shading analysis; use sun-path tools if needed. - 2
Evaluate structure and load
Verify roof structure can bear the added weight and that the chosen mounting system is appropriate. If necessary, consult a structural engineer or builder before proceeding.
Tip: Check for signs of damage or water intrusion; address any issues before installation. - 3
Design system and select components
Choose modules, inverters, and mounting hardware based on roof type and climate. Ensure components are compatible and rated for outdoor use; plan for future expansion if desired.
Tip: Model pairings (modules + inverter) to optimize voltage and current ranges. - 4
Plan layout and permits
Mark the layout on the roof and prepare required permit packets. Coordinate with utility for interconnection and schedule inspections.
Tip: Keep copies of permits and timelines; delays often come from missing documents. - 5
Install mounting rails and mounts
Attach rails to the roof using the chosen attachment method. Verify alignment, spacing, and level before proceeding to module mounting.
Tip: Use a spirit level and string line to maintain straight rows. - 6
Attach modules to rails
Place modules in a consistent pattern, secure with clamps or brackets, and maintain clearance for thermal expansion. Avoid over-tightening to prevent frame damage.
Tip: Leave space for thermal expansion and cleaning access. - 7
Run wiring to inverter and disconnects
Route conduit from the modules to the inverter and disconnects. Install DC wiring, install the AC disconnect, and ensure all wiring is protected and labeled.
Tip: Power down main service equipment before handling any conductors. - 8
Commission and test
Connect to the inverter, perform safety checks, and verify voltage/current. Document results and schedule interconnection approval with the utility.
Tip: Conduct insulation resistance checks and verify rapid shutdown functionality.
Frequently Asked Questions
Is it legal to install solar panels yourself in residential settings?
Rules vary by location, but most places require licensed electrical work for grid connections. A DIY approach is usually limited to non-utility work and roof mounting, if permitted.
Rules vary by location, but typically you need a licensed electrician for grid connections; you can mount the panels yourself in some circumstances, depending on local codes.
Do I need a permit to install solar panels?
Yes. Most jurisdictions require a building or electrical permit and a final inspection to confirm code compliance and safe interconnection.
Yes, you will likely need a building or electrical permit and a final inspection.
How many panels do I need for my home?
The number depends on roof space, energy goals, and system size. A professional should calculate energy needs and shading to optimize placement.
The number varies by energy goals and roof space; have a professional calculate needs.
Can I install solar on a flat roof?
Yes, with ballast or elevated mounting systems designed for flat roofs; ensure drainage and proper tilt.
Yes, but you’ll need special mounting for flat roofs and proper drainage.
What maintenance is required after installation?
Regular cleaning, inspection of connections, and monitoring system performance are key. Schedule professional checkups annually.
Regular cleaning and annual professional checks help keep your system performing well.
How long does installation take?
Typical installations take anywhere from a day to a few days, depending on system size and interconnection work.
Most installs take one to a few days, depending on complexity and permitting.
Watch Video
Top Takeaways
- Plan with safety first and secure permits before any work
- Choose quality modules and inverters aligned to your roof and climate
- Prioritize code compliance and professional verification
- Document interconnection steps and inspection results
- Maintain a proactive maintenance schedule for longevity