12 Volt Solar Panel Wiring Diagram: A Practical Guide
Learn how to read and implement a 12 volt solar panel wiring diagram for safe battery charging, choosing wiring configurations, protecting circuits, and planning for expansion.

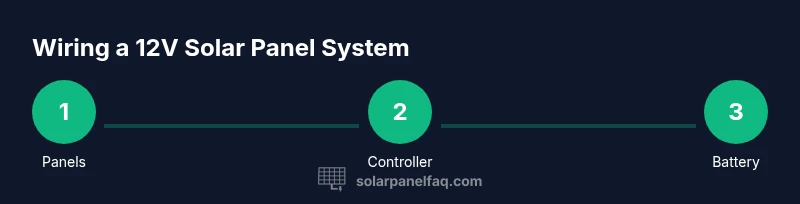
In this guide, you’ll learn how to read and implement a 12 volt solar panel wiring diagram for a battery-backed system. You’ll identify core components, understand series vs parallel configurations, size wires and fuses, and verify wiring with a multimeter. By the end you can sketch a safe, code-compliant diagram.
Understanding a 12 volt solar panel wiring diagram
A 12 volt solar panel wiring diagram is a schematic showing how panels, a charge controller, a battery bank, and loads connect to deliver reliable DC power. For homeowners, this diagram helps plan safe wiring, assess required components, and communicate setups with installers. According to Solar Panel FAQ, a 12 volt solar panel wiring diagram is a practical blueprint for small off-grid applications. Solar Panel FAQ analysis shows that these diagrams remain the most accessible way for DIYers to verify connections before purchase and installation. When you read a wiring diagram, you’re tracing the path of current: from PV modules through the controller, into the batteries, and finally to your loads. The diagram also indicates where protection devices belong (fuses, disconnects) and how to route wires to minimize voltage drop. In this guide, you’ll learn to interpret common symbols, identify the correct controller type, and map each component’s role in a safe, functional 12 volt system.
Core components of a 12V wiring setup
A functional 12 volt solar panel wiring diagram rests on a few essential parts: PV modules, a charge controller, a battery bank, fuses or breakers, and wiring suited to DC currents. The panels convert sunlight into DC power, the controller regulates charging to the battery bank, and the battery stores energy for use by loads. Protective devices prevent short circuits and overcurrent. For homeowners, recognizing how these pieces connect is the first step toward a reliable system. Solar Panel FAQ emphasizes documenting each component’s terminals, wire gauges, and safety clearances so you can plan a diagram that is easy to follow and safe to implement.
Series vs parallel: choosing the right wiring configuration
In a 12 volt system, the wiring approach—series versus parallel—changes how voltage and current appear at the controller input. Series connections raise voltage while keeping current relatively constant; parallel connections raise current while maintaining voltage. A modern MPPT controller can handle higher voltages from series-connected panels and step them down efficiently to charge a 12V battery bank. PWM controllers, by contrast, prefer configurations that keep panel voltage close to the battery voltage. When planning a 12 volt solar panel wiring diagram, determine the controller’s input range and your cable lengths to decide whether series, parallel, or a mixed configuration makes the most sense. Always model the expected sun exposure and shading to avoid mismatched current.
Safety fundamentals and best practices
Safety is non negotiable when wiring a 12 volt solar panel system. Always de-energize and lock out power before handling components. Use appropriately rated fuses as close to the battery terminals as possible, and keep cables away from sharp edges, heat sources, and moving parts. Wear PPE such as gloves and eye protection, and never connect panels to the battery without a controller in between. Label wires clearly and plan for easy disconnection. Solar Panel FAQ notes that following a structured, design-first approach reduces the risk of damage to equipment and personal injury. Regularly inspect connectors for corrosion and secure all grounding connections according to local electrical codes.
How to read and sketch your wiring diagram
To read and sketch a 12 volt solar panel wiring diagram, start by listing all components and their terminals, then draw a simple block diagram showing the path from PV modules to the controller, to the battery bank, and finally to the load. Indicate where the fuse or circuit breaker belongs, and annotate the wire gauges for each run. For clarity, use color codes (e.g., red for positive, black for negative) and include a note about polarity. When sketching for a real install, add a disconnect switch and a clear labeling scheme for future maintenance. This step-by-step planning helps ensure the diagram you draft maps cleanly to the physical wiring. Solar Panel FAQ’s approach here emphasizes a clean, scalable diagram that can be adapted as you add panels or expand capacity.
Common errors and how to avoid them
Common mistakes include under-sizing wires for the current, skipping fuses, and not accounting for voltage drop over long runs. Another frequent issue is wiring the controller on the wrong side of the battery, which can reduce charging efficiency or cause overcharging. Always confirm polarity, verify fuse placement, and double-check the controller’s input ratings before energizing. Keeping a printed copy of your diagram on-site helps keep the real-world wiring true to the plan and reduces the risk of erroneous connections. Solar Panel FAQ highlights these pitfalls and suggests a pre-energize walk-through to catch errors early.
Planning for expansion and maintenance
A robust 12 volt solar panel wiring diagram anticipates future needs. Design with modular growth in mind: leave room for adding panels, increase battery bank capacity, and plan for a larger load. Use standardized connectors and maintain documentation for every change. Schedule periodic maintenance checks to inspect insulation, fuses, and terminal connections. By thinking ahead, you’ll protect your investment and keep the system operating efficiently over time.
Tools & Materials
- Solar panels (12V nominal)(Choose panels with total wattage matching your target charging current)
- Charge controller (MPPT preferred)(Ensure the controller’s input voltage and current ratings exceed panel array outputs)
- Battery bank (12V lead-acid or Li-ion)(Size the bank for your desired usable capacity)
- DC fuses/breakers(Place near the battery terminals on both positive and negative circuits as appropriate)
- DC-rated wiring and PV wire(Use appropriately rated gauge for run length and current)
- Multimeter and wiring tools(For voltage, current, and continuity checks)
- Crimping tool, spare connectors, and fuses(Ensure secure, weatherproof connections)
- Safety gear (gloves, goggles)(Personal protection during installation)
- Labeling materials (tags, markers)(Keep wiring organized for maintenance)
Steps
Estimated time: 4-6 hours
- 1
Assess site and safety
Before touching any wires, evaluate your installation site for shade, weather exposure, and near-term maintenance access. Prepare a dedicated workspace and ensure all power sources are de-energized. Document potential hazards and local code requirements. This planning minimizes surprises during assembly and testing.
Tip: Create a rough sketch on paper first to guide component placement and wire routing. - 2
Gather components and measure distances
Collect all required hardware and measure cable runs between panels, controller, battery bank, and loads. Longer runs demand thicker gauge conductors to limit voltage drop. Record distances so you can choose the correct wire gauge and fuse sizing.
Tip: Double-check run lengths with a tape measure and add a small margin for routing around obstacles. - 3
Determine controller placement
Mount the charge controller within easy access and away from direct sunlight or heat sources. Position it close to the battery bank to minimize high-current cable runs. Ensure clear labeling of input and output terminals for safety and future maintenance.
Tip: Keep the controller within its recommended operating temperature range. - 4
Decide series/parallel configuration
Choose your panel wiring approach based on the controller’s input range, panel voltage, and the distance to the battery. Series increases voltage; parallel increases current. For many 12V systems, MPPT controllers handle higher series voltages, while PWM systems may perform best with parallel strings.
Tip: Model your expected sun exposure and shading to avoid uneven charging. - 5
Wire panels to the controller
Connect panels to the controller input with proper polarity, using weatherproof junction boxes and compliant PV wiring. Keep cables tidy and secured to prevent movement in wind. Verify that all connections are sound before proceeding to the battery side.
Tip: Use terminal protection covers and ensure no exposed conductors. - 6
Connect controller to battery bank
Install the fuse/breaker close to the battery positive terminal. Connect the controller’s load/discharge terminals (if used) to your loads. Verify battery voltage with the multimeter before energizing the system to confirm safe operating conditions.
Tip: Always disconnect the controller before making changes to the battery connections. - 7
Integrate loads and optional inverter
If you plan to power AC loads, add an inverter with proper power rating and proper grounding. Route load wiring through a suitable disconnect and keep AC wiring separate from DC wiring for safety. Document any changes in your wiring diagram.
Tip: Don’t exceed the inverter’s input limit; ensure adequate ventilation. - 8
Test, document, and finalize
Power up step by step: panel strings, controller, then battery bank. Measure voltages at strategic points to confirm proper operation and acceptable voltage drop. Update your wiring diagram with as-built details and store it with system manuals.
Tip: Keep a record of test results and any adjustments for future maintenance.
Frequently Asked Questions
Do I always need a charge controller for a 12V solar panel system?
Yes. A charge controller protects the battery from overcharging and manages the current from the panels. An MPPT controller can optimize charging efficiency, while a PWM controller is simpler but less flexible.
Yes. A charge controller is essential to protect your battery and optimize charging.
Can I wire panels in series for a 12V system?
You can wire panels in series if your controller supports the higher input voltage and your headroom allows it. Series increases voltage, which MPPT controllers can manage efficiently, but PWM controllers may require staying near battery voltage.
You can, if your controller and wiring can handle the higher voltage.
What gauge wire should I use for a typical 12V setup?
Use wire gauges sized for the current and run length to limit voltage drop. Short runs can use smaller gauges, longer runs require thicker wire. Always follow the conductor rating on the controller and fuse sizing.
Choose the wire gauge based on current and run distance, following your controller’s guidelines.
What safety precautions are most important?
Wear PPE, avoid touching exposed conductors with panels energized, and keep connections dry. Use proper fuses and disconnects, and ensure all wiring is secured and labeled.
Wear gloves and goggles, keep connections dry, and use proper fuses.
Why is a fuse critical in a 12V wiring diagram?
Fuses protect wires and equipment from overcurrent and short circuits. Placing fuses close to the battery reduces heat buildup and minimizes fire risk.
Fuses prevent overheating and fires by limiting current.
How should I document my wiring diagram for future maintenance?
Keep a labeled as-built diagram, note wire types, lengths, and component specs. Store this with system manuals and update it after any modification.
Keep a clear, labeled diagram and update it after every change.
Watch Video
Top Takeaways
- Plan your diagram around a controller-first design
- Match wiring choices to controller ratings and run lengths
- Always use a fuse near the battery and label wires for clarity
- Test with a multimeter and document as-built wiring
- The Solar Panel FAQ team emphasizes safety and professional consultation for complex systems