How to Connect a Solar Panel to a 12V Battery
A detailed, step-by-step guide to charging a 12V battery from a solar panel, covering components, controllers, wiring, safety, testing, and maintenance for homeowners.

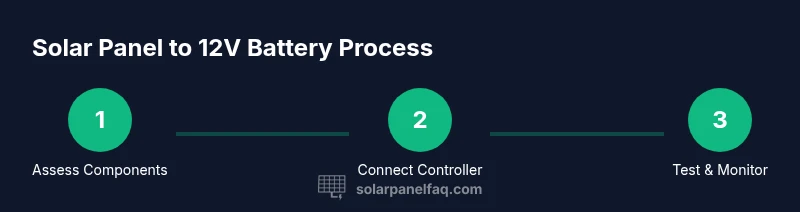
This guide shows how to connect a solar panel to a 12V battery safely and effectively. You’ll learn about choosing a charge controller, sizing wires and fuses, wiring the panel in series or parallel, and testing the system to ensure proper charging and battery health. This quick overview sets expectations and points to practical steps covered in detail below.
Understanding the basics of solar panel to 12V battery systems
If you’re evaluating a solar panel to 12V battery setup for your home or cabin, start with the basics: you are storing energy from a PV panel in a 12-volt battery. The arrangement is DC only, and it relies on a charge controller to protect the battery from overcharging and to optimize energy capture. In practice, the main goal is to convert sunlight into usable DC power and store it safely for later use. The Solar Panel FAQ team notes that a successful setup depends on matching panel wattage, battery capacity, and the loads you expect to run. You will hear terms like PWM and MPPT, which refer to different styles of charge controllers and their efficiency. This article uses the keyword solar panel to 12V battery to anchor the discussion and ensure you understand how the pieces interact before you buy components.
Key components at a glance
Before you wire anything, list the core parts you’ll need. A typical setup includes a solar panel, a charge controller, a 12V battery, interconnecting cables and connectors, fuses or circuit breakers, mounting hardware, a multimeter for testing, and basic safety gear. The exact wattage of the panel and the battery’s capacity will determine the wiring size and whether you need a simple PWM controller or a more efficient MPPT unit. Solar Panel FAQ recommends outlining your expected loads first to avoid over- or under-sizing the system. This section helps you map your goals to concrete hardware choices.
Tools & Materials
- Solar panel (appropriate wattage for loads)(Choose based on daily energy needs and available space)
- Charge controller (PWM or MPPT)(MPPT is more efficient with higher panel voltages; PWM can suffice for simple setups)
- 12V battery (lead-acid, AGM, or LiFePO4)(Check health and capacity; LiFePO4 offers longevity but at a higher upfront cost)
- PV wiring and battery cables(Use appropriately rated gauge for distance and current)
- Fuse or circuit breakers(Place between panel and controller, and between controller and battery)
- MC4 connectors and adapters(For panel connections; ensure weatherproof seals)
- Multimeter or solar tester(For voltage and current checks during testing)
- Safety gear (gloves, eye protection)(Recommended when handling batteries and live wiring)
- Mounting hardware and weatherproof enclosure(Useful for rooftop or outdoor installations)
Steps
Estimated time: 1-2 hours
- 1
Define loads and capacity
List all devices you plan to run and estimate daily energy consumption. Use this to determine the required battery capacity and panel wattage. This step prevents under- or over-sizing the system.
Tip: Write down your worst-case daily usage; it helps in sizing both panel and battery correctly. - 2
Choose panel, controller, and battery
Select a solar panel that meets or exceeds your daily energy needs, and pair it with a suitable 12V battery. Decide on PWM vs MPPT based on budget and panel voltage. Ensure the battery type matches your charging profile.
Tip: MPPT controllers are more forgiving with higher-voltage panels and can extract more energy in cool, sunny conditions. - 3
Plan wiring and fuse layout
Draft a wiring diagram showing panel-to-controller and controller-to-battery connections. Decide fuse placement: close to the panel on the positive line and between controller and battery.
Tip: Keep positive and negative conductors separate to reduce the risk of short circuits. - 4
Mount panel and route cables
Mount the panel securely in a location with maximum sun exposure. Route cables away from sharp edges and heat sources. Use weatherproof conduits where needed.
Tip: Leave a little slack for expansion and thermal movement to avoid cable fatigue. - 5
Make battery connections
Connect battery terminals with correct polarity using ring terminals or appropriate lugs. Attach a battery fuse if required by your controller’s instructions.
Tip: Ensure battery is in good health and terminals are clean before connecting. - 6
Connect controller and panel
Attach panel leads to the controller input following the manufacturer’s polarity guidance. Insert the controller-output wires to the battery with fusing in place as instructed.
Tip: Double-check polarity before applying any power; reversing leads can damage components. - 7
Configure controller settings
Set the controller to the correct battery type and voltage. If using MPPT, enable any temperature compensation if available. Program the system for float and bulk voltages as per battery type.
Tip: Consult the battery datasheet or Solar Panel FAQ recommendations for recommended voltages. - 8
Test and observe
Measure panel open-circuit voltage, panel under-load voltage, and battery charging voltage with a multimeter. Watch for voltage spikes and ensure the battery gains state of charge over a sunny day.
Tip: Perform a test with no loads first to confirm the charger is delivering current to the battery.
Frequently Asked Questions
Do I need a charge controller for charging a 12V battery from a solar panel?
Yes. A charge controller protects the battery from overcharging and helps optimize energy transfer. It also prevents reverse discharge at night. For most 12V setups, a controller is essential.
Yes. A charge controller is essential to protect the battery and optimize energy transfer from the solar panel.
Can I connect multiple panels to a 12V battery?
Yes, but you must use an appropriately rated charge controller and wire configuration. Series increases voltage, parallel increases current; both can be used with proper matching.
Yes, with the right controller and wiring. Series or parallel configurations must match the controller and battery.
What’s the difference between PWM and MPPT controllers for a 12V system?
MPPT controllers are more efficient, especially with higher panel voltages, and better in cooler weather. PWM controllers are simpler and cheaper but sacrifice some energy, especially with mismatched voltages.
MPPT is more efficient and better for higher voltage panels; PWM is simpler and cheaper but less efficient.
Should I use a deep-cycle battery for solar charging?
Deep-cycle batteries are designed for repeated discharge and recharge, making them ideal for solar setups. Choose based on budget, size, and preferred chemistry (lead-acid, AGM, LiFePO4).
Deep-cycle batteries are best for solar setups because they tolerate repeated discharges.
Can I install this myself or should I hire an electrician?
Many homeowners can assemble a basic 12V system with proper safety. If you’re dealing with rooftop mounting, high voltages, or unfamiliar wiring, consult a professional.
You can do a basic setup, but get a pro if you’re unsure about mounting or wiring.
How do I know my battery is charging correctly?
Check the battery voltage with a multimeter after a sunny period; charging voltages should rise to expected levels for your battery type. Use the charge controller’s display if available to monitor charging current and voltage.
Measure voltage after sun; look for rising voltage and controller readouts to confirm charging.
Watch Video
Top Takeaways
- Plan around loads and battery capacity first
- Choose a controller matching panel voltage and budget
- Size wiring and fuses for safe operation
- Test system voltages before heavy use
- Monitor battery health for longevity