How Roofers Handle Solar Panels: A Practical How-To
Discover how roofers safely manage solar panels during roofing projects, including removal, safety protocols, warranties, and coordination with installers.

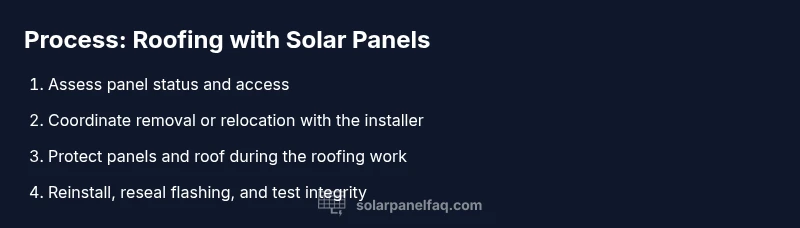
How do roofers deal with solar panels? They coordinate with installers, secure and protect panels, and follow safety protocols to keep the roof watertight. Key steps include assessing the panel layout, temporarily removing or lifting modules when needed, and reinstalling with proper sealing. This guide explains the typical process, safety requirements, and how roofers protect warranties during panel work.
Overview: How roofers approach roofs with solar installations
When a roof job coincides with active solar panels, the first priority is to protect both the roof structure and the solar system. Contractors typically begin with a coordination call between the roofing crew and the solar installer to review the panel layout, racking, and shutoff points. A site plan is created that identifies safe access routes, panel removal areas, and temporary storage spots for equipment. In many cases, electricians or solar technicians will isolate the array's DC and AC circuits to prevent any energizing of conductors during the work. This is not just about convenience; it's about preventing electrical hazards, avoiding accidental damage to microinverters, and preserving warranty terms for both the roof and the solar system. According to Solar Panel FAQ, the best outcomes arise from early planning and clear lines of communication between trades.
Safety, codes, and documentation
Safety governs every decision when solar panels are involved. Roofers follow general construction safety rules and the solar team observes electrical safety standards. Typical steps include verifying set-up against local building codes, obtaining any required permits, and ensuring fall protection is in place for the crew. Documentation is essential: checklists, permit copies, and camera notes to track changes in panel positioning and seal integrity. Solar-related components often require careful handling to avoid microcracks or misalignment that could impact performance. The Solar Panel FAQ Team reminds readers that documentation helps protect warranties by proving that all steps followed manufacturer and code guidelines.
Coordinating between roofing and solar teams
Effective collaboration reduces downtime and minimizes the risk of miscommunication. A joint working window is scheduled: the solar installer arranges panel isolation and panel relays, while the roofer plans flashing adjustments and tile alignment. Roles are defined so that one crew moves panels while the other protects the roof edge. This coordination also covers weather contingencies; if rain makes panels slippery or if heavy wind threatens exposed components, the teams pause work and re-evaluate the plan. Clear line-of-sight communication tools, such as radios or dedicated messaging apps, help ensure everyone stays on the same page.
Temporary handling techniques for panels during roofing
There are several ways roofers manage solar panels during a roof project. In some cases, panels are carefully unmounted and moved to a safe, shaded area for the duration of the job. In others, panel sections are covered and stabilized to protect glass and wiring. Lightning, hail, or strong winds can create sudden risk, so many crews use panel grip mats and frame guards to reduce movement. If panels must remain in place, bolstered protective barriers and wind-limiting tarps help minimize debris contact. The goal is to leave the system in a safe, restorable state without introducing new leaks or stress on railings and flashings.
Removing vs relocating: Pros, cons, and best practices
Temporary relocation usually provides the deepest access to flashing and underlayment but adds the work of re-securing and resealing. Removal is easier to inspect the roof surface and allows for full control of sealants and flashing replacements. Each approach has implications for warranties; improper resealing after relocation can void certain manufacturer terms if not done per spec. Best practices include using manufacturer-approved lanyards, documented reattachment torque specs, and re-tightening flashings to manufacturer guidelines.
Protecting warranties and roof integrity during panel work
Warranties depend on both the roof and the panel system. Roofers avoid practices that void roof warranties, such as cutting through sealants or altering flashing beyond specified limits. When possible, they coordinate with the solar installer to ensure that panel mounts and racking are inspected and re-tightened after the roof work. Protective measures, such as temporary coatings on the underlayment and re-installation checks by a qualified technician, help sustain performance assurances and prevent issues that could lead to leaks or electrical faults. The Solar Panel FAQ Team emphasizes that proactive communication with the panel manufacturer can avert warranty disputes.
After roofing: inspection, testing, and re-sealing
Once the roofing work is complete, a thorough inspection confirms the roof’s integrity and the solar system’s readiness. The roofer and solar tech perform a seal check around all flashing, then verify that vents and gutters are clear and free of debris. Electrical checks should verify continuity and grounding, and a leak test or water test is performed to ensure no moisture intrusion. Finally, the system is resealed and reenergized, with a documented status update filed for future service visits. The process reduces post-work warranty risk and helps ensure long-term roof durability.
Tools & Materials
- Roofing harness(Full-body harness with lanyard for fall protection)
- Ladder or mobile elevating work platform(Stable access to roof line; safe edge clearance)
- Non-conductive gloves(Heat-resistant if near hot roofing materials)
- Marker or chalk line(Identify panel removal zones and racking alignment)
- Panel-safe lifting tools(Lifting grips or suction cups designed for solar panels)
- Sealant compatible with roofing material(High-quality silicone or polyurethane sealant)
- Torque wrench(Confirm mounting bolts torque per manufacturer specs)
- Electrical tester or multimeter(Isolate and test panel circuits safely)
- Temporary weather protection (tarps, windbreaks)(Protect panels and roof during wind or rain)
- Camera or smartphone for documentation(Record panel condition before/after work)
Steps
Estimated time: 60-120 minutes
- 1
Plan with solar installer
Coordinate access and establish safety zones. Review the panel layout, shutoffs, and how relocation will be executed. Document responsibilities and schedule so both teams know when to act.
Tip: Use a shared plan and confirm it in writing. - 2
Isolate and de-energize the array
Turn off the DC disconnect and ensure the AC supply is isolated as required by the installer. Verify there is no electrical current in exposed conductors before touching anything.
Tip: Lockout/tagout procedures prevent accidental energization. - 3
Remove or relocate panels
Gently unmount panels or shift them to a safe location according to the plan. Use panel-safe lifting tools and avoid twisting the glass.
Tip: Work with a helper to support weight and maintain balance. - 4
Proceed with roof work
Carry out the roofing tasks (shingle work, flashing replacement) with care. Protect wiring paths and inspect for potential leaks as you progress.
Tip: Maintain clean, dry work surfaces to prevent slips. - 5
Reinstall and reseal
Return panels to their mounts and re-tighten bolts per torque specs. Re-seat flashing and re-seal joints to original manufacturer standards.
Tip: Document torque values and take photos for warranty records. - 6
Final checks and energize
Test electrical continuity and grounding. Restore power per the installer’s sequence and verify the system operates correctly.
Tip: Obtain a sign-off from the solar installer.
Frequently Asked Questions
Do roofers need to remove solar panels before roofing?
Not always, but often panels are temporarily removed or relocated to access the roofing surface. The solar installer and roofer coordinate to minimize downtime and protect the system.
Usually panels are temporarily removed or relocated to access the roof; coordination minimizes downtime.
Who is responsible for safety when solar panels are involved?
Both the roofing crew and the solar installer share safety responsibilities. Workers follow fall protection, electrical isolation, and proper handling procedures to prevent hazards.
Safety responsibilities are shared by both teams to prevent hazards.
Will removing panels affect warranties?
If panels are removed, reinstallation must follow manufacturer guidelines to avoid warranty issues. Always document torque, sealants, and reattachment procedures.
Warranties depend on proper reinstallation per guidelines.
What if weather is bad during panel work?
Work may pause until conditions improve. Panels and open racking should be secured to prevent damage in wind or rain.
Work may pause if weather is unsafe.
How do roofers protect the roof surface during panel work?
Roofers use tarps, edge protection, and careful flashing work to minimize damage and leakage.
Protecting the roof surface is essential during panel work.
What should I expect after roofing is done?
A final inspection ensures leaks are sealed, flashing is intact, and the solar system is reenergized safely.
Expect post-work checks and system re-energization.
Watch Video
Top Takeaways
- Coordinate early with solar installers.
- Prioritize safety and code compliance.
- Choose relocation or removal based on access needs.
- Document all steps for warranty protection.
- Inspect seals and flashing after reinstallation.