Can You Install Solar Panels on a Tile Roof? A Practical How-To
Discover how to install solar panels on a tile roof, including mounting options, roof prep, permits, costs, and selecting a qualified installer for tile roof projects.

Can you put solar panels on a tile roof? In most cases yes, but success depends on tile type, roof condition, mounting system, flashing quality, and local codes. With careful planning, a suitable non-penetrating or penetrating mounting solution, and a licensed installer, tile roofs can support efficient solar arrays while maintaining roof integrity. Always verify underlayment, tile condition, and manufacturer guidance before proceeding.
Can tile roofs accommodate solar panels?
If you’re considering solar energy for your home and ask can you put solar panels on a tile roof, the short answer is often yes. Tile roofs are common in many climates and can provide a durable, aesthetically pleasing mounting surface for photovoltaic (PV) arrays. The key is to assess the roof’s current condition, the tile material (clay, concrete, or composite), and whether the tiles and underlayment can tolerate the weight and penetrations required by a mounting system. Tile roofs with solid underlayment, intact flashing, and a strong structure are generally good candidates. The Solar Panel FAQ team emphasizes that early planning and a professional assessment dramatically improve installation success while protecting the roof’s longevity.
Tile roof types and their impact on mounting
Different tile types present distinct mounting challenges. Clay and concrete tiles are rigid and heavy, offering a solid base but requiring careful handling to avoid cracks. Ceramic or composite tiles may vary in flexibility, affecting how mounting brackets sit and seal. The geometry of the roof, including tile interlocks, ridges, and valleys, influences how racks are attached and how water will shed. A crucial takeaway is that the feasibility of solar on tile depends less on style and more on the underlying roof deck integrity, underlayment, and a mounting system engineered for tile roofs.
Mounting options for tile roofs
There are generally two broad approaches: penetrating and non-penetrating mounting systems. Penetrating mounts anchor to the roof deck but require precise flashing to prevent leaks where brackets touch tiles. Non-penetrating or semi-penetrating solutions use clips or rails that sit on the tiles themselves, minimizing direct deck penetrations. Your choice depends on tile type, slope, weather exposure, and local codes. In all cases, professional installation is strongly advised to ensure a stable, weatherproof connection that won’t compromise roof integrity.
Pre-install roof assessment and preparation
Before any mounting begins, conduct a thorough roof inspection. Look for cracked or loose tiles, deteriorated underlayment, faulty flashing, or signs of prior water intrusion. If the roof shows significant wear or is nearing the end of its life, it's often wise to replace or retrofit components before adding solar. Adequate underlayment and a clean, dry surface are essential for a reliable seal around mounts and flashing. Documentation from the tile manufacturer and the shingle or tile warranty should guide the process to avoid voiding coverage.
Electrical planning and system sizing for tile roofs
Plan the system with sun exposure and shading in mind. Orient panels toward the sun’s path to maximize energy production, and account for potential shading from vents, chimneys, or trees. Inverters and wiring should be sized to your expected output, with attention to safety clearances and code compliance. Microinverters or power optimizers can help if shading varies across the array. The goal is to balance aesthetics, roof safety, and electrical efficiency while staying within local permit requirements.
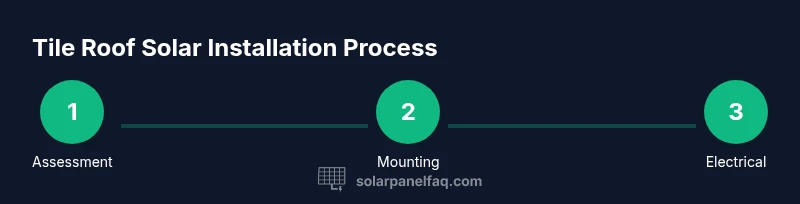
Installation steps overview (high level)
A tile-roof solar installation proceeds from assessment to commissioning. After obtaining permits, roof preparation includes securing a stable mounting surface and ensuring weatherproof flashing around penetrations. Rails or racks are attached with properly sealed mounts, followed by panel attachment and electrical wiring to the inverter. Final inspections verify structural stability, leak protection, and code compliance. This overview highlights that meticulous execution and professional oversight are critical for tile roofs.
Cost considerations and permitting
Costs for tile-roof installations vary with roof size, panel efficiency, and mounting strategy. Tile destruction, roof replacement requirements, and extra flashing increase complexity and price. Permitting often requires electrical and structural approvals, with inspections at multiple stages. While tile roofs may incur higher upfront costs than flat or metal roofs, the long-term energy savings can still justify the investment when combined with available incentives and favorable payback.
Maintenance, warranties, and roof longevity
Proper maintenance preserves both solar output and roof longevity. Keep panels clean and free of debris, inspect flashing for signs of wear after storms, and track any changes in roof condition around penetrations. Warranties from tile manufacturers, mounting system suppliers, and the solar installer should be reviewed to understand coverage if leaks occur or if panels require service. Coordinating with the installer helps ensure that solar equipment does not compromise roof warranties.
Choosing a qualified installer and getting bids
Select an installer with tile-roof experience and a track record of leak-free installations. Request references, verify licenses and insurance, and review the mounting method proposed for your tile type. Getting multiple bids helps compare materials, warranties, and timelines. A thorough bid should include roof prep requirements, flashing details, and a clear plan for post-install inspection and maintenance.
Tools & Materials
- Solar panels (PV modules)(Ensure panels meet your energy goals and are compatible with the chosen inverter.)
- Tile roof mounting rails or racking system(Choose systems rated for tile roofs (penetrating or non-penetrating as appropriate).)
- Roofing underlayment or flashing kit(High-quality flashing around penetrations is essential to prevent leaks.)
- Sealing materials (roof sealant or butyl tape)(Use weatherproof sealants designed for roof penetrations.)
- Roof-safe mounting tools (drill, torque wrench, sealant gun)(Appropriate tools prevent tile damage and ensure tight seals.)
- Electrical disconnects and conduit fittings(Meet electrical code requirements and safety standards.)
- Inverter and wiring (string or microinverters)(Choose based on shading patterns and system design.)
- Safety gear (harness, hard hat, gloves)(Tile roofs pose fall risks; ensure proper fall protection.)
Steps
Estimated time: 1-2 days
- 1
Assess roof and plan layout
Conduct a detailed roof inspection, verify underlayment, and map panel placement to maximize sun exposure while avoiding vents.
Tip: Document any tile repairs before mounting; this prevents post-install leaks. - 2
Choose mounting system
Select a tile-appropriate mounting solution (penetrating or non-penetrating) based on tile type and roof structure.
Tip: Consult the tile manufacturer’s guidelines to prevent warranty issues. - 3
Prepare roof and flashings
Install flashing around penetrations, replace worn underlayment, and ensure a clean, dry surface for rails.
Tip: Use silicone sealant to seal around flashing edges for extra protection. - 4
Install mounting rails
Secure rails firmly to the roof deck or appropriate tiles, maintaining correct spacing and alignment.
Tip: Avoid overtightening; tile cracks can occur if brackets are too tight. - 5
Attach solar panels
Mount PV modules to rails, ensure proper torque on hardware, and verify bay spacing for ventilation.
Tip: Leave room for expansion and vibration due to wind loads. - 6
Make electrical connections and test
Run conduit, connect to inverter, and perform a safety test per code requirements before commissioning.
Tip: Schedule inspections with local electrical and building authorities.
Frequently Asked Questions
Can all tile roofs support solar panels?
Most clay and concrete tile roofs can support solar panels with proper mounting and flashing, but very fragile or aged tiles may require replacement or reinforcement before installation.
Most tile roofs can support solar panels if mounted correctly, but aging or fragile tiles may need prep work.
Will installing solar panels void my tile roof warranty?
Warranties vary by tile manufacturer and mounting hardware. Always check with the tile maker and the installer to ensure mounting does not void coverage.
Check with the tile maker and installer; mounting can affect warranties depending on the hardware used.
What maintenance is required after installation?
Keep panels clean, inspect flashing after heavy weather, and monitor roof areas around penetrations for leaks. Schedule periodic inspections.
Keep the panels clean and inspect around penetrations after storms.
Are permits required for tile-roof solar?
Yes. Permits typically cover electrical work and roof modifications. Your installer should handle permit applications and inspections.
Permits are usually required and handled by the installer.
How does tile type affect installation cost?
Tile type, roof age, and mount type influence cost. Complex tile shapes or fragile tiles may increase labor and material expenses.
Tile type and roof condition can affect installation costs.
Is professional installation mandatory for tile roofs?
While DIY might be possible in simple cases, tile-roof installations pose leak and safety risks that typically require a licensed professional.
It's strongly recommended to hire a licensed installer for tile roofs.
Watch Video
Top Takeaways
- Assess roof condition before mounting.
- Choose a tile-specific mounting system.
- Proper flashing prevents leaks and protects warranties.
- Professional installation is essential for tile roofs.