Can You Put Solar Panels on a Metal Roof? A Practical Guide
Discover how to install solar panels on a metal roof, exploring mounting options, safety, warranties, and maintenance for homeowners.

You can install solar panels on a metal roof using appropriate mounting hardware and proper sealing. Standing-seam roofs are usually the easiest with non-penetrating clamps; other metal roof types may require specialty hardware. A qualified installer can confirm roof integrity and provide a plan.
Why Solar on Metal Roof Makes Sense
For homeowners, metal roofs offer durability, longevity, and fast water-shedding that can improve solar performance. Solar panels on metal roofs can be a wise investment when installed correctly, minimizing the risk of leaks and maximizing energy production. According to Solar Panel FAQ, metal roofs often have long lifespans and compatible mounting options, which can simplify maintenance over the solar system’s typical lifecycle. The combination of a sturdy deck and high reflectivity from many metal surfaces provides a solid base for a roof-mounted system. However, the roof type and condition influence mounting decisions: standing-seam roofs are generally easiest because their seams provide natural anchor points for clamps. With any metal roof, a professional installer will verify rust or corrosion, ensure fasteners are properly torqued, and confirm that seals won’t compromise the roof. When done correctly, non-penetrating clamps can avoid leaks entirely. Proper alignment, load calculations, and drainage should guide every mounting plan. The Solar Panel FAQ team emphasizes the importance of site-specific design to protect both roof and warranty.
Metal Roof Types and Their Impact
Metal roofs come in several styles, and the installation approach varies by type. Standing-seam panels offer uninterrupted joints that clamps grip without penetrating the metal, which is often ideal for retrofits. Corrugated metal roofs or bar-style panels typically require different hardware, potentially including self-tapping screws or sealant-filled penetrations. The choice of roof material also influences thermal expansion considerations; metal expands and contracts with temperature swings, which affects clamp tension and panel alignment over time. Solar panel mounting hardware is designed to accommodate these movements, but the installer must select clamps and rails that suit the exact roof profile. The Solar Panel FAQ analysis notes that a well-mocumented roof condition assessment helps avoid surprises later and supports smoother warranty claims.
Mounting Options That Work on Metal Roofs
There are several mounting strategies that work well on metal roofs:
- Non-penetrating clamps for standing-seam roofs that grip the seam without drilling or sealing penetrations.
- Penetrating rails with careful sealing where the roof type and warranty permit it, typically used on non-standing seam metal roofs with precise sealant methods.
- Ballasted racks for flat or low-slope metal roofs, which rely on weight distribution rather than fasteners.
- Hybrid systems combining clamps on seams with minimal penetrations in less critical areas, always verified by a professional.
Choosing the right system depends on roof type, wind loads, and local codes. A pro can model loads, confirm seam integrity, and ensure that clamps don’t deform or nick the metal. The goal is secure mounting with minimal risk of leaks or warranty disputes.
Preparation: Roof Condition, Warranties, and Codes
Before installing, inspect the roof for corrosion, loose panels, or damaged coatings. Metal roofs often outlast shingles, but any pre-existing damage must be repaired to avoid leaks after panel installation. Check with the manufacturer and installer about warranty coverage for the mounting hardware and roof; some warranties require specific hardware or installation methods. Local building codes and HOA rules may dictate clearances, electrical routing, and snow loads. Solar Panel FAQ emphasizes documenting roof condition and obtaining permits when required, since improper mounting can void warranties or complicate future roof replacements.
Installation Overview: From Plan to Panels
A typical metal-roof solar project begins with a site assessment, weather window, and system sizing. Next comes mounting hardware installation, ensuring seams are clean and clamps engage properly. Once rails are in place, solar modules are mounted, wired in series or parallel as planned, and routed to the inverter. Finally, the system is grounded, tested, and commissioned. Throughout, insulation, sealants, and flashing must be chosen to withstand local climate and maintain roof integrity. A qualified installer will produce a site-specific plan, verify wind loads, and ensure that the racking won’t rub against fasteners.
Maintenance, Longevity, and Common Pitfalls
Metal roofs paired with solar installations can provide decades of service if kept clean and inspected. Schedule periodic inspections to check for loose clamps, corrosion at fasteners, and sealant wear around penetrations (if any). Clean debris after storms to protect airflow and performance. Common pitfalls include choosing incompatible hardware for your roof profile, improper torque on fasteners, and underestimating wind loads in coastal or high-wind regions. Regular inspections and prompt repairs help preserve both roof health and energy output. The Solar Panel FAQ team recommends keeping a maintenance log and reviewing warranty documents after any roof work.
Is It Worth It? Key Considerations for Metal Roofs
The decision to install solar on a metal roof hinges on roof condition, roof age, and the expected system lifetime. Metal roofs often provide a robust foundation with long warranties, yet the mounting hardware must be compatible to avoid leaks or warranty issues. When aligned with the home’s energy goals, metal-roof solar can deliver strong performance, especially in climates with high sun exposure. The Solar Panel FAQ analysis indicates that many metal-roof installations achieve favorable energy payback periods when properly planned, though individual results vary with location, system size, and electricity rates.
Tools & Materials
- Ladder and fall protection gear(Stable, level ground; use a harness on sloped roofs)
- Non-penetrating mounting clamps (standing seam)(Specifically rated for your seam width and profile)
- Rails and mounting rails(Corrosion-resistant material (aluminum/steel) as appropriate)
- Solar modules and racking hardware(Match frame size and weight to system design)
- Sealant and flashing materials(Weather-rated sealant compatible with metal roofing)
- Torque wrench and installation tools(Use manufacturer-specified torque for clamps)
- Wire management clips and conduit(Keep lines protected and neatly routed)
- Punchs/impact driver and drill bits(Only for penetrations if needed and approved)
- Electrical testing gear (multimeter)(Verify system voltage and continuity)
- Safety plan and permits(Include fall protection and local permit requirements)
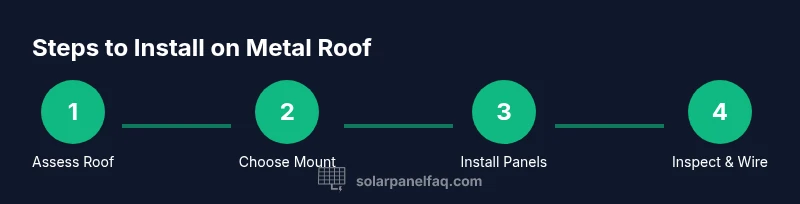
Steps
Estimated time: 4-8 hours
- 1
Assess roof type and condition
Begin with a detailed assessment of the metal roof. Identify seam type (standing-seam vs corrugated), roof age, corrosion, and any pre-existing damage. This step determines whether clamps or penetrations are appropriate and informs the warranty considerations.
Tip: Document seams and take photos from multiple angles for the installer. - 2
Choose the mounting system
Select a mounting method compatible with your roof type and local wind loads. Non-penetrating clamps are preferred for standing-seam roofs to minimize leaks, while other metal roof types may require penetrating hardware if clamps aren’t suitable.
Tip: Confirm with the manufacturer that clamps fit your exact seam width and profile. - 3
Plan system layout and wiring
Map panel orientation, stringing, and electrical routing. Ensure maximum sun exposure and consider shade from nearby trees. This step reduces wiring distance and improves performance.
Tip: Use a site plan to avoid routing wires across potential wear points or roof penetrations. - 4
Prepare roof surface
Clean the roof surface around installation points and check for any loose panels or fasteners. Address any rust spots and ensure seams are dry before hardware installation.
Tip: Avoid working on wet metal to reduce slip risks and ensure sealants cure properly. - 5
Install mounting hardware
Attach clamps or rails per manufacturer instructions. Tighten to the specified torque and verify that clamps grip the seam without deforming the metal.
Tip: Do not over-tighten; overtightening can crush or deform the seam. - 6
Mount modules and finalize wiring
Place modules on rails, secure with end clamps, and connect string wiring to the inverter. Double-check all connections and grounding.
Tip: Keep wiring away from edges to prevent abrasion and ensure safe insulation. - 7
Inspect, test, and commission
Perform a final inspection for leaks, sealant integrity, and module alignment. Test system voltage, reversal protection, and inverter communication before handover.
Tip: Request a formal inspection report for warranty documentation.
Frequently Asked Questions
Can all metal roofs support solar panels?
Most metal roofs can support solar panels if mounting hardware is compatible and the roof is in good condition. Standing-seam roofs are typically the easiest to retrofit with clamps.
Most metal roofs can support solar panels when the right hardware is used, and standing-seam roofs are usually the easiest.
Do mounting clamps penetrate the roof?
Clamps on standing-seam roofs grip the seam without penetrating it. Other metal roof types may require penetrations if clamps aren’t suitable, which increases leak risk and warranty considerations.
Clamps grip standing seams without penetrating, but other roofs may need penetrations.
Will solar panels affect metal roof warranty?
Warranties vary by manufacturer and installer. Using approved hardware and following the installer’s plan helps preserve warranty coverage; always check the terms before starting.
Warranties can stay intact if you use approved hardware and follow the plan.
Is standing-seam easier than corrugated metal for solar installs?
Yes, standing-seam roofs are generally easier for mounting because the seam provides secure anchor points and reduces the chance of leaks.
Standing-seam is usually easier due to secure anchor points.
What maintenance is needed after installation?
Regular inspections for loose clamps, sealant wear, and debris are recommended. Clean surfaces after storms and address any corrosion promptly.
Check clamps and sealants periodically and clean debris after storms.
Do I need a permit for mounting solar on a metal roof?
Permit requirements vary by locality. Consult the local building department to confirm needed permits and inspection steps before installation.
Check with your local building department about permit requirements.
Watch Video
Top Takeaways
- Verify roof compatibility before mounting hardware.
- Choose non-penetrating clamps for standing-seam roofs.
- Inspect roof condition and warranty terms upfront.
- Plan electrical routing to minimize exposure and waste.
- Hire a qualified installer to ensure code compliance and safety.